Category Archives: drawloom

There is a Long Winter Ahead

I’ve been thinking about the long WI Northwoods winter ahead, and what weaving I would like to do during the coming months.  This is a preview, I hope, of what will be appearing on this blog.

Warp and weft for the Glimakra Regina.

I enjoy trying and learning about new areas of weaving, while continuing to explore current interests.  Tapestry is something I’ve wanted to learn the basics of for the past 2-3 years.  I had started a year or more ago, but the timing wasn’t working out with commitments I had made, so a new attempt is underway.  I’m hoping with a few months of winter ahead, I’ll have more time to give to it daily.

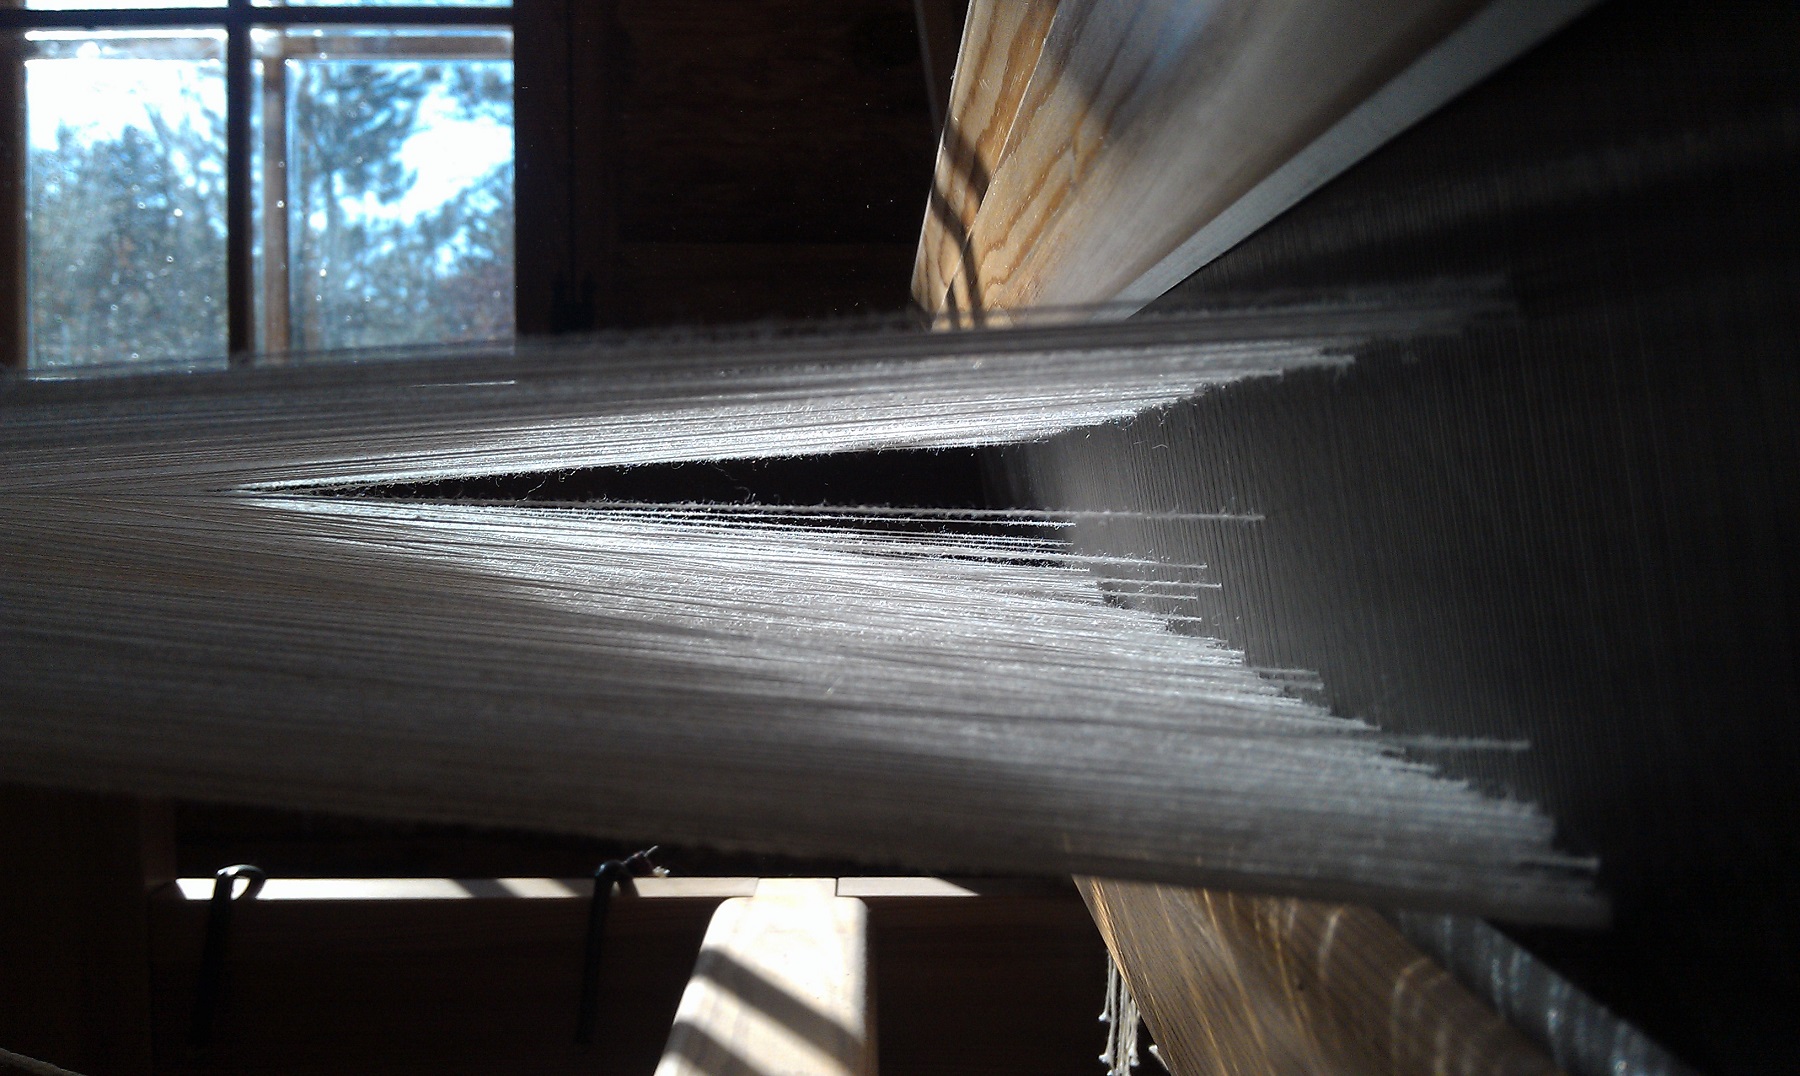
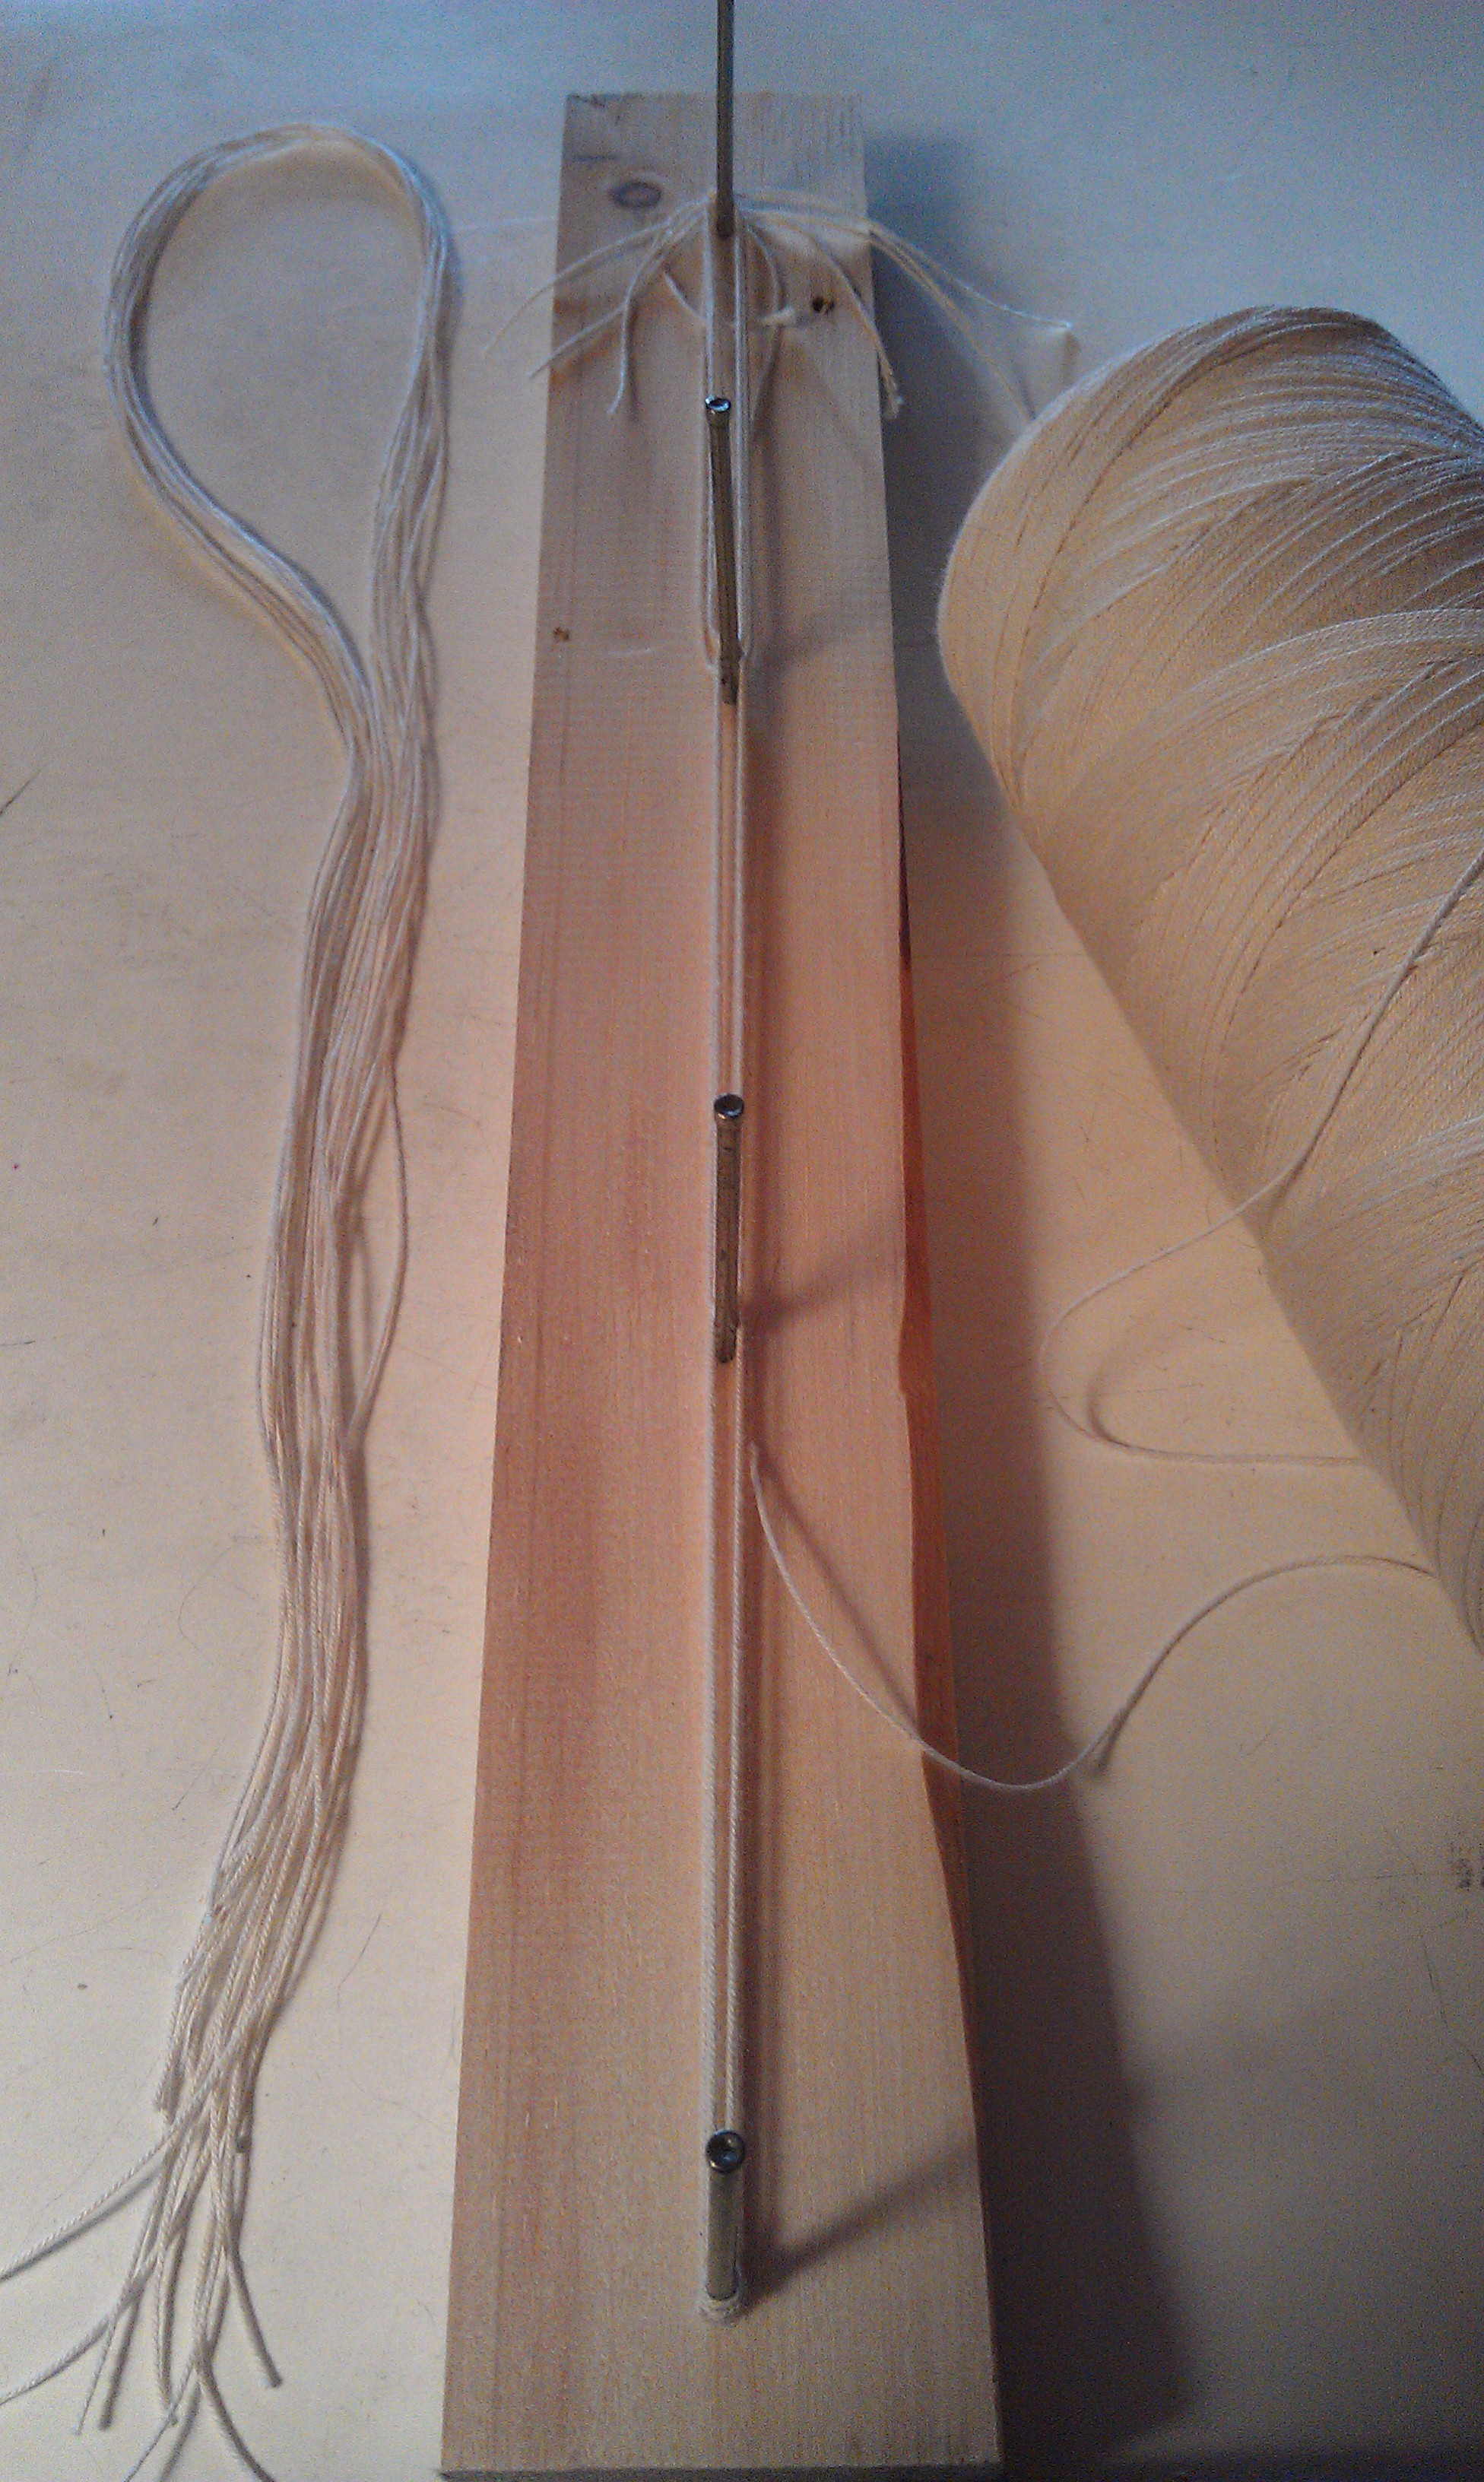
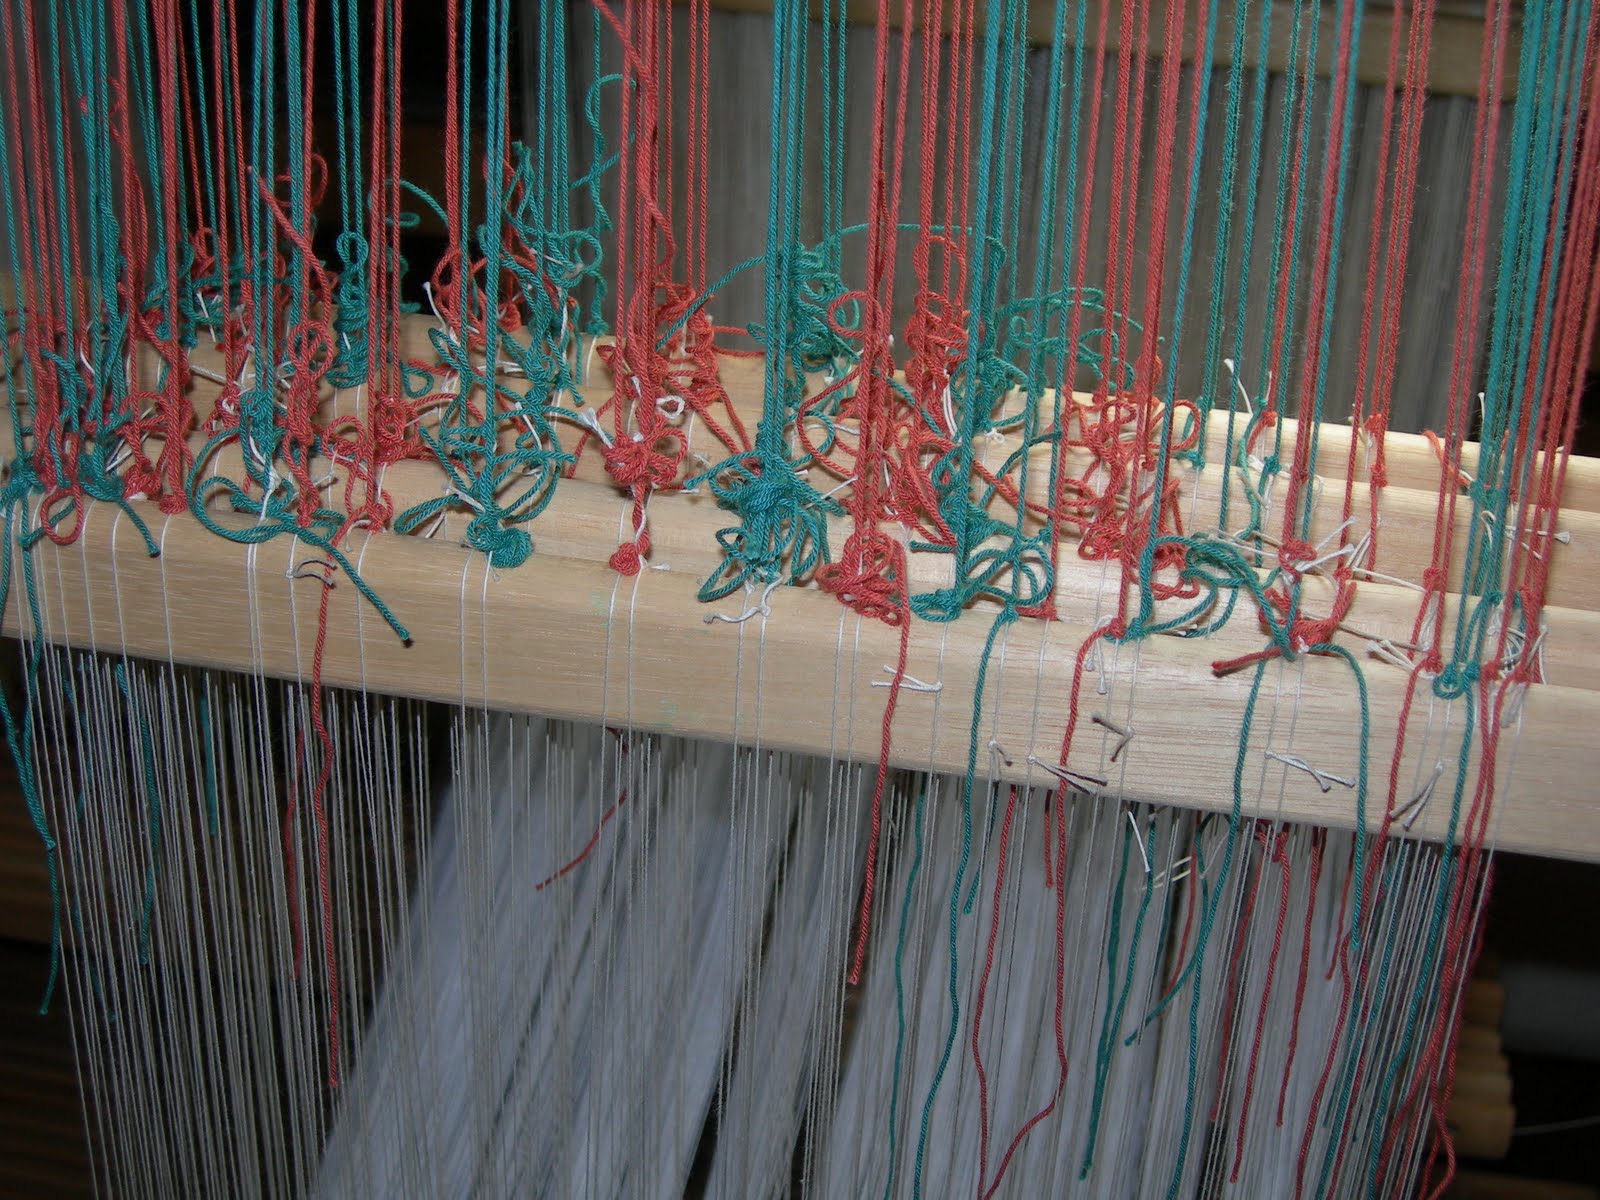
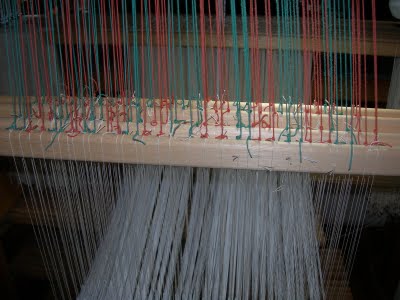
To that end, I signed up for Rebecca Mezoff’s “Warp and Weft:  Learning the Structure of Tapestry: (all-three-at-once!), almost two weeks ago, and since then have been working through the reading and videos, and ordering warp and weft which just arrived two days ago.  Now, it’s time to make a warp and learn how to beam a warp on the Glimakra Regina,… very exciting!

Harrisville Highland in autumn colors.

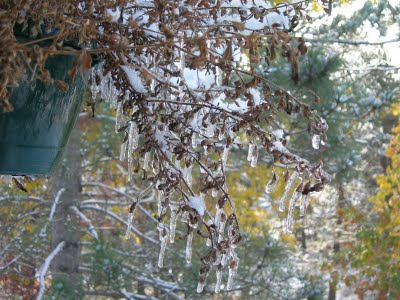
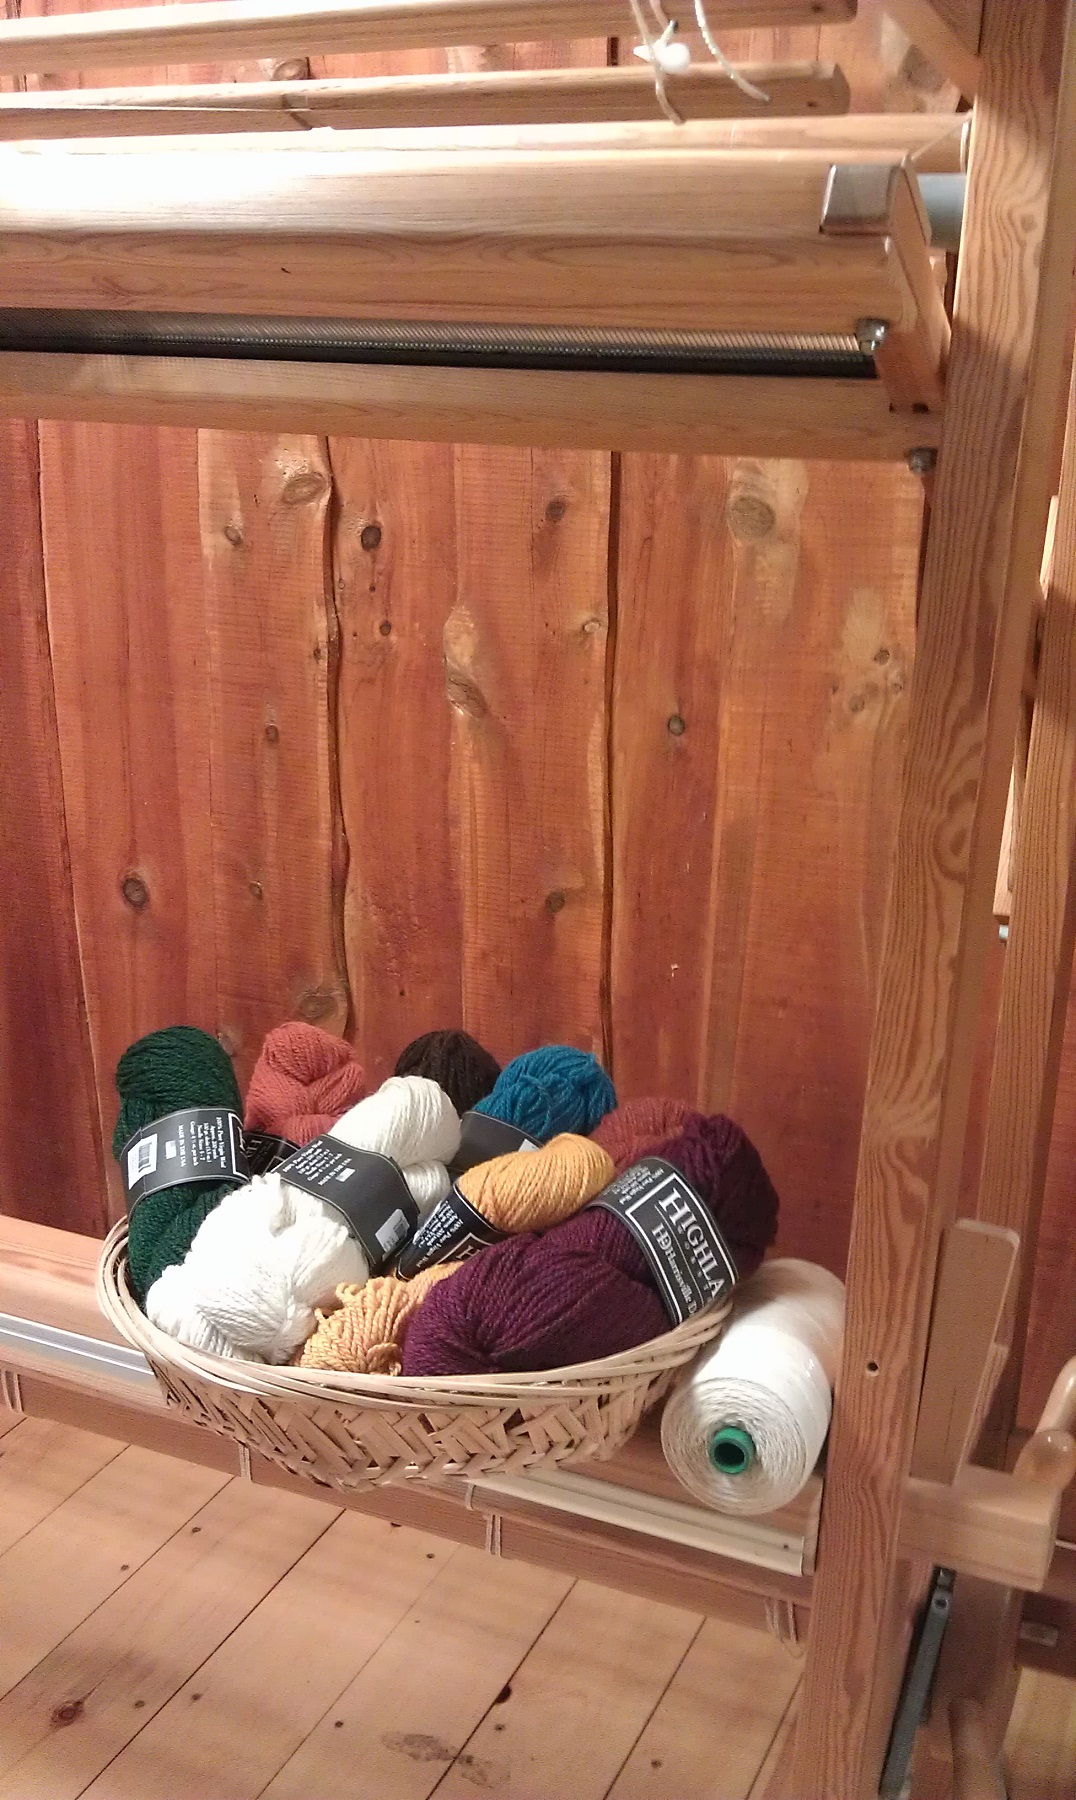
At the time the yarn was ordered, we were at peak autumn color, and those are the colors I ordered.  Autumn went by so quickly I decided capturing it in a tapestry sample would extend the season.

Marks Mattgarn.
Marks Mattgarn.

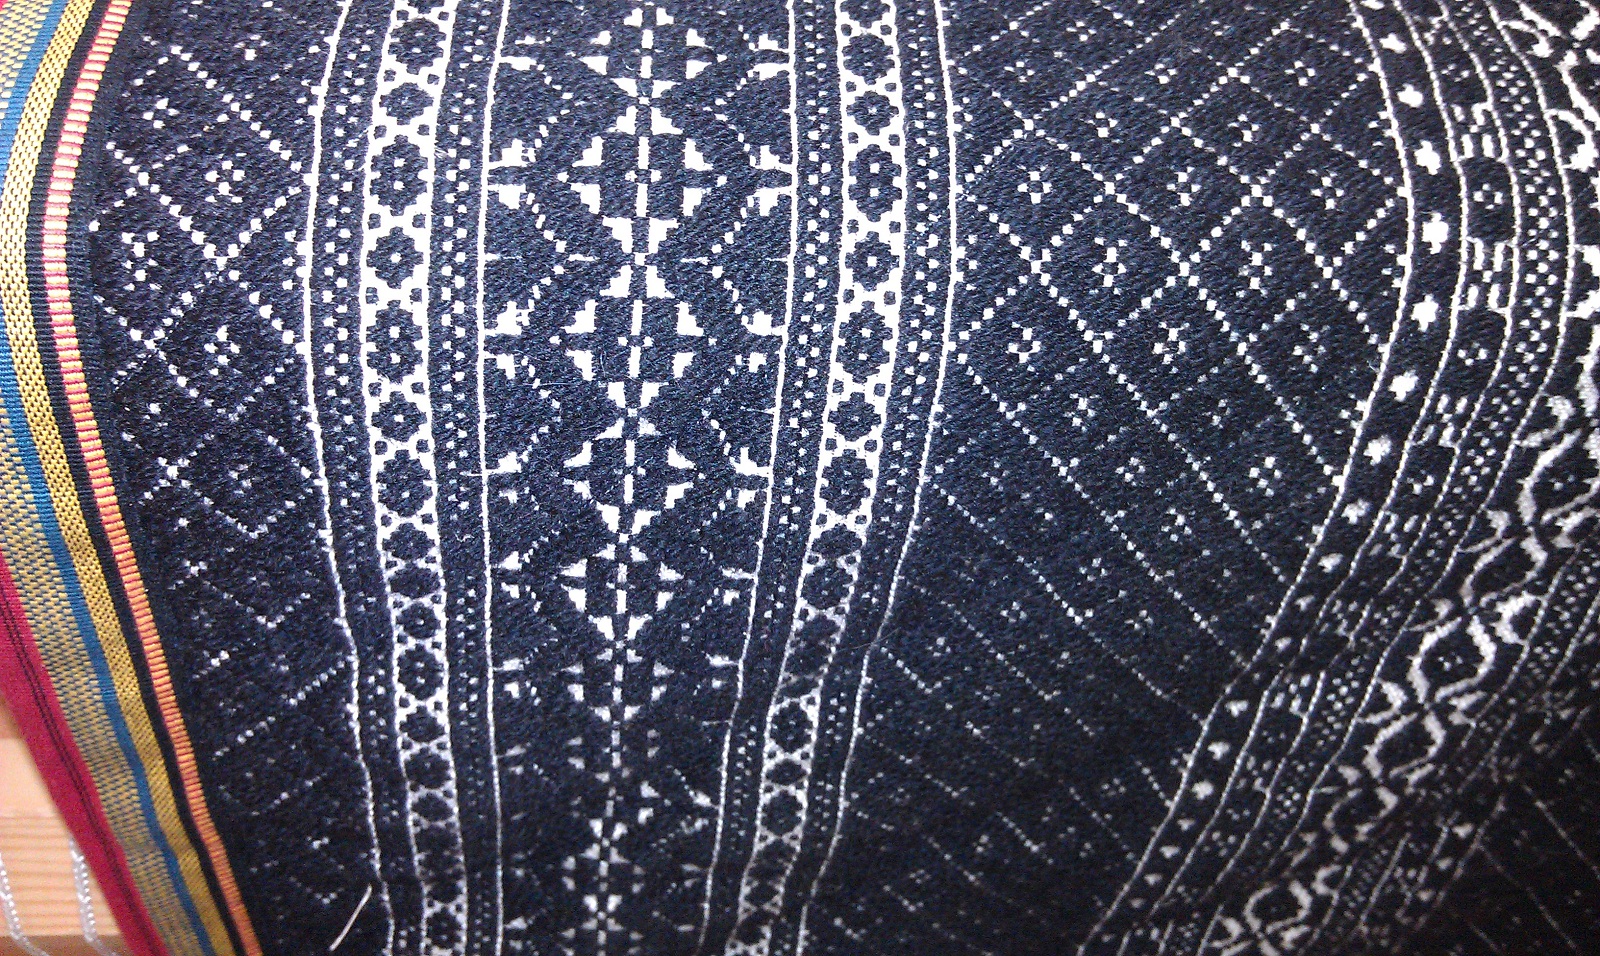
Just over a week ago I had a phone call from an area TV news program reporter, asking if she could come visit and interview me.  I was a bit hesitant, but agreed, and the day and time were set.  She didn’t know until later, but the interview was the morning of my 65th birthday!  The video can be found here.  A couple days after it aired, I received a phone call from a gentleman whose (late) wife was a weaver,… would I be interested in purchasing some yarn.  He arrived a couple days later, and I added 33 skeins of royal blue, red, and evergreen Marks Mattgarn to my weaving yarn stash.  I’ll think of you, Alice, when it is woven up.

Woven shibori, in progress.

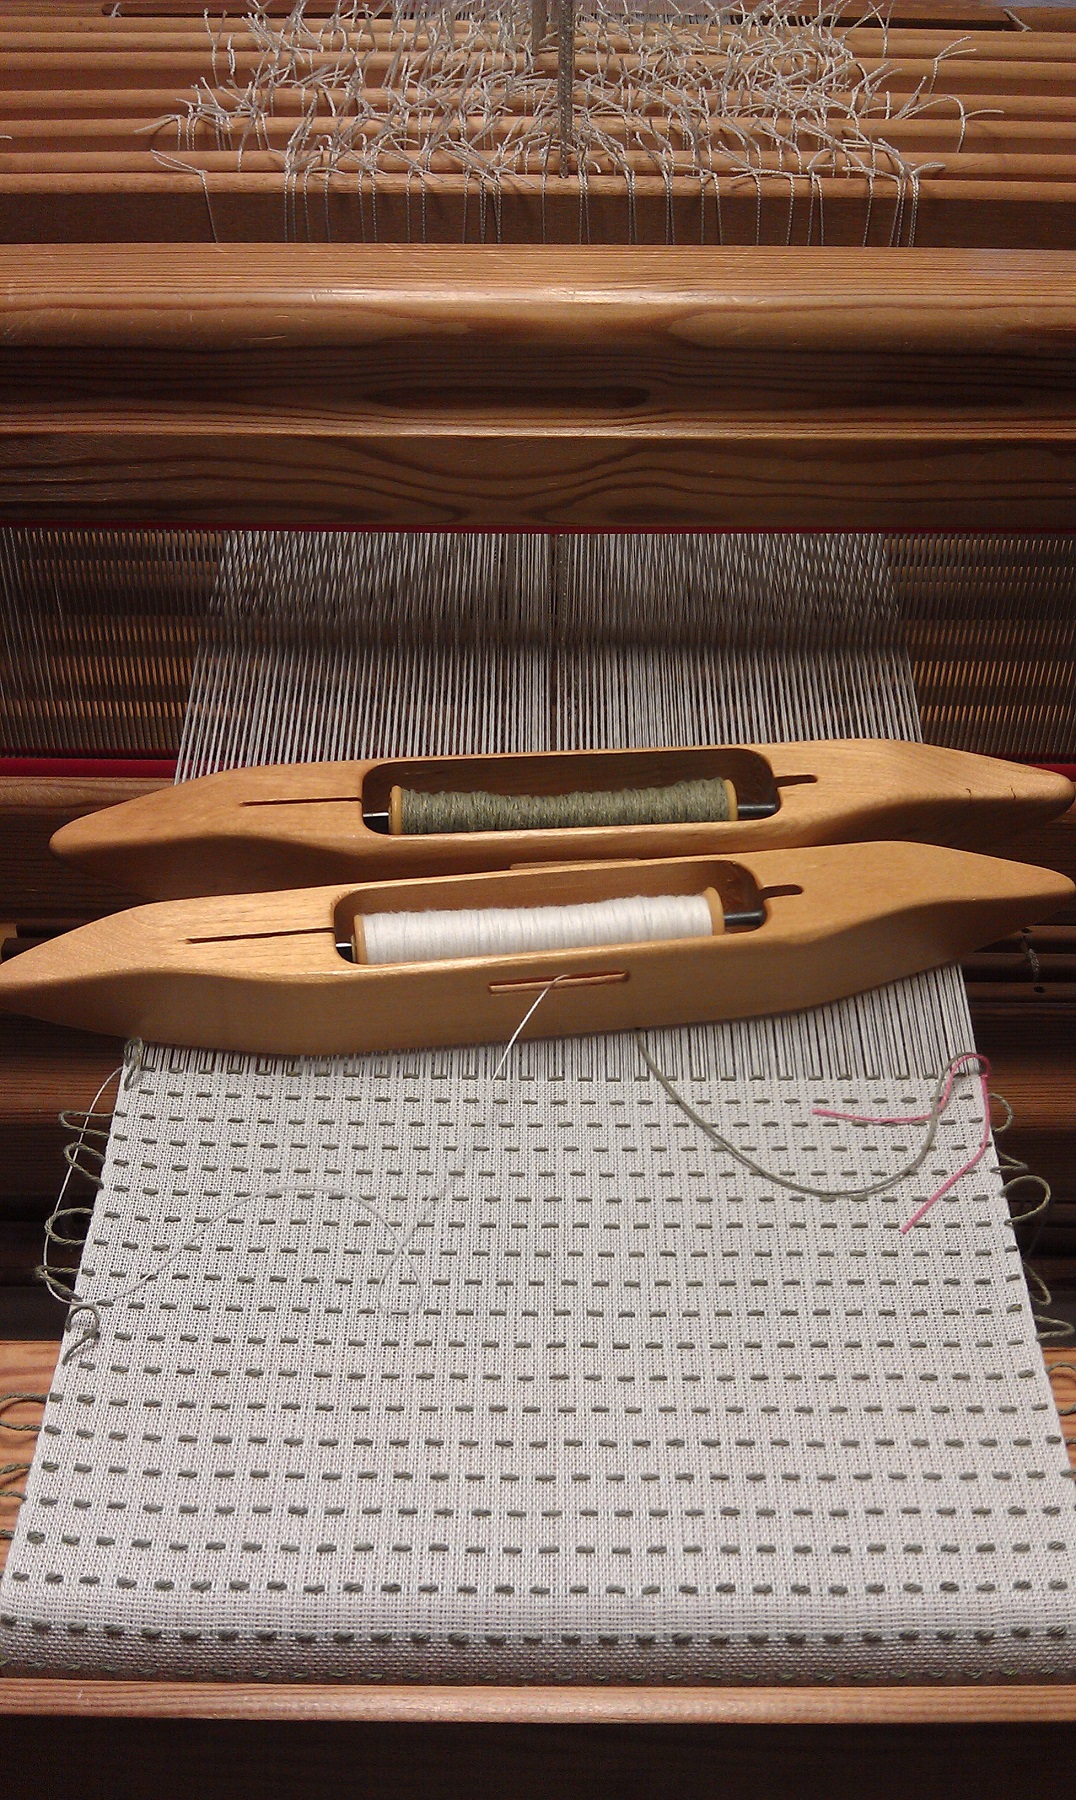
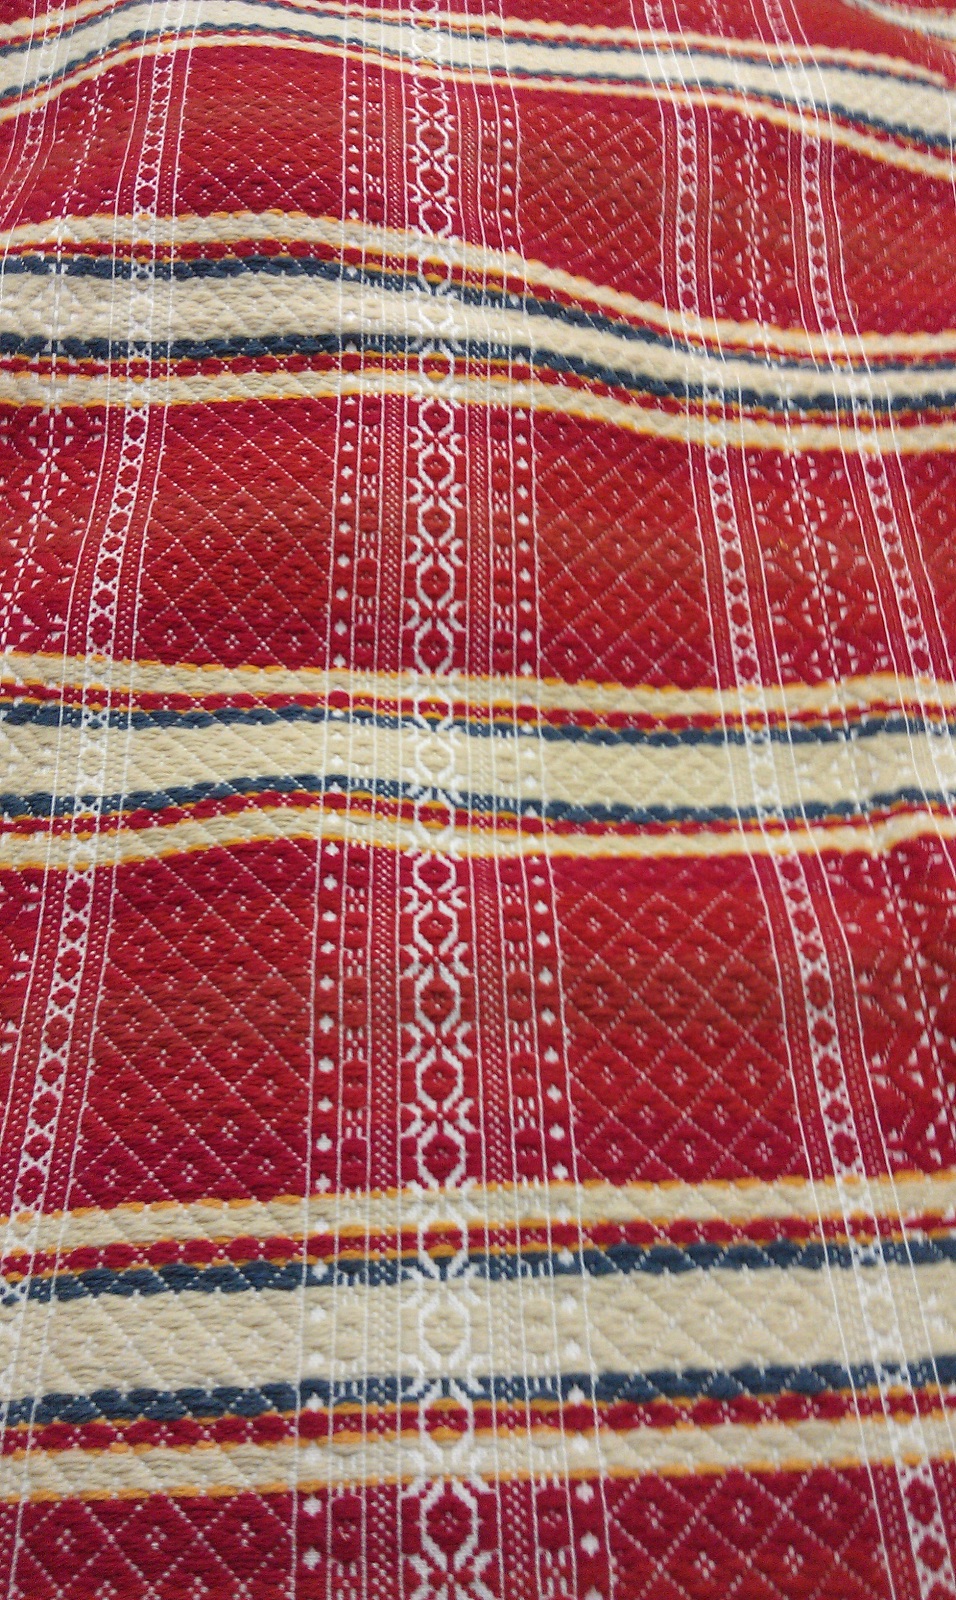
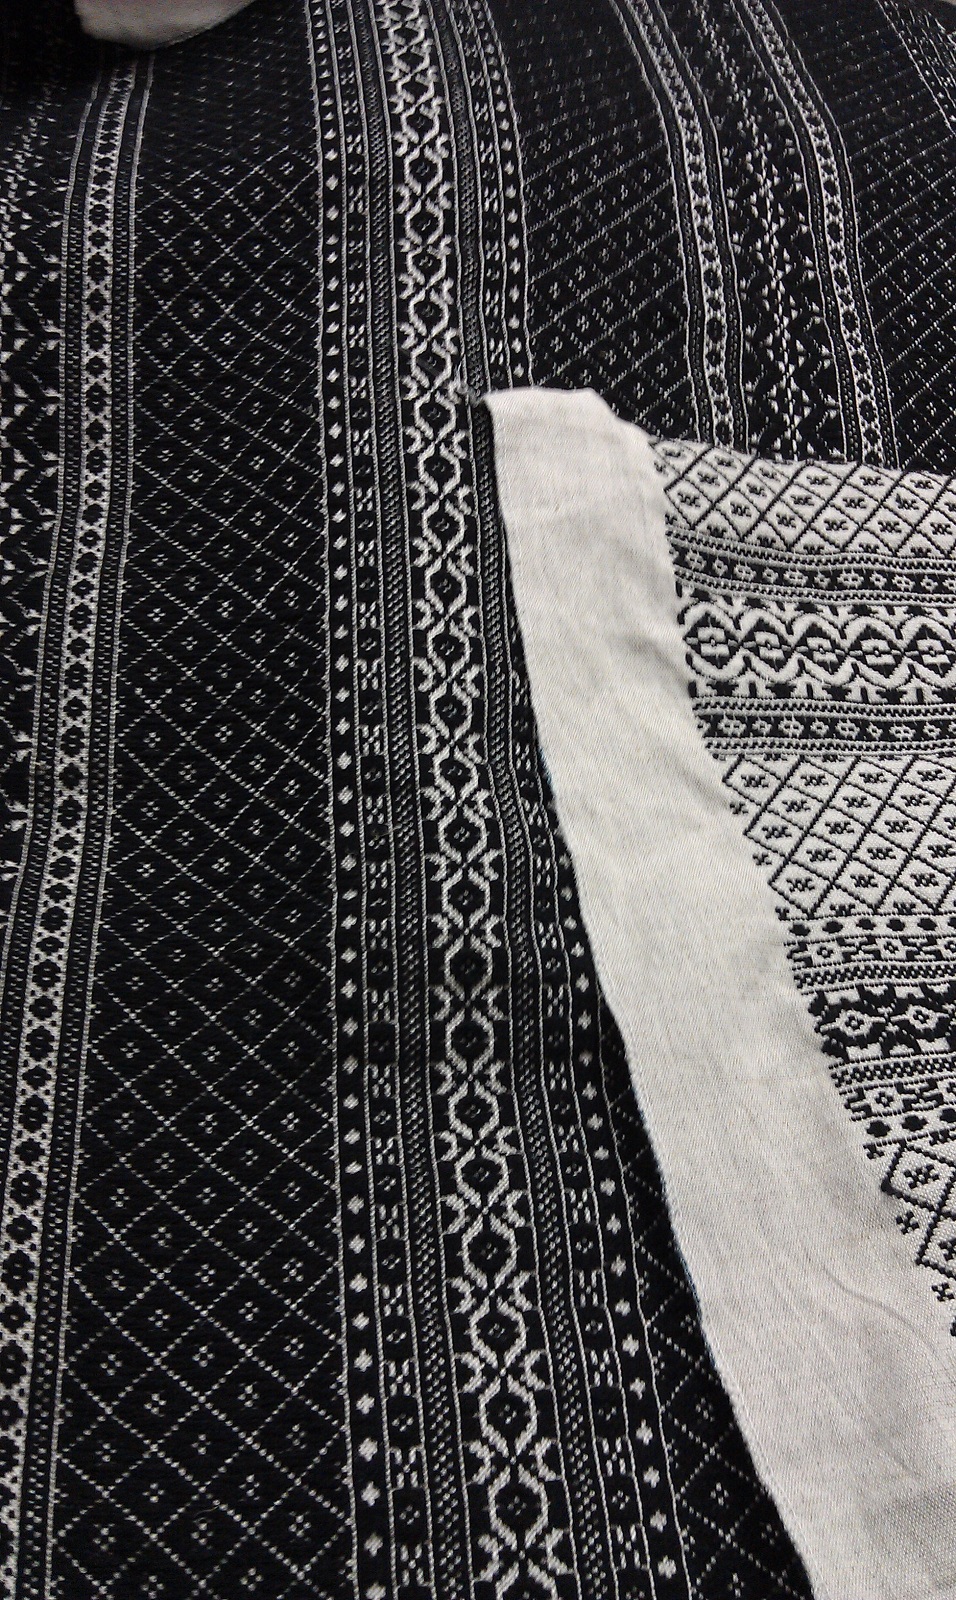
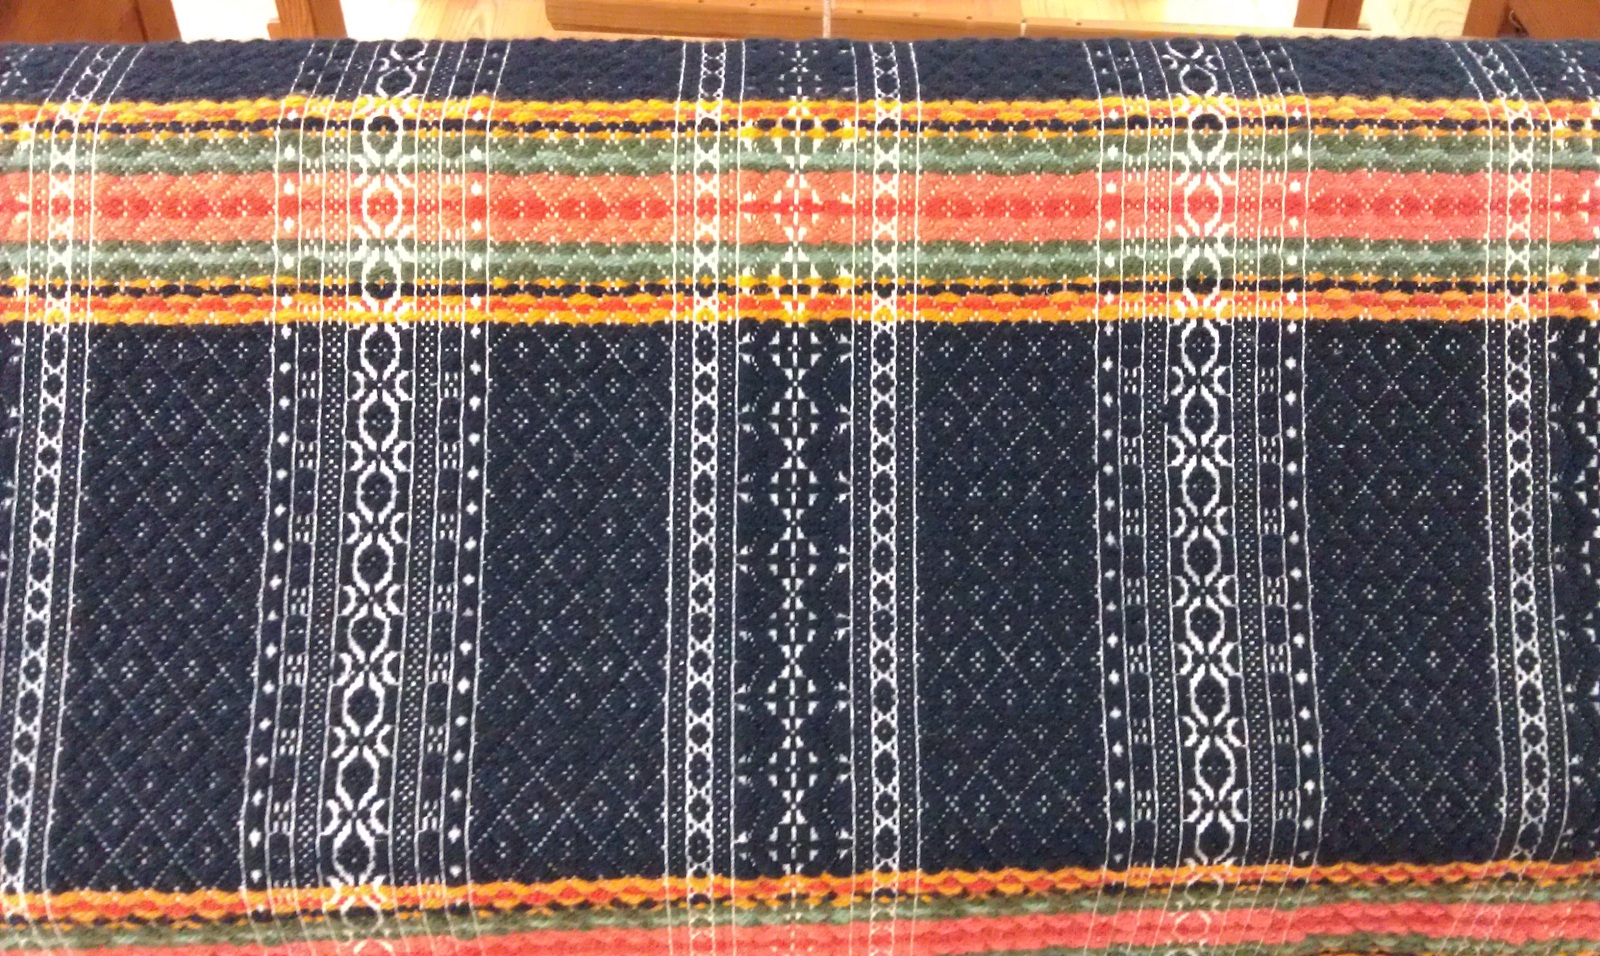
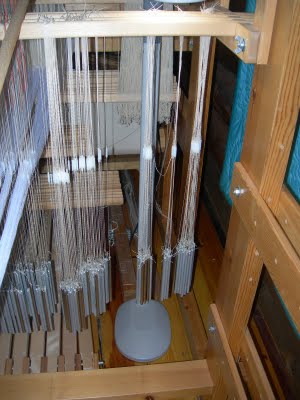
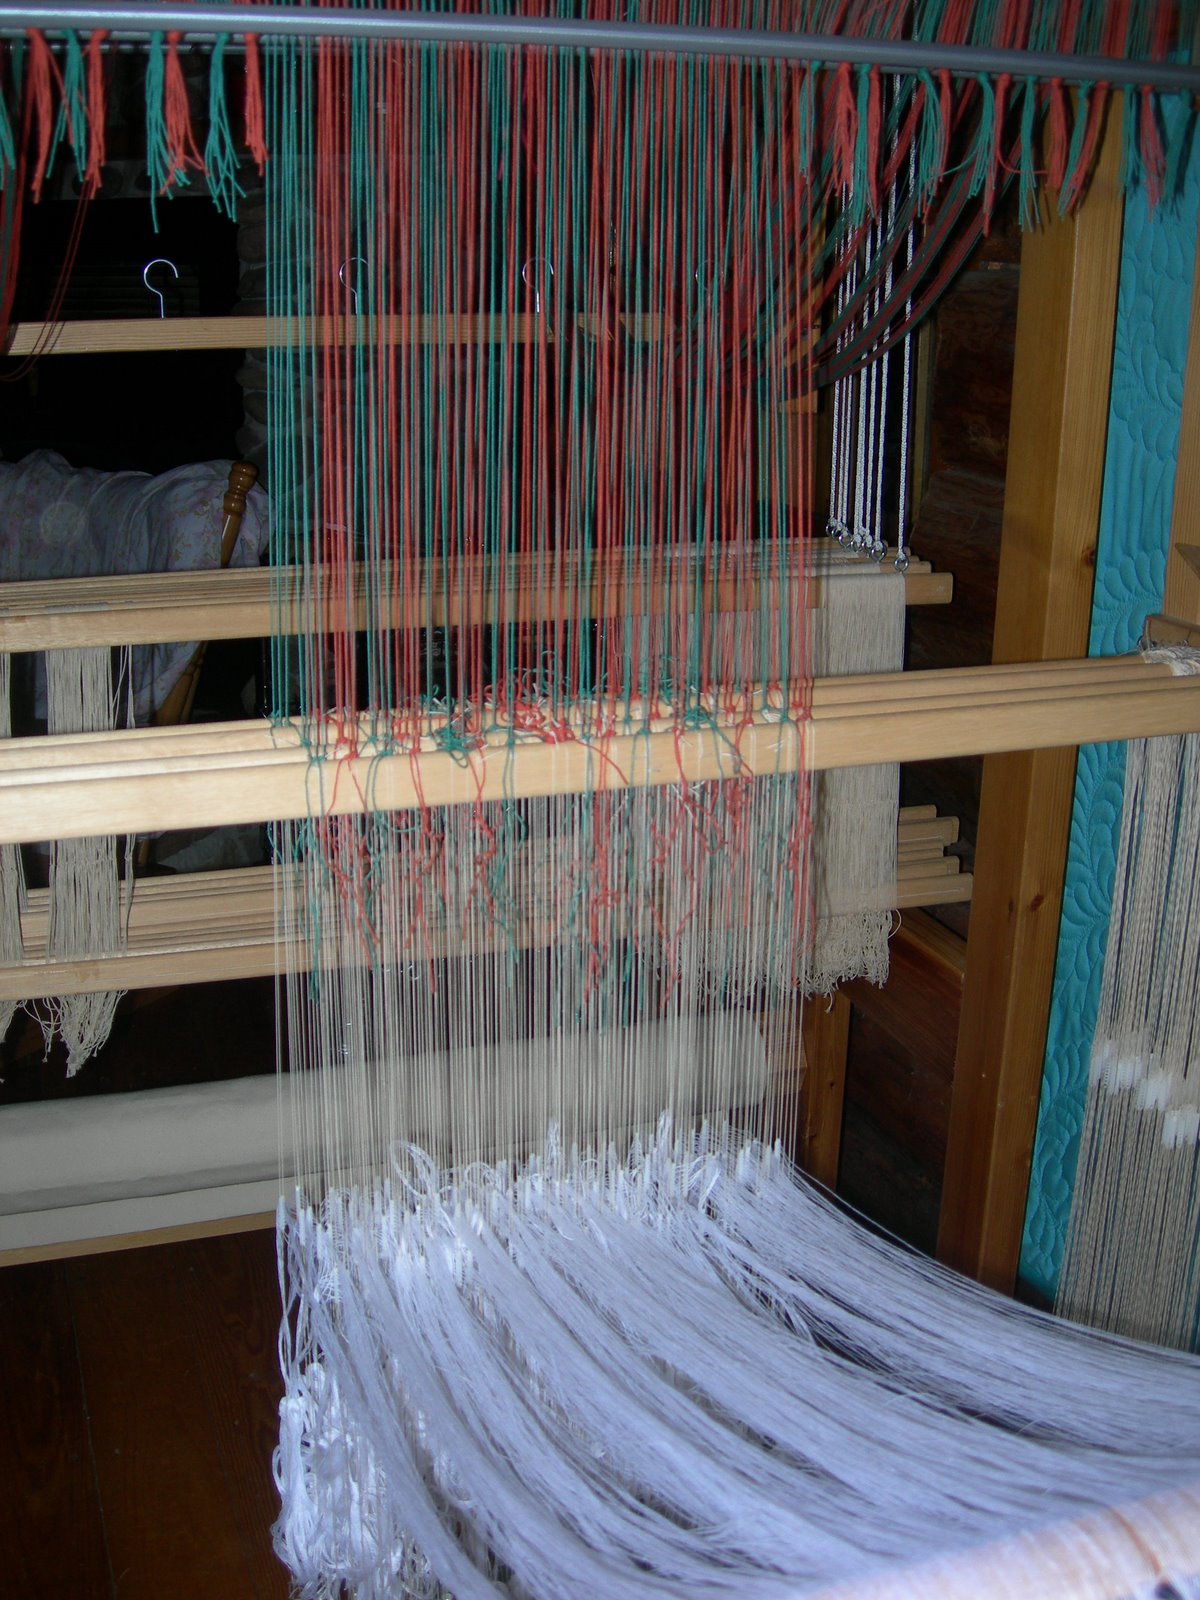
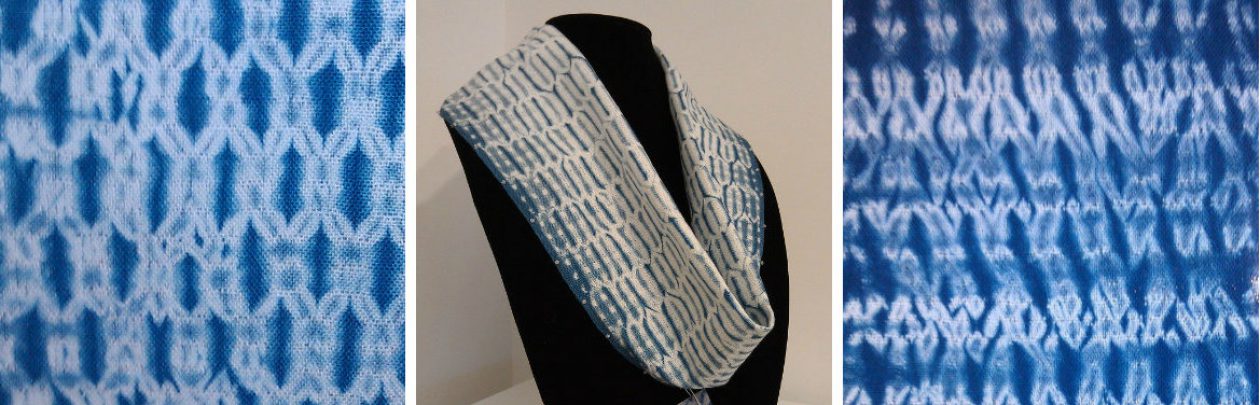
Woven shibori continues on my countermarche loom, currently 10 shaft/12 treadle, straight draw twill, 100% Bockens cotton.  This particular scarf is planned to be an infinity scarf.  After that, I believe I’ll change the tie-up for longer floats.

First scarf off this twill warp.

This scarf still needs to be washed, pressed, and have fringe twisted.  I like the slightly meandering lines.   This warp needs to be woven off, or re-threaded and new tie-up as I have a custom order to do and I want a different look for the borders.  After several more scarves for Artistree Gallery, and after I have my online shop finally up and running, the next warps will be for my first attempts at woven shibori garments.  I’m looking forward to this and expect a lot of trial and error, and learning.

Woven shibori.
Woven shibori.

This woven shibori was meant to be a scarf with hand-twisted fringe.  Unfortunately, I ran out of warp just before the end, no fringe for the end, so it will be used in sachets, part of a cushion, or other work.

Single-unit drawloom, waiting for this weaver.

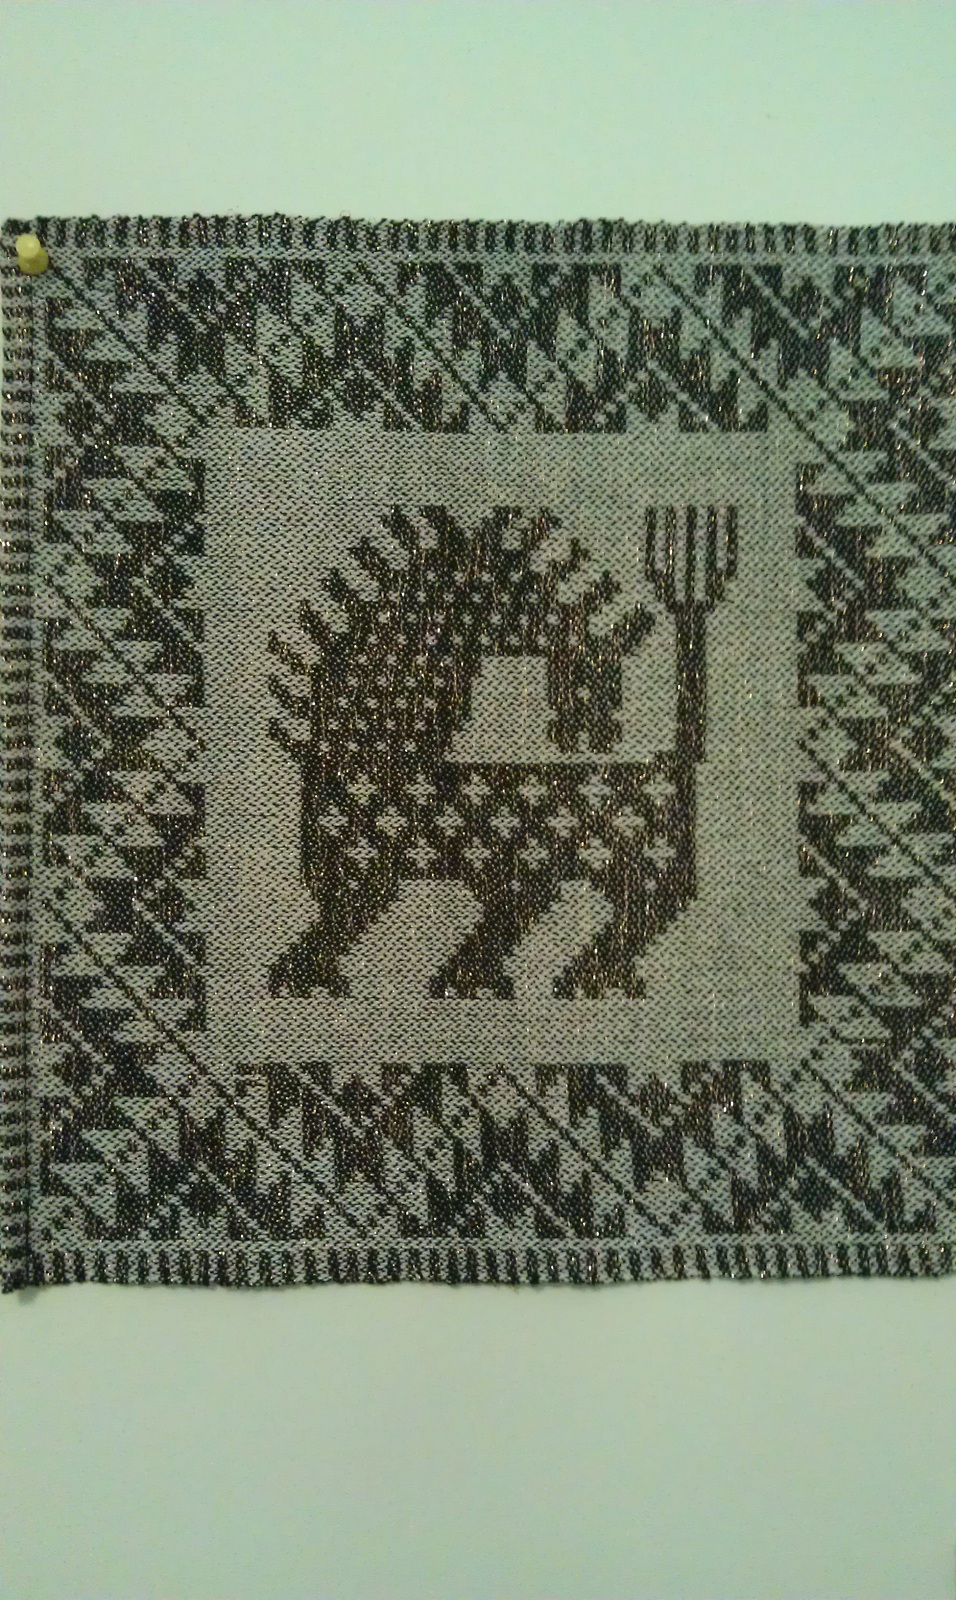
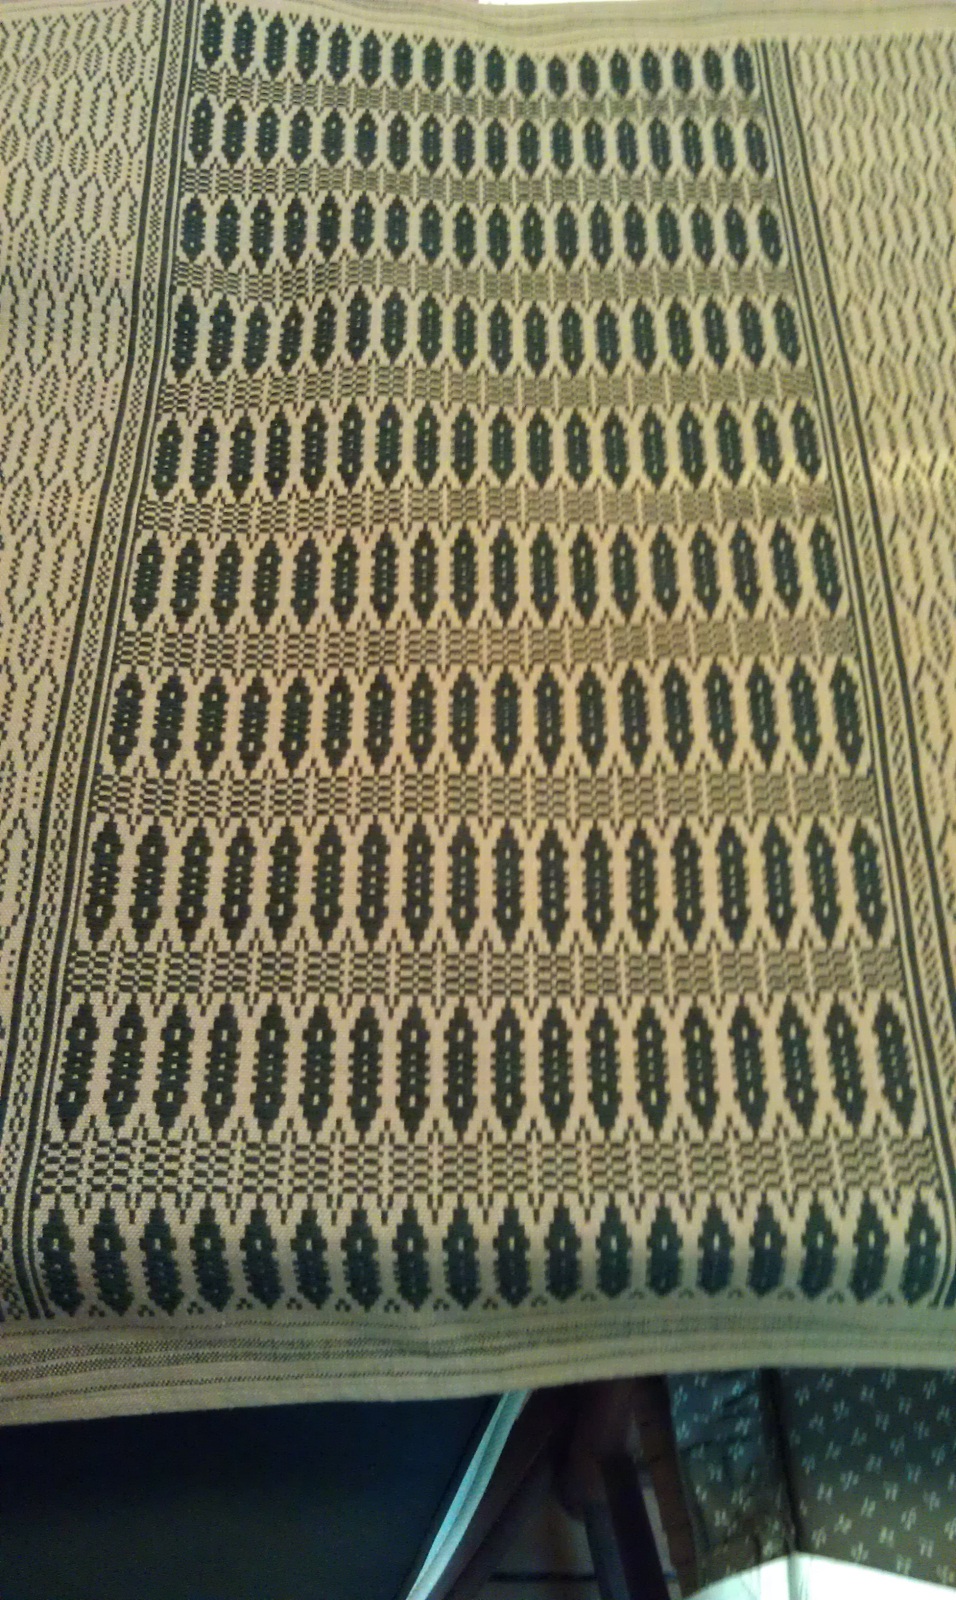
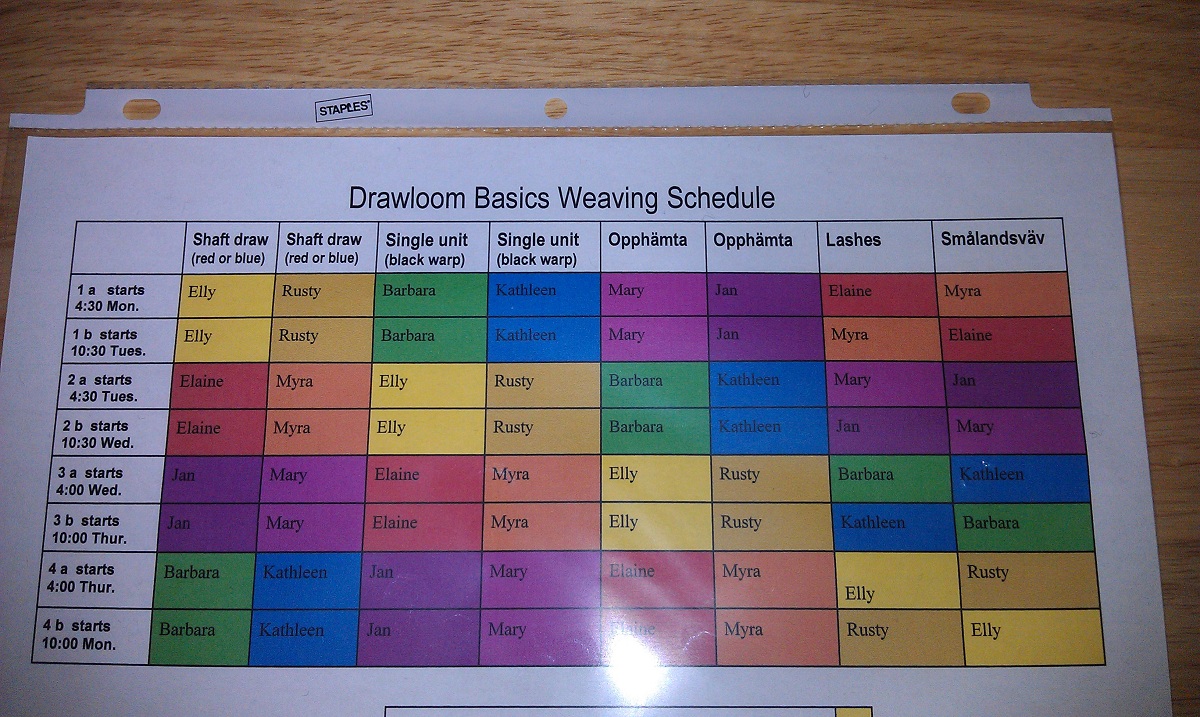
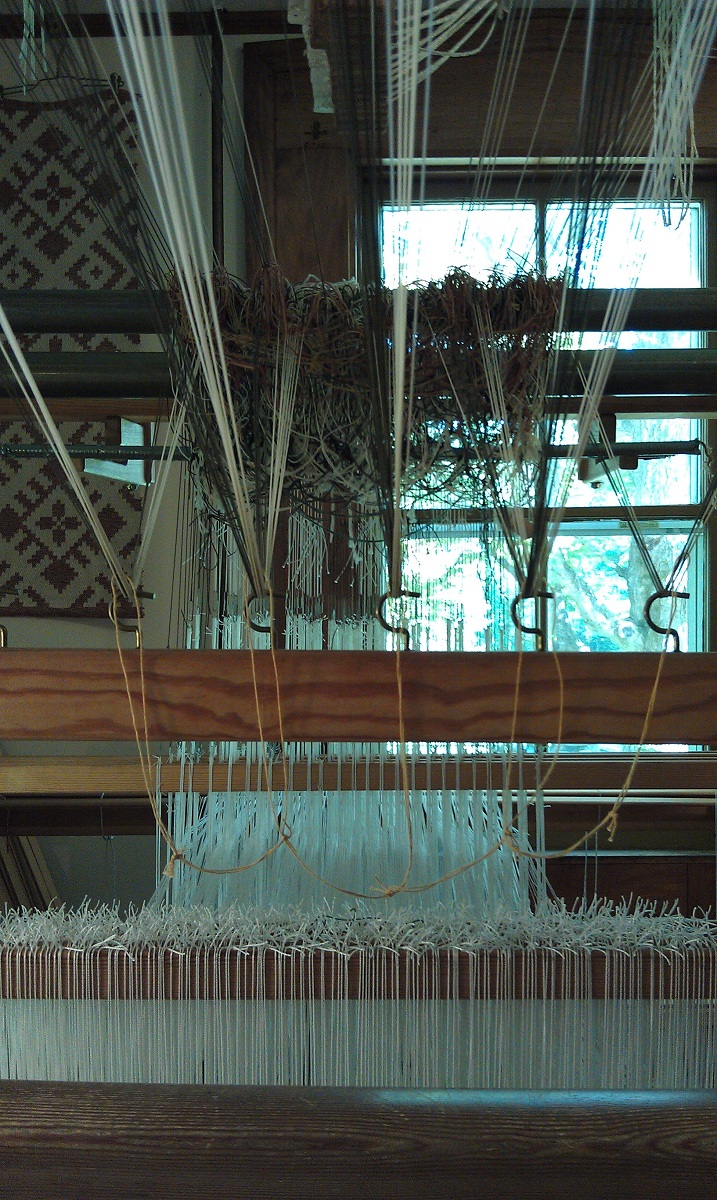
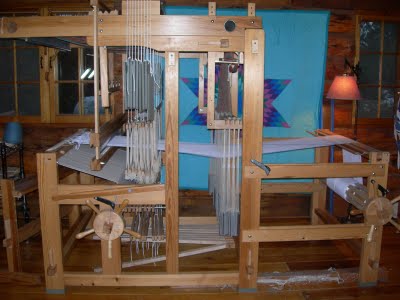
In the studio, the drawloom has been sitting neglected for a long, long time.  I have a deadline coming up for a sample exchange so a lot of time at the drawloom, every day, will be needed, starting tomorrow.  (Tonight I hope to finish up the Medicare Maze/decisions.)

Handspun Coopworth (roving).

I wrote about Spinzilla 2015 in the previous post.  When I went to ply the yarn on four bobbins (into two skeins of 2 ply), the plying head driveband was nowhere to be found (and is still missing). However, I wasn’t going to wait to find it, and a new one is on the shelf.  I need to place each skein on the yarn swift and re-fill the bobbins, then do the plying.  Then back to occasional spinning (there is quite a bit more roving left).  I’m hoping the yarn won’t be too bulky for a sweater; if it is, then a knit or woven shawl.  Someday this project will be done.

Homemade valances for the kitchen.

One last small home project the past three evenings has been picking the hems out of seven valances and the linings, so 14 panels in all.  I had these in the kitchen a few years back and want them up again this winter, but shortened by a couple inches.  Two left to do, then I can rotary cut the couple inches off each, re-pin, and machine sew.  They should be up in a few days!  Living in a log home in the woods, curtains have never been needed, especially in summer with windows open. But in winter, that added color makes the kitchen feel even more cozy.

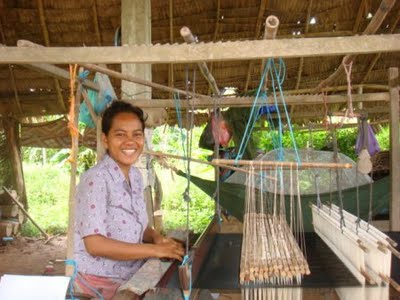
Being thankful for the blessings in my life, I like to contribute to programs that speak to me.  KIVA microloans is one, Adopt-A-Native-Elder is another.  A month or so ago, another program crossed my path, The Tibetan Nuns Project (website), and TNP Facebook page, and I have made the commitment to sponsor a Tibetan nun for a year (it will be more!), and have been learning about their lives, struggles, and goals.  We can add happiness to our lives in many ways.

I had thought previously about giving a percentage of what I earn to a cause or program, and a few days ago decided The Tibetan Nuns Project would be the one.  In addition to my sponsoring the young woman, 10%+ of what I earn will go to either sponsoring another nun, and/or towards the needs of the nunneries that TNP are working with.

The Tibetan Nun Project in Shuttle Works Studio.

So, as a positive reminder, a photo of the nun I sponsor along with her information, and a 2016 TNP Calendar are posted on the bulletin board over a work table, near the loom I spend the most time at.   I’m looking forward to an occasional letter exchange with her, reading newsletters and updates about the nunneries and program, making TNP another reason to keep on weaving!

Oh yes, all that isn’t enough, I have a few sock orders to do, Artistree Gallery wants socks, and Louise (friend) and I are planning a first attempt at warp painting in November, before it gets too cold.  It’s good to keep busy with things we enjoy doing!

POSTSCRIPT!

I had emailed The Tibetan Nuns Project to see if there was a photo I could use, without breaking copyright.  Later in the day I did this blog post and had not yet heard back from them.  Well, I have heard back, and a photo was sent, and here it is!

Tibetan Nuns Project photo, provided by and used here with their permission.

Busy Year Coming Up!

Hemstitching a new woven shibori scarf.

It feels good to be back in my weaving studio again, surrounded by looms, threads, and books.  I’m a bit late getting started on plans for the new year.  A tooth infection, the flu (both in January), followed by a more severe tooth infection (same tooth), so in mid-February, I took time off to heal and take better care of myself.

I did meet the deadline of completing the woven shibori screen and three scarves for the Art Gypsy Trunk Show/Exhibit, now at Nicolet College Art Gallery,… the show ends Saturday, March 7, 2015.

Woven shibori scarves will remain the focus this year,  Yes, I have noticed a lot of “blah” photos here, it’s not easy to make them interesting or exciting, until you reach the indigo dyeing stage.  I am hungry for COLOR in weaving so I expect to slip a different warp/project in on occasion.

Artistree Gallery, Land O' Lakes, WI.
Artistree Gallery, Land O’ Lakes, WI.
Artistree Gallery, Land O' Lakes, WI
Artistree Gallery, Land O’ Lakes, WI.

Artistree Gallery, a cooperative gallery in Land O’ Lakes, WI with work of about 30 area artists, is waiting for more new work.  I’m told they will take anything I weave that is woven shibori technique.  Open now four days a week, they are closed the month of April for cleaning and rearranging, then re-open May 1st. You can find more info at https://www.facebook.com/ArtistreeGallery.

Also coming up fast is the Art Gypsies June 13th show/sale in Minocqua, WI, as well as the Northwoods Art Tour (summer and fall). A lot of weaving to do and socks to be made.

Drawloom warp is not clear, threads sticking.

I’m having issues with the warp on the drawloom.  I really like weaving with the Bockens 16/2 cotton, but the threads stick together and it takes treadling a couple times at this sett to maybe have a clear shed, or clear each shed with a weaving sword.

Tiny spots of white where they should not be.

Random single threads showing (white) should not be there.  It was suggested to me to re-sley to a bit wider sett, so I need to do a bit of research for sett for 16/2 cotton in satin weave.  With more sunny days (I hope!) it would be a good time to do this, then enjoy weaving in the sunshine.

IWarp ends from previous owner need to be cleared from the Regiina.

The Glimakra Regina rug/tapestry loom has been sitting here now for a year.  It was a busy year, and sometimes I need time to ponder what I want to weave while busy with another loom.  I’ve decided I want to begin with a Rana, weft face weaving traditional in Norway and Sweden.  There are nice examples in a number of books, and I need to order warp and weft so I can finally begin weaving on this loom.  And yes, there will be COLOR with this weaving!  The two harnesses with heddles are on, I just need to remove remaining warp ends from the previous owner, and add treadles.

So, a lot more woven shibori coming up for Artistree, the Art Gypsies show, and the art tours.  Also, some Norwegian weaving, also for the art tours as well as for my home.  And I now would like some handwoven valances on windows, so there is plenty to weave over the coming months.  All this along with occasional visits to my 87 year old father, as well as my grandson & family.

I’m looking forward to continuing my weaving interests, exploring, learning, successes as well as challenges.  Now, back to my loom!

Very Close to a Working Drawloom

I am very happy with the progress made this afternoon on the drawloom.  I looked closely again at photos of a drawloom, identical to my loom, taken about 29 years ago.  The counterweights looked to now be at the proper height, but the beater seemed low so that was raised, then came more adjusting of shafts, lamms, and treadles.

At long last we seemed to have quite good sheds, with just a few threads out of place, but I believe they are being caused by two broken warp ends tangling with neighboring threads, and they will be fixed Thursday.

You couldn’t really see them in the photo yesterday, but there were some loose, “baggy” heddles on the first four shafts and I was wishing I’d replaced them while threading.  Then I decided three shafts not being used would be removed right then, so that was taken care of.

I bought this drawloom used, about 29 years ago, and it came with “string heddles,” made from what feels like seine twine, but slightly finer than the 12/6 sold today.  Four years ago, after calculating the heddles I would need, I found there were nowhere near enough, so I went on a two or three evening binge of making the needed long-eye heddles.  It turns out I had left some of the old ones on the loom in case they were needed.

Homemade long-eye heddle jig (made on short notice, by Char).  150 made this evening.
Homemade long-eye heddle jig (made on short notice, by Char). 150 made this evening.

They were needed, but after threading, sleying, and lashing the warp on, I did not like the baggy heddles constantly moving outward, so the warp was un-lashed, and the threads in the baggy heddles were un-sleyed and un-heddled.  Then I asked Char, on rather short notice, if she could quickly make a heddle jig using one of my long-eye heddles for a pattern.  She did, and another 150 long-eye heddles (always keep a tube of 12/6 seine twine in your stash!) were made.  Late this evening, the tremaining original heddles were removed from shafts 1-4 and the new ones placed on the shafts.

In the morning, I’ll re-thread the 150 or so threads, re-sley, lash the warp back on, check the sheds again, and hopefully, at long last, finally be able to start weaving!  I think I’m fine, but a couple members of my family said they can see the excitement! Perseverance is a very good thing!  And having Char to help puzzle all this out and help make adjustments has been a blessing!  Thank you, Char!

After we were done this evening, I was showing Char examples of double-harness weaving including an example of weaving I’d done on this drawloom 29 years ago, a piece woven on a loom with an opphamta attachment 30 years ago, as well as my samples from the Basic Drawloom class at VavStuga (from Nov. 2012).  She was surprised and a bit impressed with what can be done on these looms. And now I’m looking forward to years of double harness weaving!

There will be a break while I weave and Char continues with her woodworking projects, and then we’ll see about getting the opphamta attachment added to the standard loom.  I can hardly wait!

Drawloom Weavings at VavStuga

This post is of photos of drawloom or double harness weavings, all but two taken during the Sept. 17-21, 2012 Drawloom Basics class I attended at VavStuga.  These photos are posted here with the knowledge and permission of VavStuga, and my thanks to them for sharing these and so many more examples with their students, and allowing me to share a few of them here.


Opphamta weaving.


Shaft draw weaving.


Shaft draw blanket.


Shaft draw blanket.


Single unit weaving.


Smalandsvav coverlet with sheepskin backing, woven by Becky Ashenden.


Becky’s coverlet, larger view (photo taken Nov. 2011).


Smalandsvav coverlet, by Susan Z. Conover, quilted, with handwoven band trim.


Susan’s coverlet, prior to finishing, with reverse side shown on the right.  (Photo taken Nov. 2011)


Smalandsvav coverlet by VavStuga apprentice Terry Slagel, Sept. 2012.


Smalandsvav weaving.

Smalandsvav weaving.

Smalandsvav weaving.

Smalandsvav weaving.

We were shown so many other examples of double harness weavings, and I wish I had photos of all of them.  (Any errors in identifying the types of weaving shown here are mine.)  So, now it’s time to learn more and begin weaving my own.

Drawloom Basics Class , Part 1 of 3

Bridge of Flowers, Shelburne Falls, MA.

I returned to Shelburne Falls, MA to take another weaving class at VavStuga, this time “Drawloom Basics,” Sept. 17-21, 2012. Arriving early afternoon, first I checked out the Bridge of Flowers.


Bridge of Flowers, in bloom!

I had been here last November, and most of the flowers were no long in bloom. This time, the bridge was a riot of color, something you need to see!


VavStuga, Shelburne Falls, MA (photo from Nov. 2011).

I travelled back to VavStuga to take their Drawloom Basics class, September 17-21, 2012.  Though we would be weaving off-site, most students stayed and had meals here (see three posts from January 2011 for photos from VavStuga Basics class, including the wonderful accommodations).


Susan Conover & Becky Ashenden at the start of a VavStuga lunch.

Breakfast, lunch, and dinner are available at VavStuga and are delicious!  Meals are served in the room at the back of the building with a wall of windows looking out onto the river and foothills.  At each meal, the table is set with different handwoven runners, placemats, and napkins, making each meal even more special.  Conversation and laughter accompany each meal with Becky, Susan, and the apprentice.

Accommodations at VavStuga are very confortable.  Each room has handwoven curtains, rugs, blankets, coverlets, and table covers, that make you want to go home and do the same!

During Drawloom Basics, we would have the opportunity to weave on  several different types of drawloom setups including opphamta, single unit with lashes, Smalandsvav, shaft draw, and single unit (Myrehed).


The VavStuga Drawloom Annex (as I call it).

The drawlooms had previously been set up when needed at VavStuga, but late last year the drawlooms had been moved to a farmhouse (above) about five minutes away, belonging to Becky’s father.  The looms fill several rooms on the first and second floors in the right side of the farmhouse.  


You can clearly see I am enjoying the week!

One room has two long tables and chairs, used for lecture, drafting, viewing many, many samples, and where we worked on designing. 


Weekly Schedule.


Copy of schedule.

Becky had prepared a weekly schedule showing what loom each of us would be working on each day, and for how long.  A daily schedule was also available.  Some projects were allowed 7.5 hours, others were 3.5 hours.  Days were broken up with lecture, explanation of looms and how they work, drafting, and designing.  It was always a treat to be shown many examples of the different types of weaving done on the various drawloom setups.  Photos of those as well as older pieces on display in the rooms were will be in the third post.

The first day began with designing.  We could design our own or use a design from any of the many books/charted designs available.  I chose a design from a book, and that evening added a border.  This design turned out to be the last project I did, on Friday of that week, woven on the drawloom with a Myrehed single unit setup.  Photos will be in the next post.  More designing went on during the week as well as drafting.


Loom with “opphamta attachment.”

On Day 2, I started weaving Opphamta, on a loom with a 20 shaft attachment (not all 20 were not tied up and being used).  This was a 3.5 hour project.  I didn’t have much time and may have made an error on my charted design, but this is what I came up with.  Opphamta has a ground of plain weave, and the design of floats.


My weaving, in progress.


My weaving after having rolled under the warp as another student was weaving.


Single Unit Draw with Lashes.

My next weaving session was on an Oxaback single unit drawloom with the design we would all weave saved in lashes.  This was a BIG loom, heavy, beautiful,… and I found it physically a bit more challenging to weave on simply because I am 5’4″, shorter arms and legs, and as I say, this was a big loom.  I tried weaving standing up, but that didn’t work.  Sitting on the bench, I couldn’t move the lashes far enough to the back and ended up using the cloth protector piece to push them to the back of the loom.  Where there is a will, there is a way!

Here you see the lashes hanging down and the cords pulled for a particular line on the chart. 


My view while weaving.


Completed “double-dragon” weavings.

On this loom, because the design was saved in lashes, we all wove the same double-dragon design, linen warp and weft, and name tags on each so we would have our own to take home.

Tomorrow, I’ll photograph my weavings, meanwhile, I’ll get to work on the photos for Drawloom Basics Class, Part 2.


The Journey Continues

If you have been following my journey of getting my drawloom up and working after 18 or so years, you may recall I was re-threading the loom from 8 shaft satin to 5 shaft satin, as I was having trouble with the counterweights not pulling the ground shafts back to neutral.

More than one drawloom weaver advised me to change from an 8 shaft satin to something using 4 or 5 shafts, so the decision was made to change to a 5 shaft satin.

After pulling 1,024 threads of 20/2 cotton out of the long-eye heddles (ground shafts) and maillons (pattern shafts), I was back at the lease sticks to again thread the the loom.

All was going well until I found a maillon with no threads. Disaster! I thought I had been watching so carefully, and now this meant having to yet again re-thread 1/4 of the maillons, then the long-eye heddles, approximately 256 threads. I tried to think if there was a way of moving the pattern heddles around on the pattern shaft bars, but as each pattern heddle was already tied to a drawcord, that would have meant untieing 1/4 of the drawcords, too. I decided against that.


Also unwilling to remove loom parts at this point, it meant bending over the side of the long back extension to re-thread those tiny holes. I should have owned stock in an ibuprophin manufacturing company over the past month! My aching back meant I could only work on this for short stretches at a time.


Above, you can see the size of a maillon and those tiny holes.

Yesterday, I finally finished re-threading the left side of the loom, left of the
center cords. Today, I’ve been threading the long-eye heddles on the right half of the loom, a job which goes fairly fast, and thankfully, went without incident.


No threading hook is needed, just reach through that large eye with your fingers and pull your warp thread through.

There are 75 threads to go, and as I write this post and load in the photos, I’m on a stepstool moving heddles to the three shafts where I ran short. The re-threading will be completed in just a bit.

Yes, it has taken me quite awhile to reach this point (for the second time!). Yes, I want to weave on this loom sooner than later, but the more important goal is to understand the loom, the processes, what is happening and why (or why not), and figuring out what to do when things don’t go as planned. It’s been an interesting journey, and I’m looking forward to learning so much more.

Drawloom Issues

Loom mechanics are something I am paying attention to at the moment. The drawloom warp was tied on, pins pulled out of upper jacks, warp tension increased slightly, and…

when I depressed treadle #1, one shaft went up, one went down, six stayed neutral, all as should be happening. The first shed was okay, I took my foot off the treadle, and nothing changed, the treadle stayed down, shafts did not move, counterweights (above) are not pulling shafts back to “rest” position. It’s a mystery.

So, I have spent a day or two trying to sort this out, checking the loom over from back to front, top to bottom, and still have no idea what is wrong, so back to checking every detail again.

I’ve written to weavers in the Complex Weavers Double Harness Study Group, posted photos in an album, and asked for ideas, suggestions, and/or experiences with this, and replies are starting to come in.

Meanwhile, in-between getting ready for weaving guild members meeting here tonight, I’ll be going over the loom again, trying to discover the problem and how to fix it. I’ll keep you posted.

Studio Days and Inspiration

Today and tomorrow are studio days, for working on and at looms and sock machine. My time to work here has been so broken up the last couple weeks, that I have not getting much done. Too many interruptions lately, demands on my time, errands, appointments, and I’ve called a halt.


This morning the drawcord warp was trimmed where each cord is tied to a pattern heddle. There were approximately 3″+ tails left on each when they were tied awhile back, and pulling the cords was causing those ends to wrap around themselves and their neighbors (above).


All I could see to do was cut those ends off, so they were trimmed to 1″. So far there has been no further problem. The old drawcord warp was a thicker linen with a slightly waxy finish on it, and the knots were tight and held. With the seine twine, I have not been able to tie good tight knots, so hoping they will hold.

The next task today, when I’m done here, is lashing the tie-on rod onto the apron, so large-eye needle, string, and pliers are standing by. When I’m done with that, I’ll tie the 20/2 cotton warp on, then be able to pull the pins out of the upper jacks and check to see if I have a shed and how much adjusting needs to be done (next post).

I have always enjoyed visiting artists studios, seeing how and where they work. It was something I did each summer when going to The Looms. Now, living where I do, these opportunities are rare, so I turn to books like…


those of Rice Freeman-Zacher, author of “Living the Creative Life, Ideas and Inspiration from Working Artists” and her new book, “Creative Time and Space, Making Room for Making Art.”


I also enjoy publications like American Artist’s “Studios” magazine (left), for fine artists, and “Studios” (right) by Cloth.Paper.Scissors, for artists working in paper/collage/fibers/art quilts.

WI weaver Dawn MacFall is featured in this issue. Fun and interesting reads that give ideas for my studio that may work for me here or in the future.


While ordering “Creative Time and Space” on Amazon, I suddenly remembered an article that had been in an issue of Shuttle, Spindle & Dyepot (Winter 2008/2009), “Kimono as Art: The Landscapes of Itchiku Kubota.” This book and the work of Itchiku Kubota is incredibly beautiful. Pure inspiration! A treasure!

Every Day is an Adventure

Yesterday I was UNtangling pattern heddles under the drawloom. Here you can see the pattern heddles and lingos are now hanging straight, not the tangled mess shown in the previous post.

Half of the tangled heddles on the other side of the loom were also straightened out last night, and now have only 50 or so to finish up today.

This silk weaver in Cambodia has an interesting double harness loom, with the ground shafts in back and 16 pattern shafts in front. I would love to know more about this loom as well as see the weaving she does on it. I found her last night on Kiva.org, and made another microloan. I am SO enjoying this!

Like elsewhere across the country, WI is having unusual weather for this time of year. Last night the weatherman said it is usually Nov. 24th when we have a couple inches of snow. Well, we have the couple inches of snow on Oct. 12 and as I wrote this it is only 32 outside at 10:15 AM.

Bringing wood in this morning, from the wood rack on the porch to the woodbox in the kitchen, I noticed the icicles on the remains of a hanging plant on the porch, with a backdrop of birch leaves that have not yet fallen.

Postscript: The above photos were taken about 9:15 AM; by 11:30 the snow was melting and it is now looking more like our usual fall. I’m on dial-up, loading photos to Blogger takes TIME, and circumstances change!

Drawcords Tied to Pattern Heddles

Today, the drawcord warp ends, those needed for this warp, were tied to the pattern heddles. You may recall the (overhead) drawcord warp was made the weaving width of the loom, and those cords not needed for this weaving will be pulled up and out of the way.

In front of the weaver, there is a wood bar with several “hooks.” This is to hook individual or groups of drawcord warps which are pulled, according to the charted design, raising those groups of threads up above the rest of the warp, weaving proceeds, then they are released and lowered again. I’m looking forward to showing these things with actual weaving, but for now, trying to give a simple explanation with words of what you are seeing in the photos.

I also cut Texsolv cord in the two lengths needed for the treadles, in this case, 16 cords (8 long and 8 short) and singed the ends to make them easier to pass through holes in the lamms and treadles. Unlike a regular countermarche loom, the drawloom will have only two ties on each treadle, one to raise, one to lower, the other shafts stay in a neutral position.

This evening, I ran into Fiona and son Luke at a store tonight. She had looked at this blog again today and said she now has a whole new appreciation for handwoven textiles, and the preparation needed to make them. They are coming to the studio Friday morning, on the art tour and I am looking forward to their visit.

I was hoping to get more done tonight, but I’m going to get a good night’s rest so I can start early and do a lot more on the drawloom tomorrow. In the morning, we’re putting the center cords back down through the shafts, adding the lamms and treadles, and tieing up the treadles for the 8 shaft satin weave. Then I’ll thread the ground shafts (long-eye heddles). I’m getting a step or two closer every day.