Category Archives: “Damask and Opphamta”

Drawloom Progress

The drawloom has been sitting here, temporarily abandoned while I have been working at weaving towels and cranking socks to sell, and today I couldn’t stand it any longer. I had to have part of a day for my personal weaving interest of making progress on the drawloom.


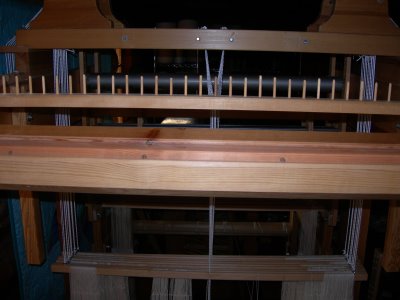
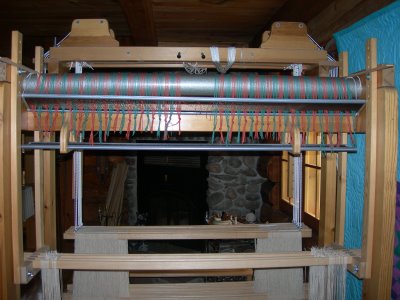
I had previously sleyed the 440 cords (seine twine, two colors) through the reed shown suspended from the upper drawcord warp beam.


The center of the reed was marked with a red thread, also two inches on each side of the center. This space is left empty to allow the drawcords closest to the middle to pass by those center Texsolv cords as they are pulled. There are 220 cords on each side, groups of 8 cords, with an empty dent between each group.

This afternoon I pulled the long Texsolv cords, that go from the upper jacks and down through the shafts to the lamms, out of the shafts and wrapped them up around the top. Though I had previously read how to put a drawcord warp on, on p. 149 in “Damask and Opphamta,” I went about this slightly differently.


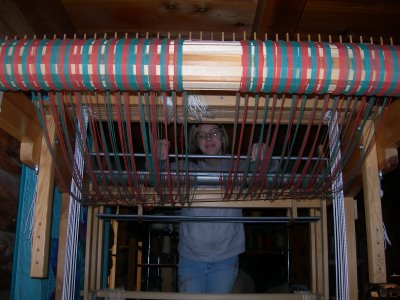
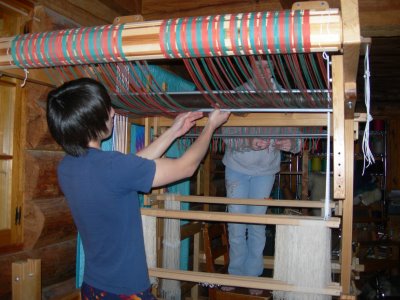
With help from daughter Sarah and son Noah (so I could take photos), the reed (with lease sticks still in) were passed to the back of the loom, over and down behind the round steel beam.


Instead of sleying both reeds at the front of the loom, as described in the book, I sleyed the first reed at the front, then passed the reed to the back to sley the second reed. Here the first reed is suspended about five inches above the second reed, making it easy to sley the second reed. The pattern heddles are directly underneath the lower reed.


The second reed is now sleyed straight across, the 4″ space in the middle of the reed is not needed on the second reed. I will leave the cords as is until the weaving warp is beamed.


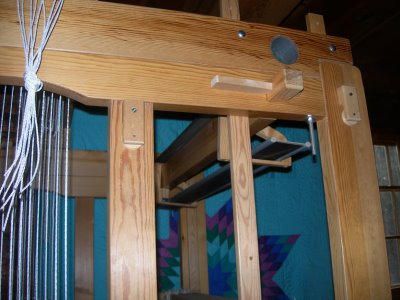
At this point, the first reed was passed back to the front of the loom,…


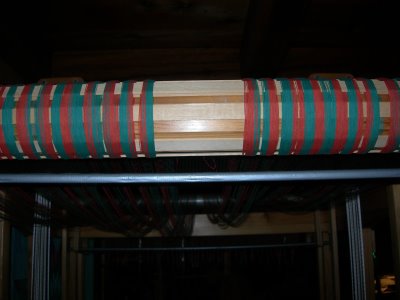
and tied in place to the upper beam overhead.

The cords are ready to tie to the pattern heddles, after the weaving warp is beamed. Tonight, this is a beautiful sight! One step closer,…

Drawcord Warp, Prep for Beaming

The drawcord warp was finished two days ago, and made in four sections as I don’t overlap threads when making a warp. I placed a label on each section (Drawcord Warp 1, etc.). The warp was made in groups of eight threads, and alternating two colors, teal and terra cotta (my names for them). These colors were chosen first because they were colors I could live with, and second because they weren’t too dark to see against a wood ceiling and beams, during the day, anyway.
This warp has 400 “cords,” a lot to start with, but done on the advice of a respected weaver who wrote I should make the warp for as wide and as many cords and units I thought I might like to weave. Since I’d made 400 pattern heddles, I thought this was a good place to start. 400 or so will be the maximum, but I’ll start by using a lot less. Unused cords will be tied together and tied off to the side until needed. If a future project needs more, I’ll need to make a new warp.

Above, you can see the top beam which has groove in it. There is a rod to slip the warp sections onto, then the rod is set into this groove and tied into place on each end so there is no chance of it falling out when the ratchet is turned. The raddle is taped into place and the lease sticks will be behind the raddle. String, scissors, lease sticks, and the firsts of two reeds are standing by. Basically I will be warping “back to front,” only the direction I’m working is reversed, and working on the top front of the loom. As this is a short warp, it should not take long to wind on, then picking each cord from the cross, I’ll sley the first reed.

This is how I recall doing this process long ago when Ken Colwell drive to our home to show me how to do this, and how to tie the cords to the pattern heddles. Unfortunately, some details have faded from memory over the years, so I’ll simply be inventive when needed.

The reeds, both 12 dent, 42″ long, 4″ wide, stainless steel, arrived a couple days ago. I was a bit afraid the reed for the back might be a bit too long to slide into the holders, but it slid in fine. From what I understand, the second reed is threaded on top then moved back, but because of the length of the reed I ordered (the book shows a shorter reed there which would slide easily into the holders), I expect it will be threaded further back.

More pics and description will follow as I work through this process for the first time in close to 23 or so years. I am using the book “Damask and Opphamta” by Lillemor Johansson as well as the video (also available as DVD) “Dressing Your Swedish Drawloom” by Becky Ashenden. Both are very helpful in understanding this area of weaving.

I was again watching the video last night, looking to see if there was anything on beaming a drawcord warp on an older style single unit drawloom. Although Becky covers the new method with pre-cut cords, I did not see what I find what I was looking for right then. If I find it on this video or elsewhere, I will post about it. This is an excellent video/DVD and I highly recommend it. I know I’ll be watching and learning from it again and again.

For anyone interested in drawloom weaving, Complex Weavers has a Double Harness Study Group. You must be a member of Complex Weavers ($25/year which includes 3 journals per year, membership list, lending library, study groups, and more). The Double Harness Study Group is an additional $5 per year (at present) which includes 4 newsletters per year and the option of participating in a private yahoo group.

If anyone is interested, please contact me at jzindel@newnorth.net. You do not have to have a drawloom to join, just an interest in this type of weaving. For information on Complex Weavers, or to join, go to their website at: http://www.complex-weavers.org.

Drawcord Warp in Progress

The long-awaited drawcord warp is in progress. As you can see, the warp is being made on a warping board instead of a mill because I couldn’t do a short enough warp on the mill without excessive waste of materials and time. In “Damask and Opphamta” the suggested warp length is about 4.5 yds; I am making about six yards to allow for a little extra and in case of any wearing in future, I may be able to cut it back, advance the warp and re-tie back onto the pattern heddles.

I am using 12/6 seine twine in two colors to make pulling cords easier when working from a graphed design. I have two kinds of graph paper, sent by a friend, set up with four and eight squares per block, so I am making this drawcord warp 8 threads followed by a space, across the reed, and alternating the two colors, so the drawcords and graph paper will work together. There are other ways of setting this up this kind of warp, but I’m going to see how this works out.

I had planned to make this warp in two halves (because of the Texsolv cords running down from upper jacks to lamms, but as the pegs on the warping board fill up, it will likely be made in quarters instead, we’ll see.

Back to the warping board. Check in tomorrow. I am still working on exactly how we are going to beam this warp. Hopefully the reeds won’t take long to arrive.