Tag Archives: indigo dyeing

Challenges Come Along

Ready to pin under a goo light.

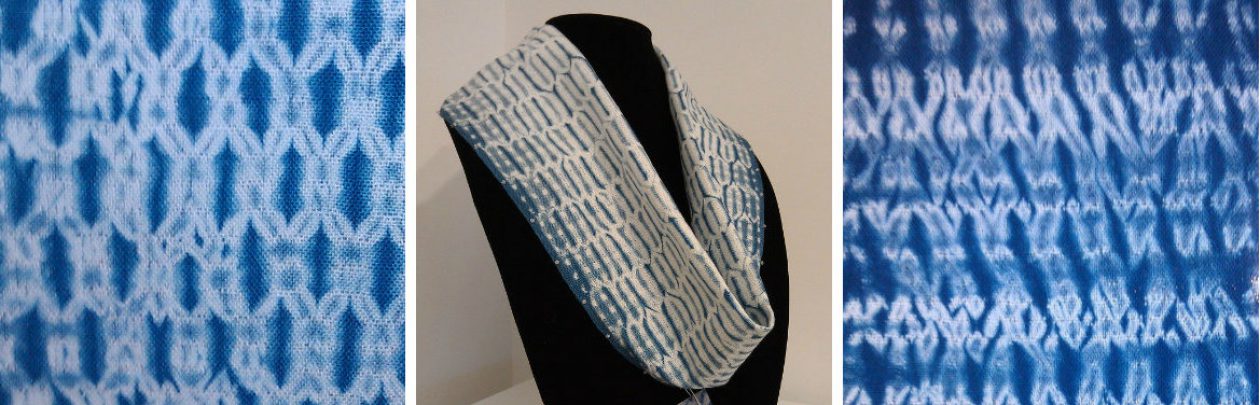
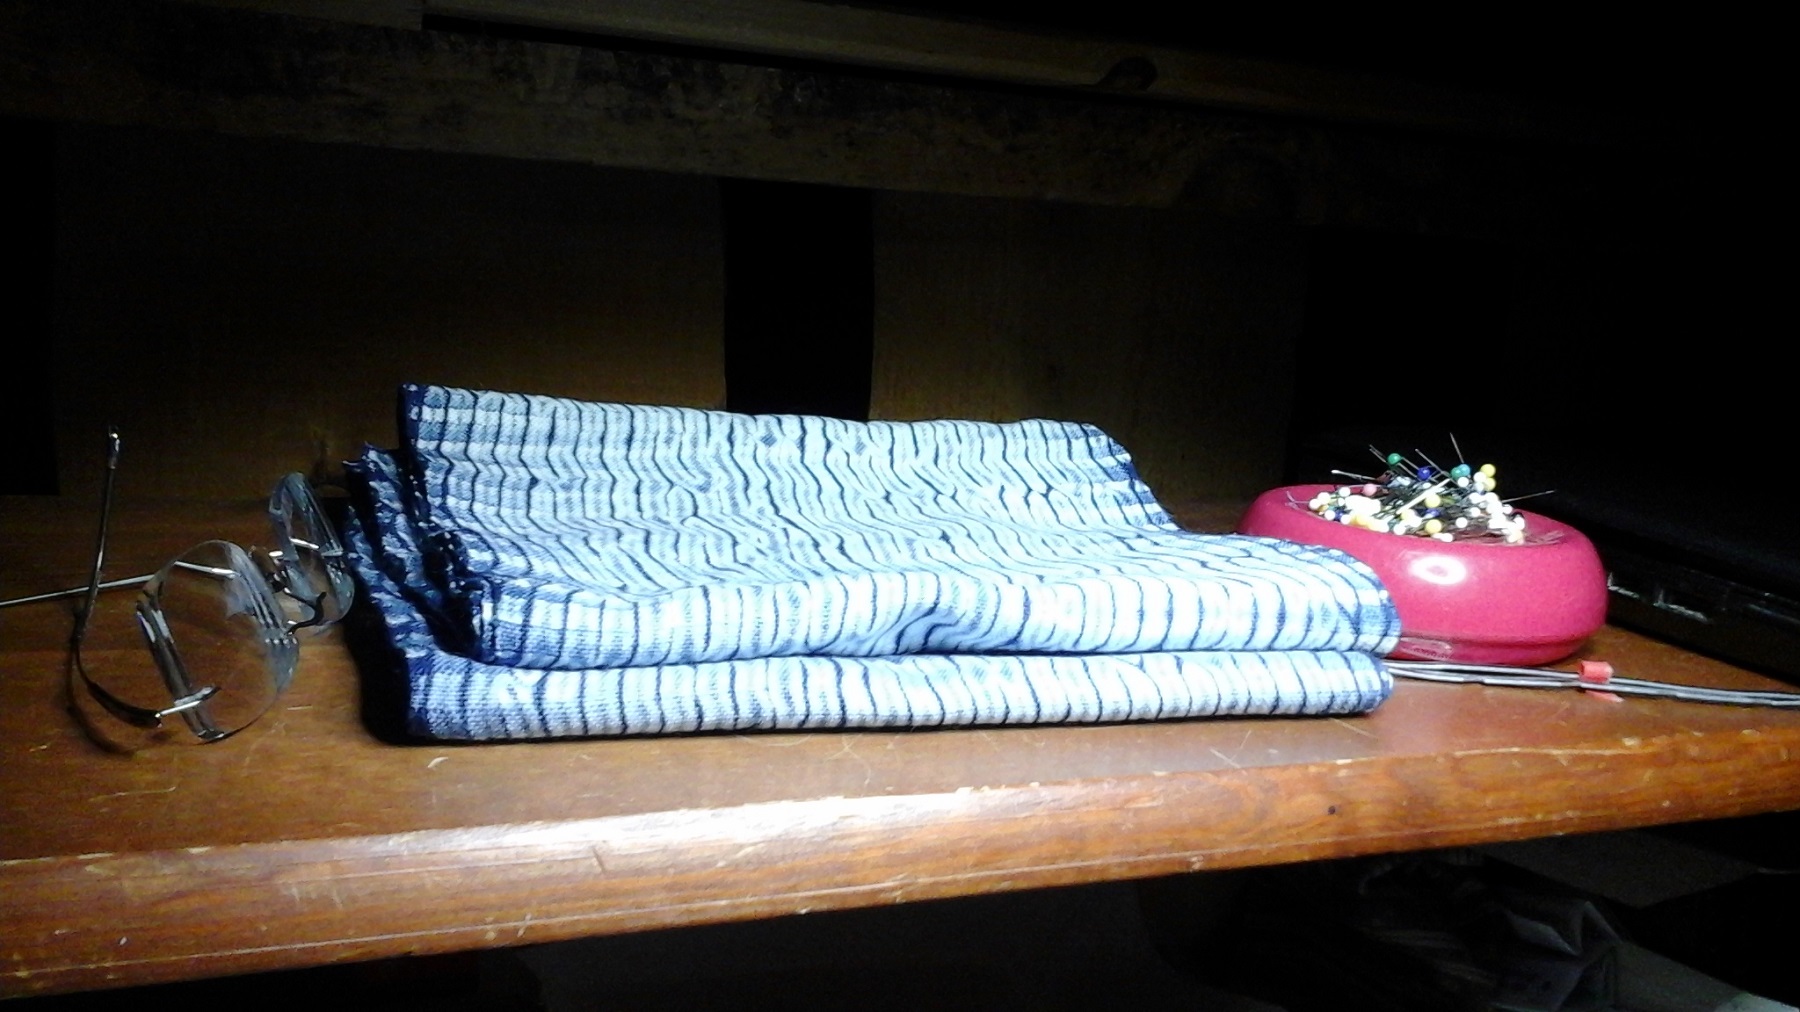
A couple months ago, or more, I was trying to finish one of those never-ending warps, and I had what I hoped were two  scarves, Because I hadn’t made notes, and didn’t remember if I’d left warp for fringe at the beginning or not, I mistakenly didn’t on the second end, of both, Wrong!  I ended up with two cowls, which is fine, not everyone likes the longer scarves or fringe, even when nicely finished with hand-twisted fringe.   The almost-cowls have been waiting a long time so tonight, very late, I sat down and took care of the seams, my variation of a flat-fell seam.

Edges are off-set.
Edges are off-set.

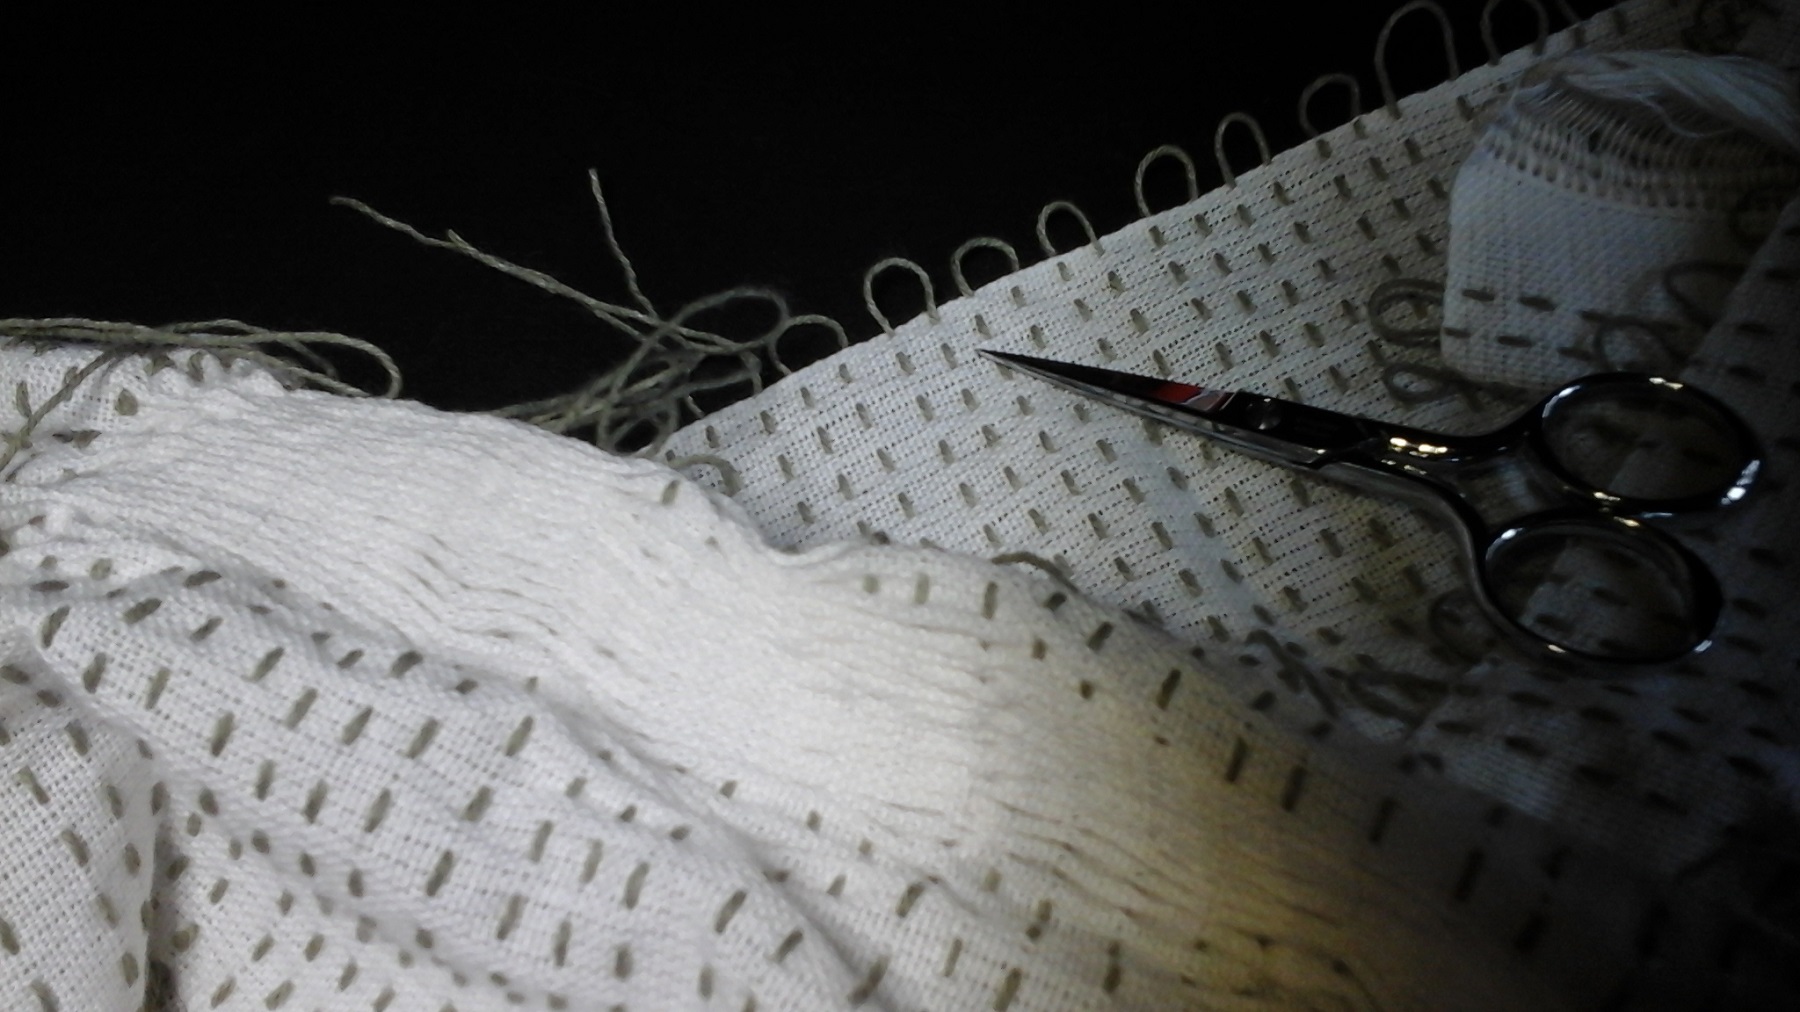
After machine-stitching both edges, about 1/8″ from the edge,  to prevent raveling, and wrong sides together, I off-set the two, and machine stitch about 1/8″ from cut edge.  If they were lined up, I would have to trim the one down to 1/8″ inch, this way I don’t need to use scissors close to the handwoven. threads.

Fold over fabric and pin.

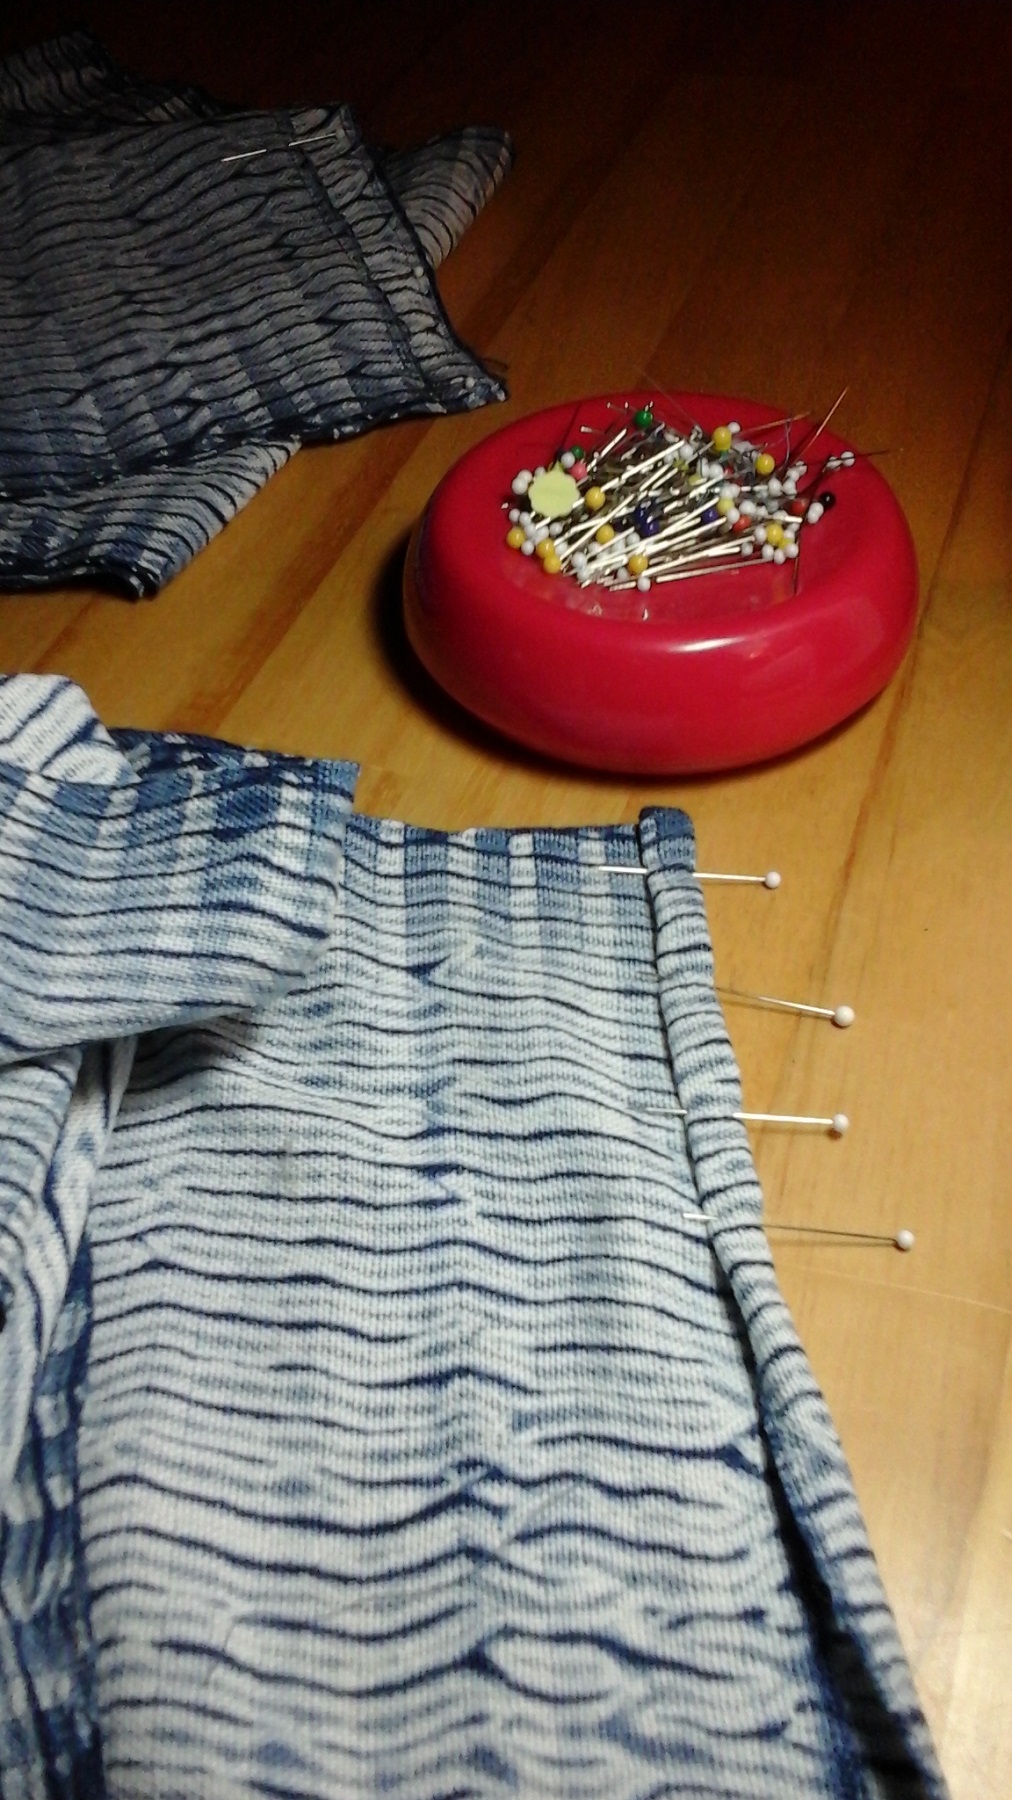
Now the fabric is folded over, enclosing the raw edge, and is stitched down.  Then I open the scarf, lay the seam down and machine stitch again (sorry, forgot to take a photo).  It makes a nice seam, three layers of fabric, not including the little bit of raw edge that is enclosed.  On these two, I did not give it a half-turn, mobius style.


Cowl, ready to be worn.

I was going to add small beads to the edge of one of these two cowls, but my cataracts have gotten worse and threading a needle has gotten to be a challenge.  Beads will have to wait a few weeks.

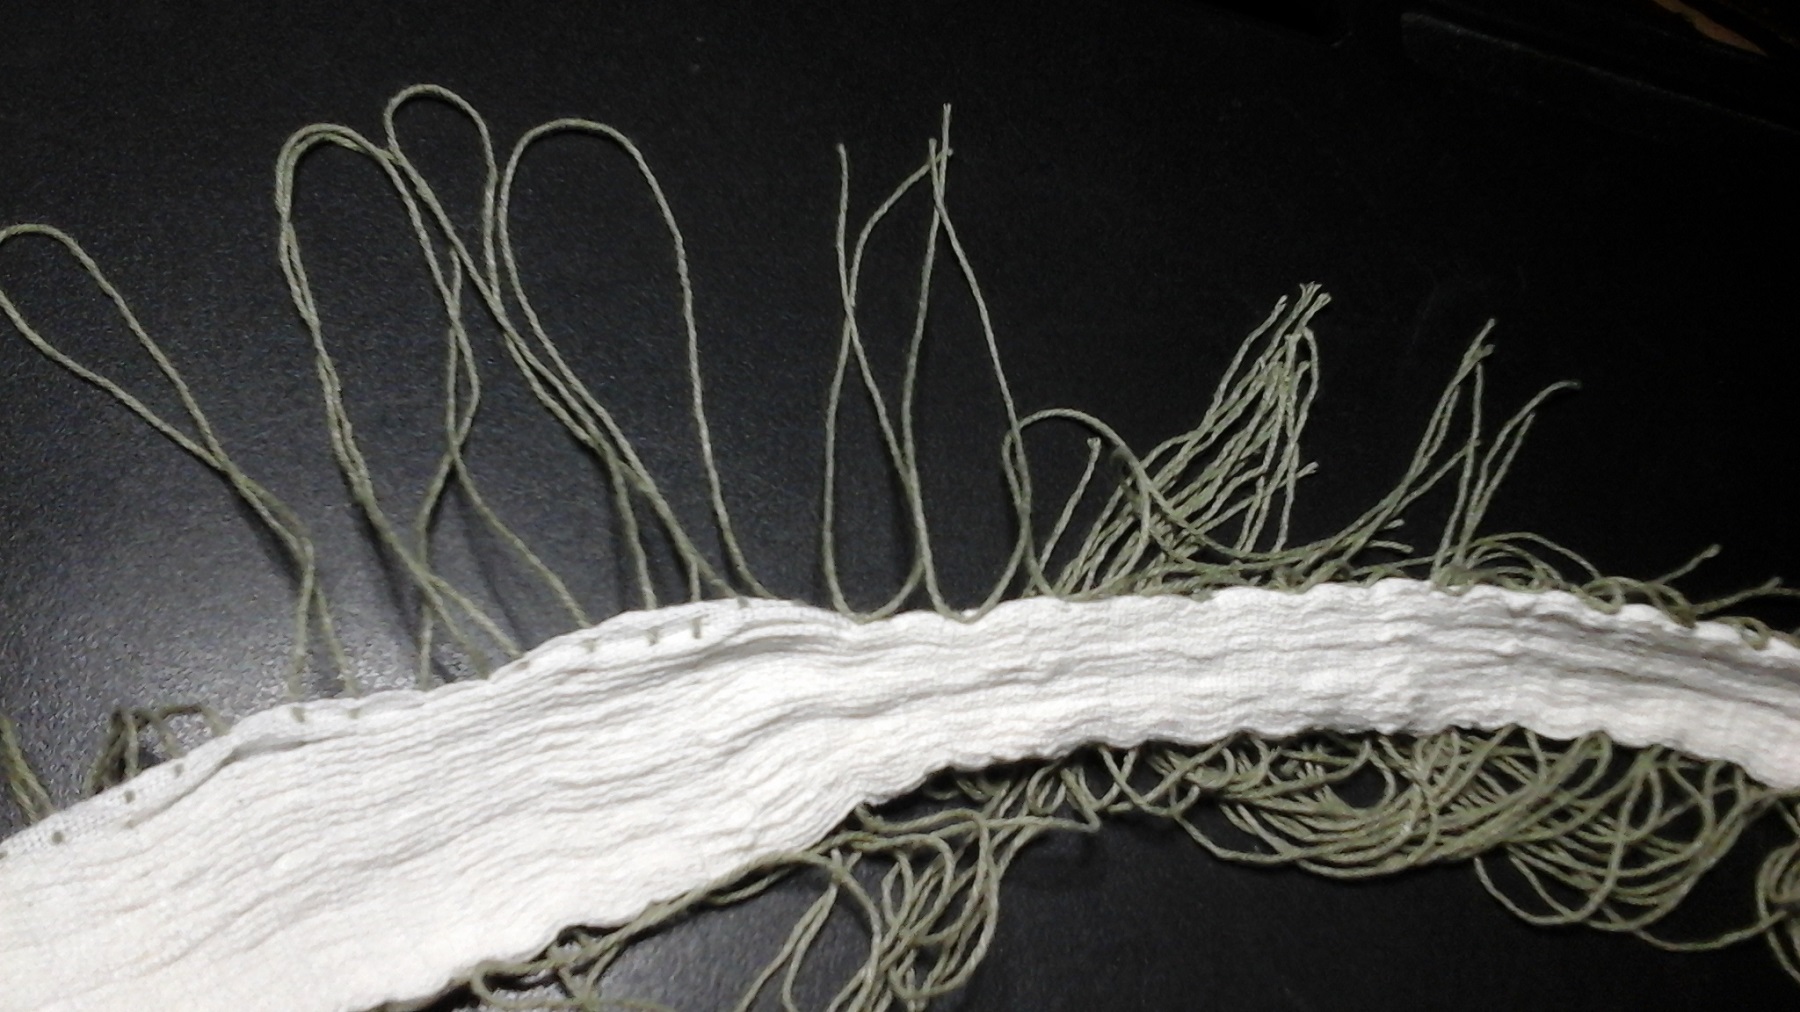
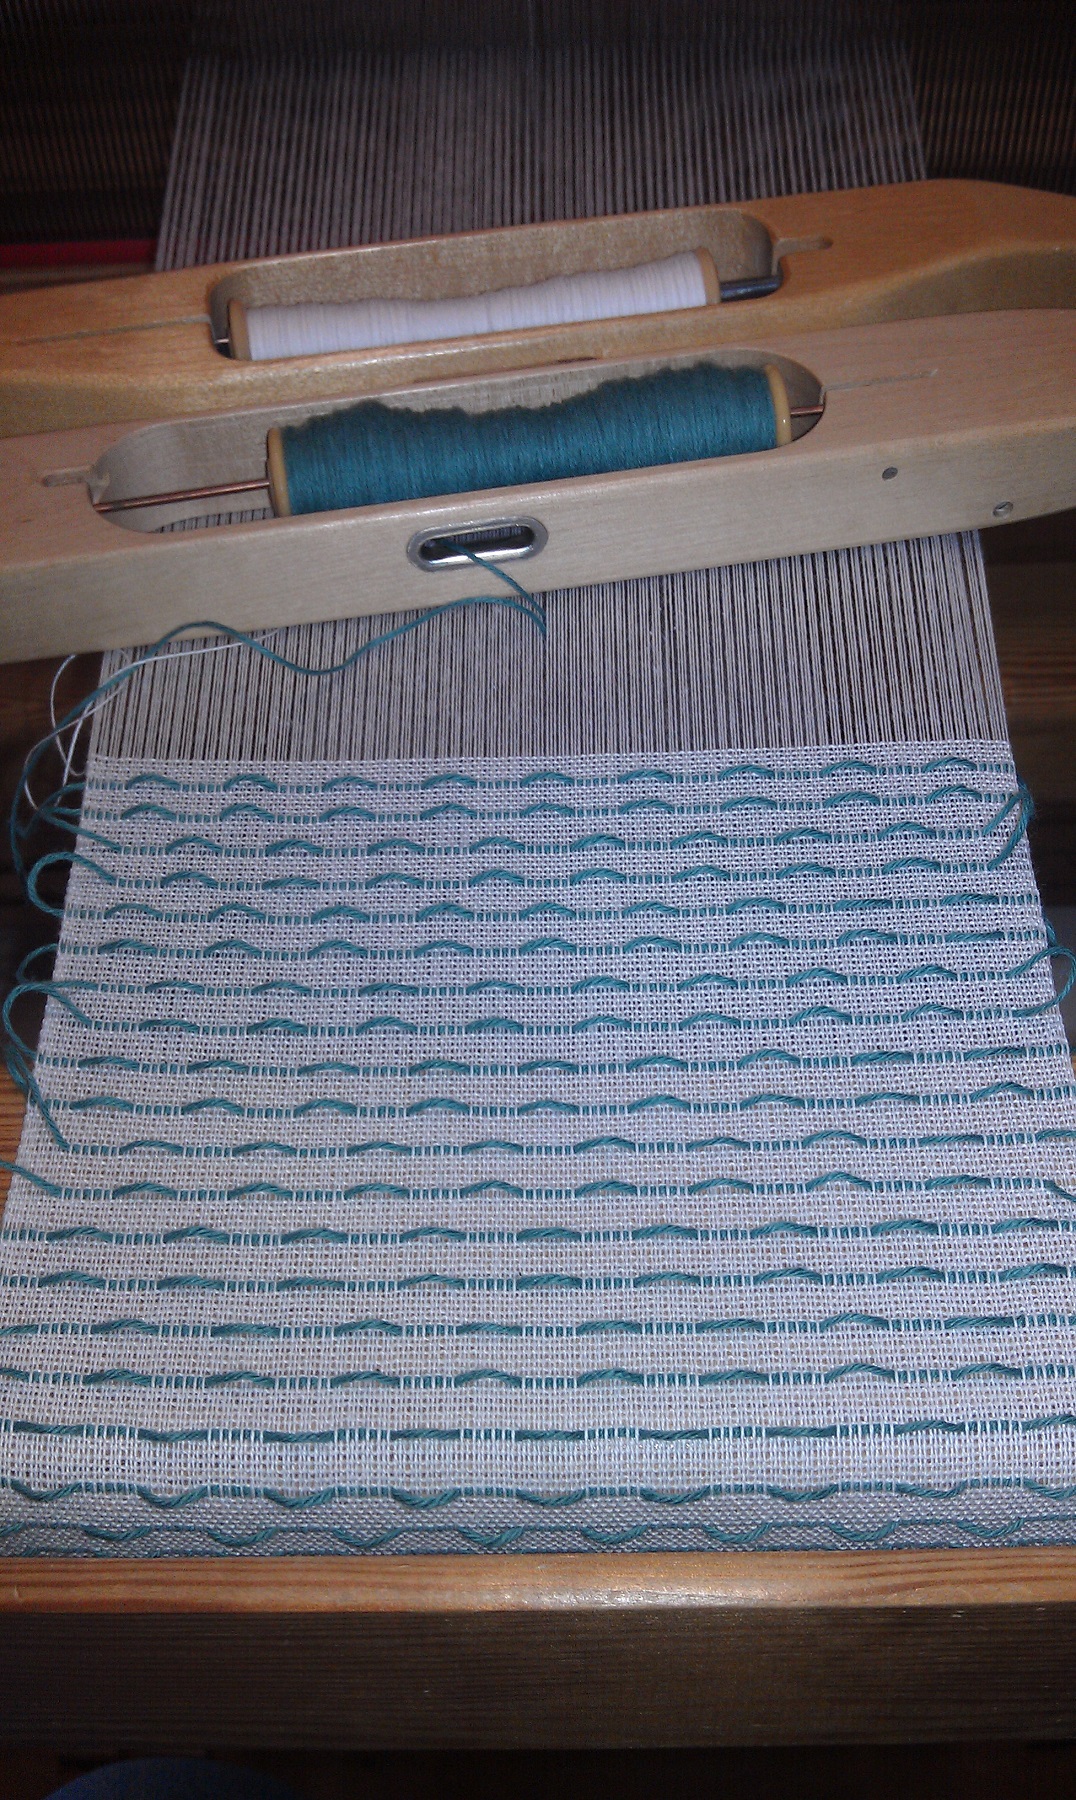
The cataracts are one of the reasons I haven’t been doing much weaving recently.  My right eye is worse than the left.  I’ve had to enlarge print on my laptop screen again, and can’t really read print on the TV screen (Netflix program descriptions, for example). Because things are blurry, I was getting little loops on my formerly nice selvedges.  I couldn’t see those little loops unless I took my glasses off and looked closely, not easy to do while weaving.  Thankfully,  surgery has been scheduled in early February, and I’m hoping the second one will also be in February.  It will be nice to see more clearly again.  I’m told I will still need glasses since my right eye has a “wrinkle” on the back side, but I won’t complain about that.  I just want to see again to get back to my weaving, be able to read, thread a needle, and all the things we take for granted.

I know these photos are a bit blurry, too.  Between using my tablet to take them, a bit of shakiness, and the cataracts, I end up taking many photos of the same thing, then going through them and choosing what looks to be the clearest to my eyes.

Growing stack of indigo dyed swatches.

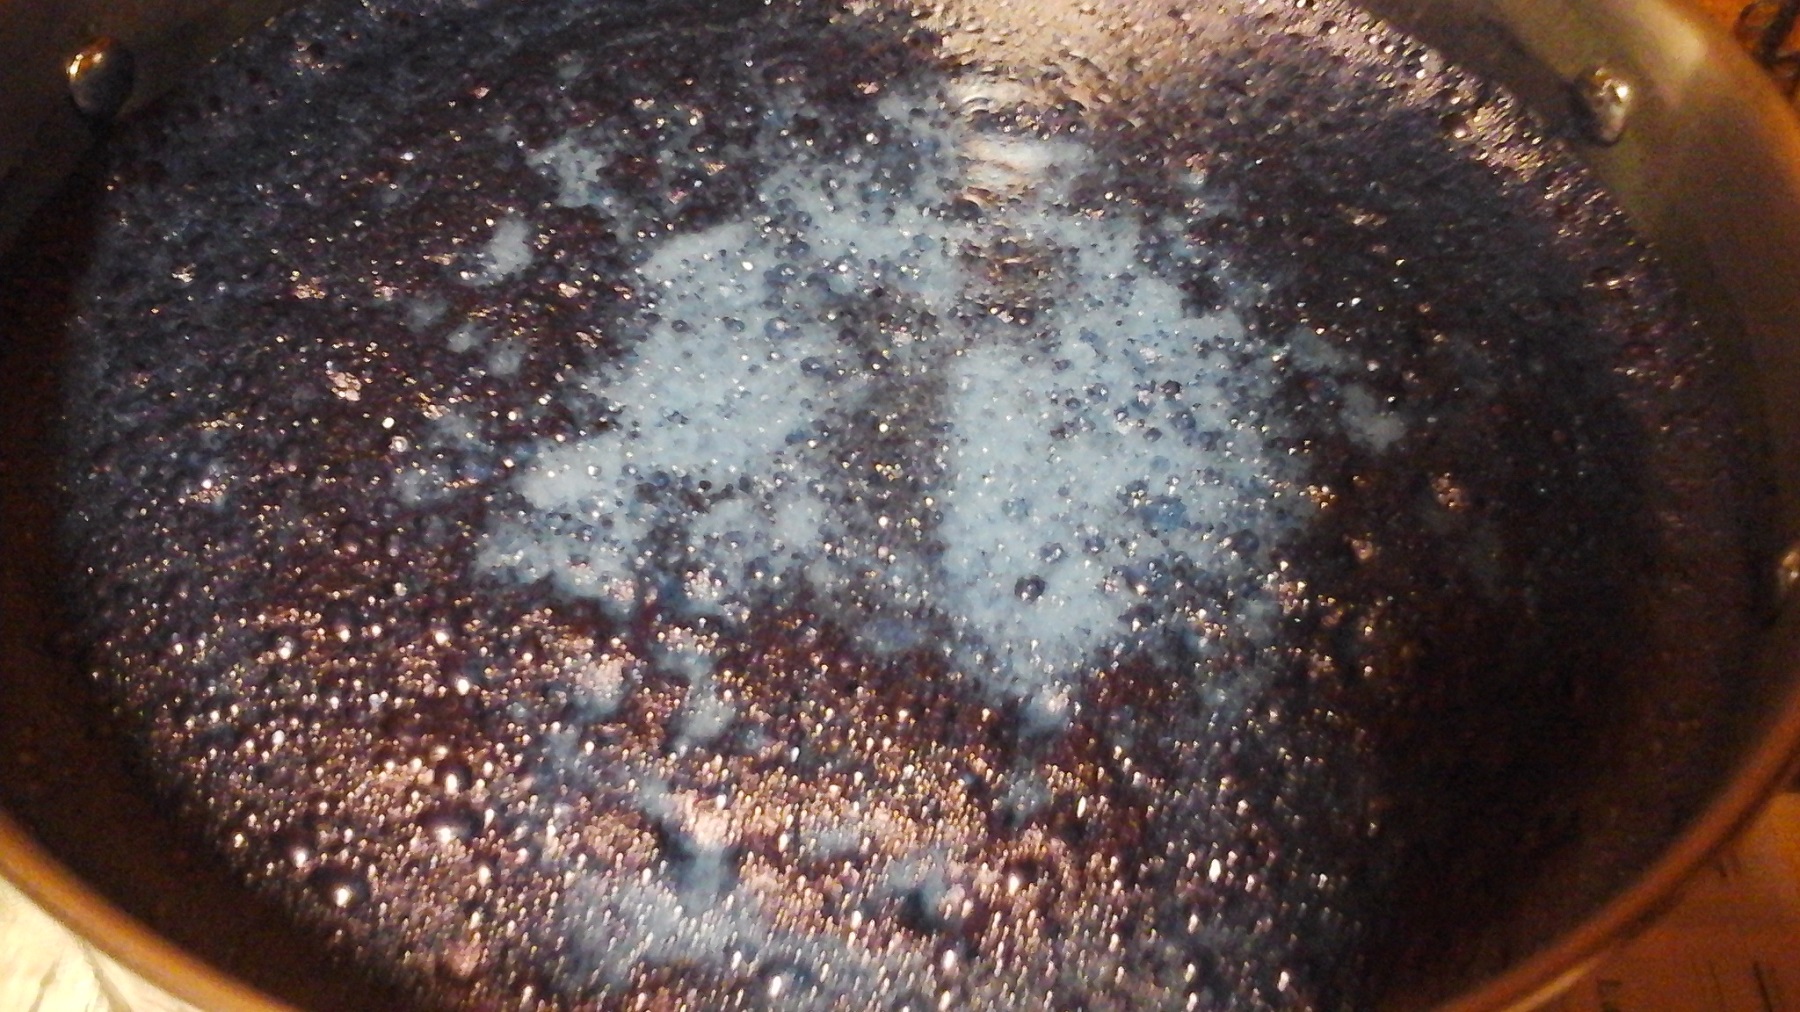
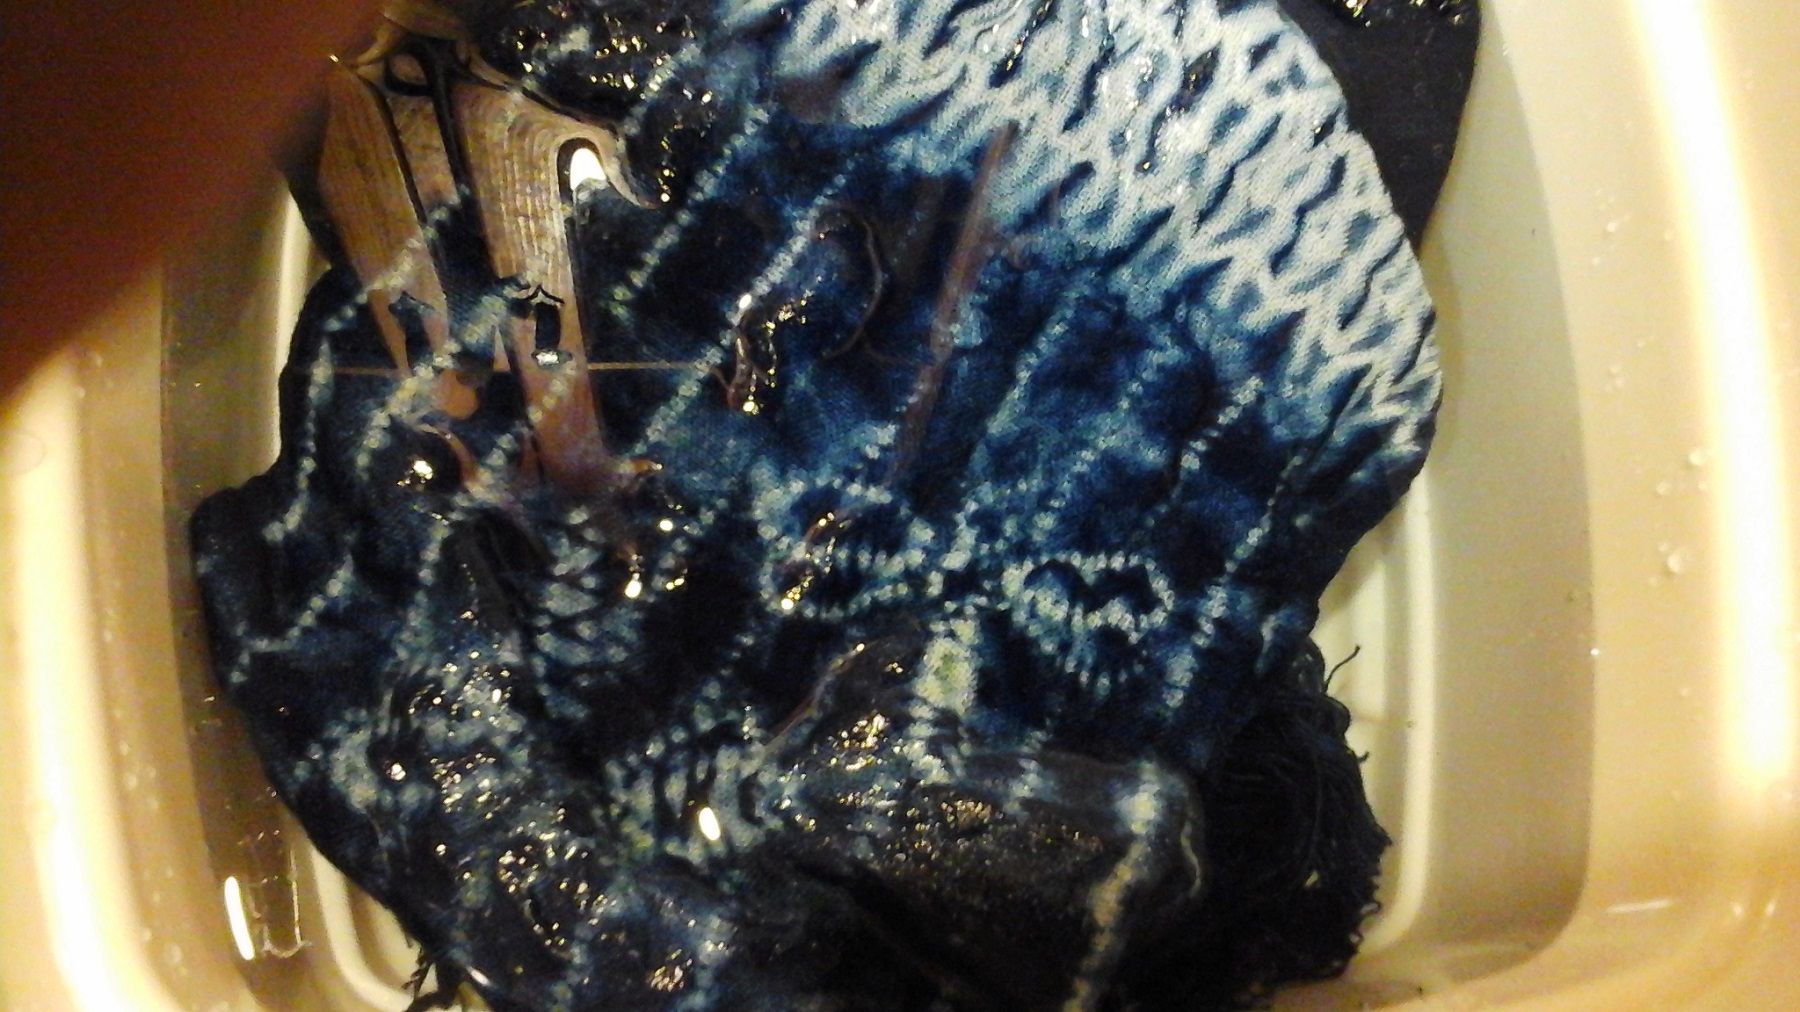
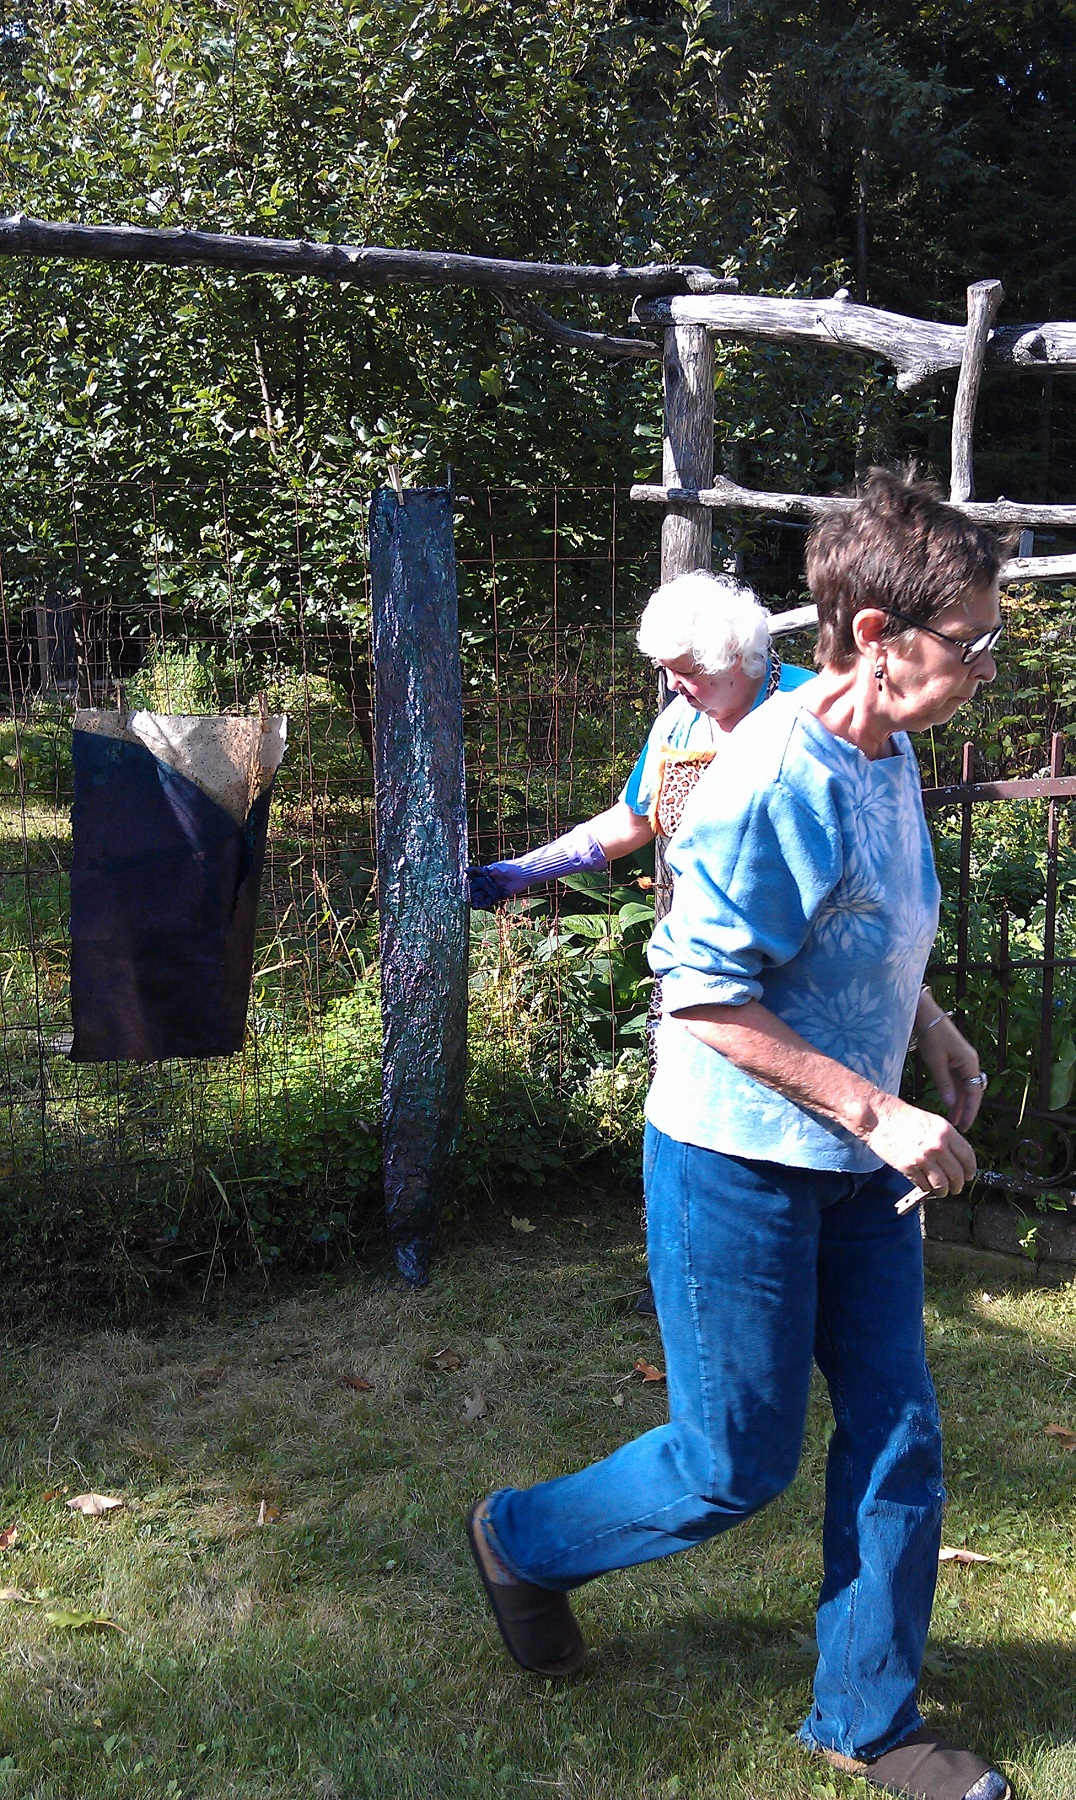
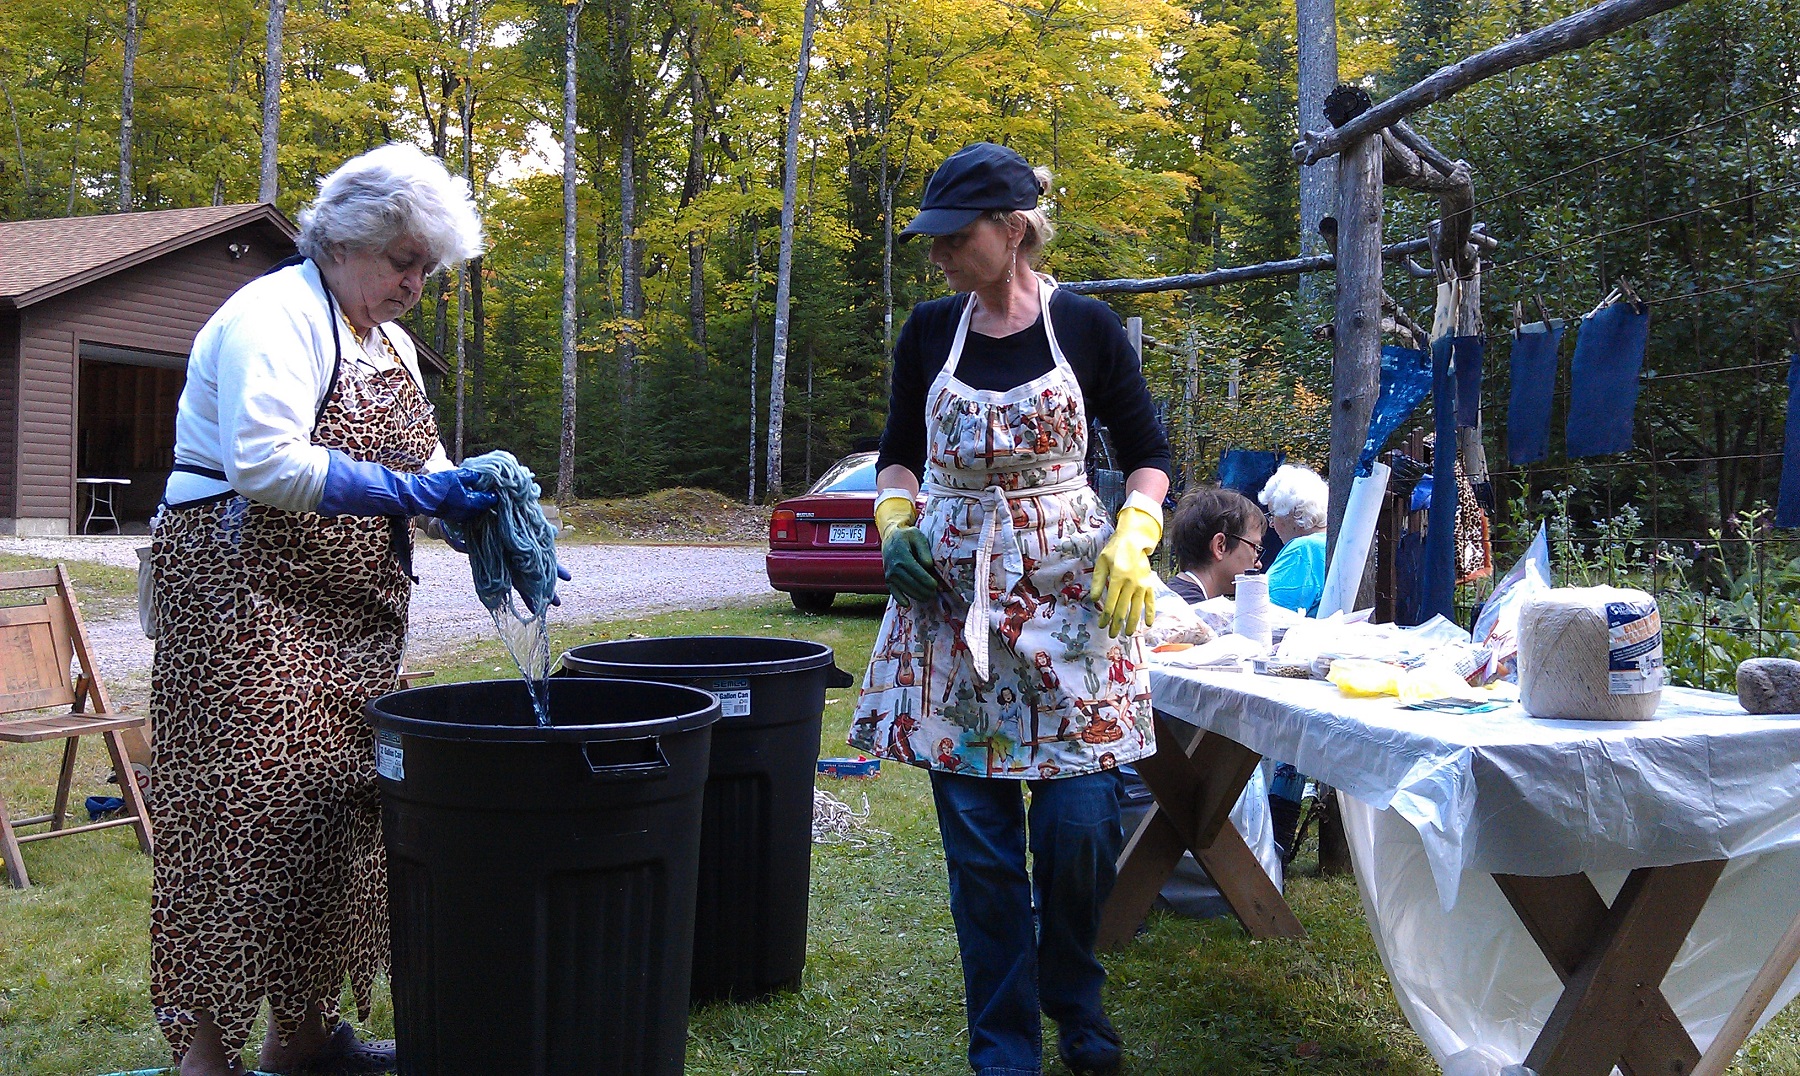
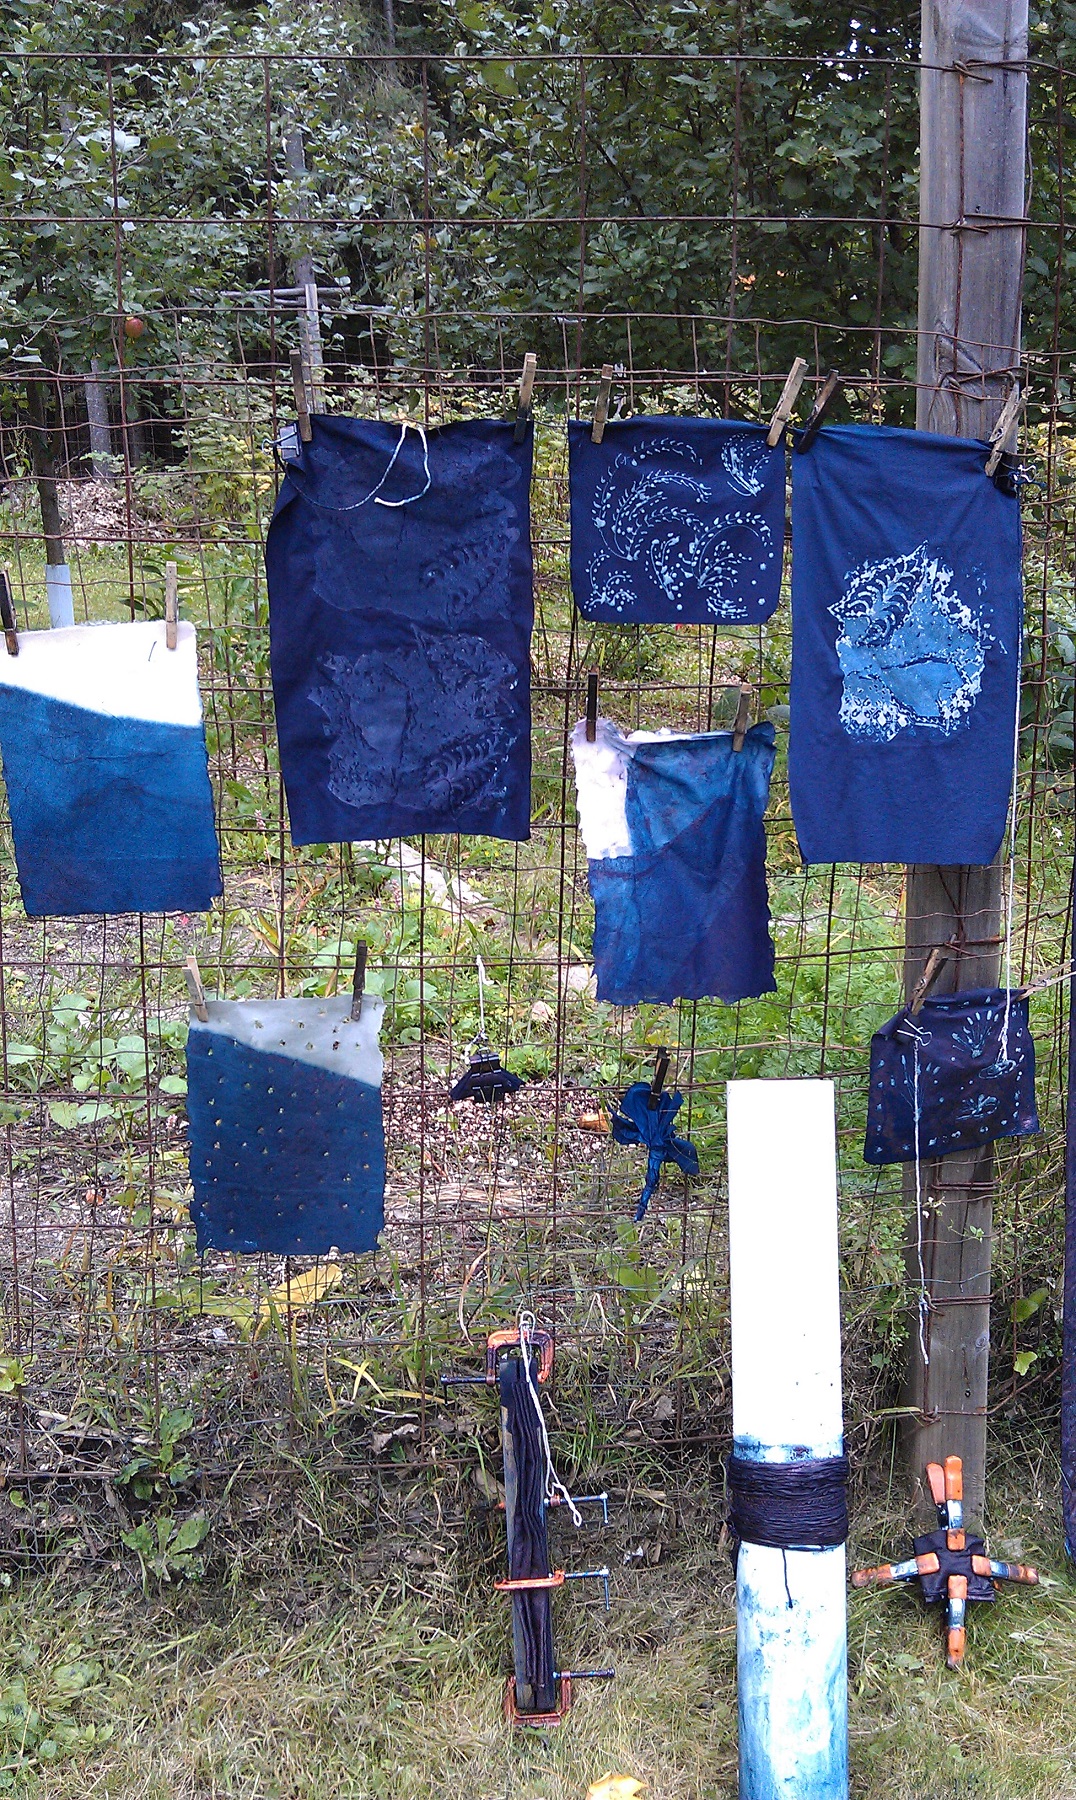
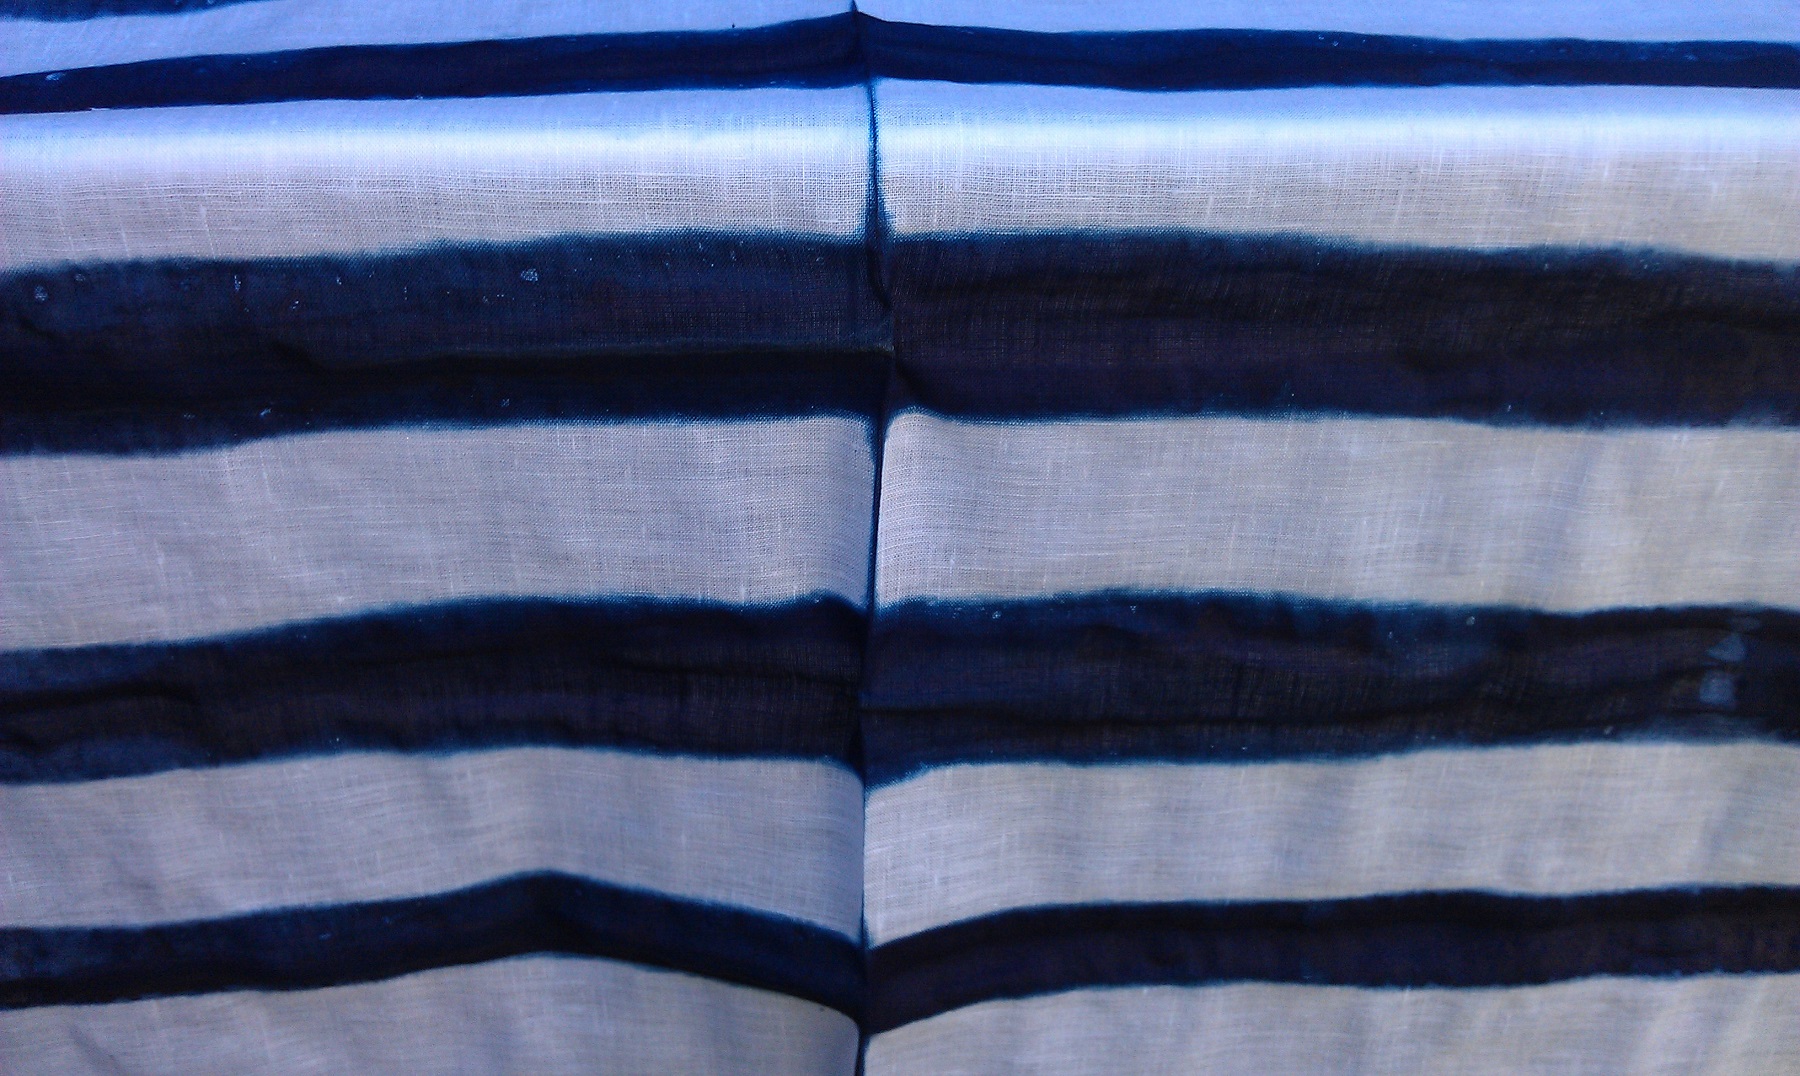
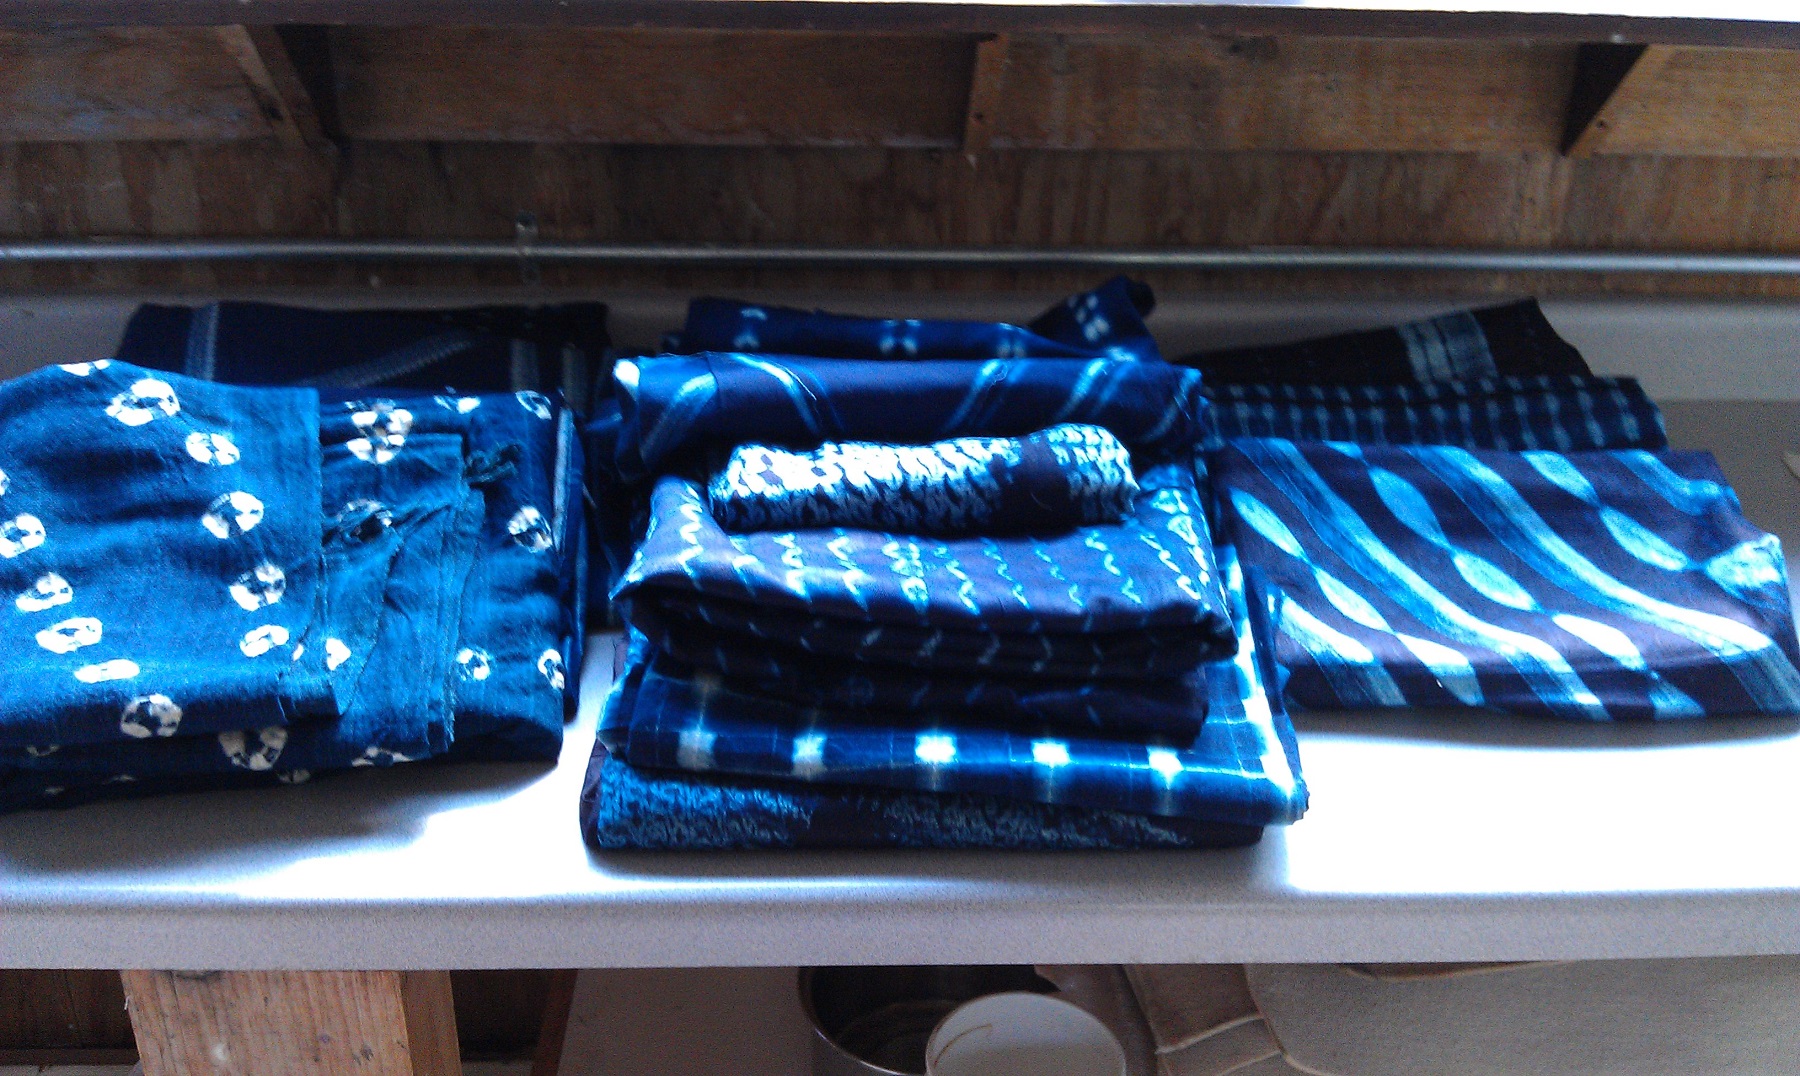
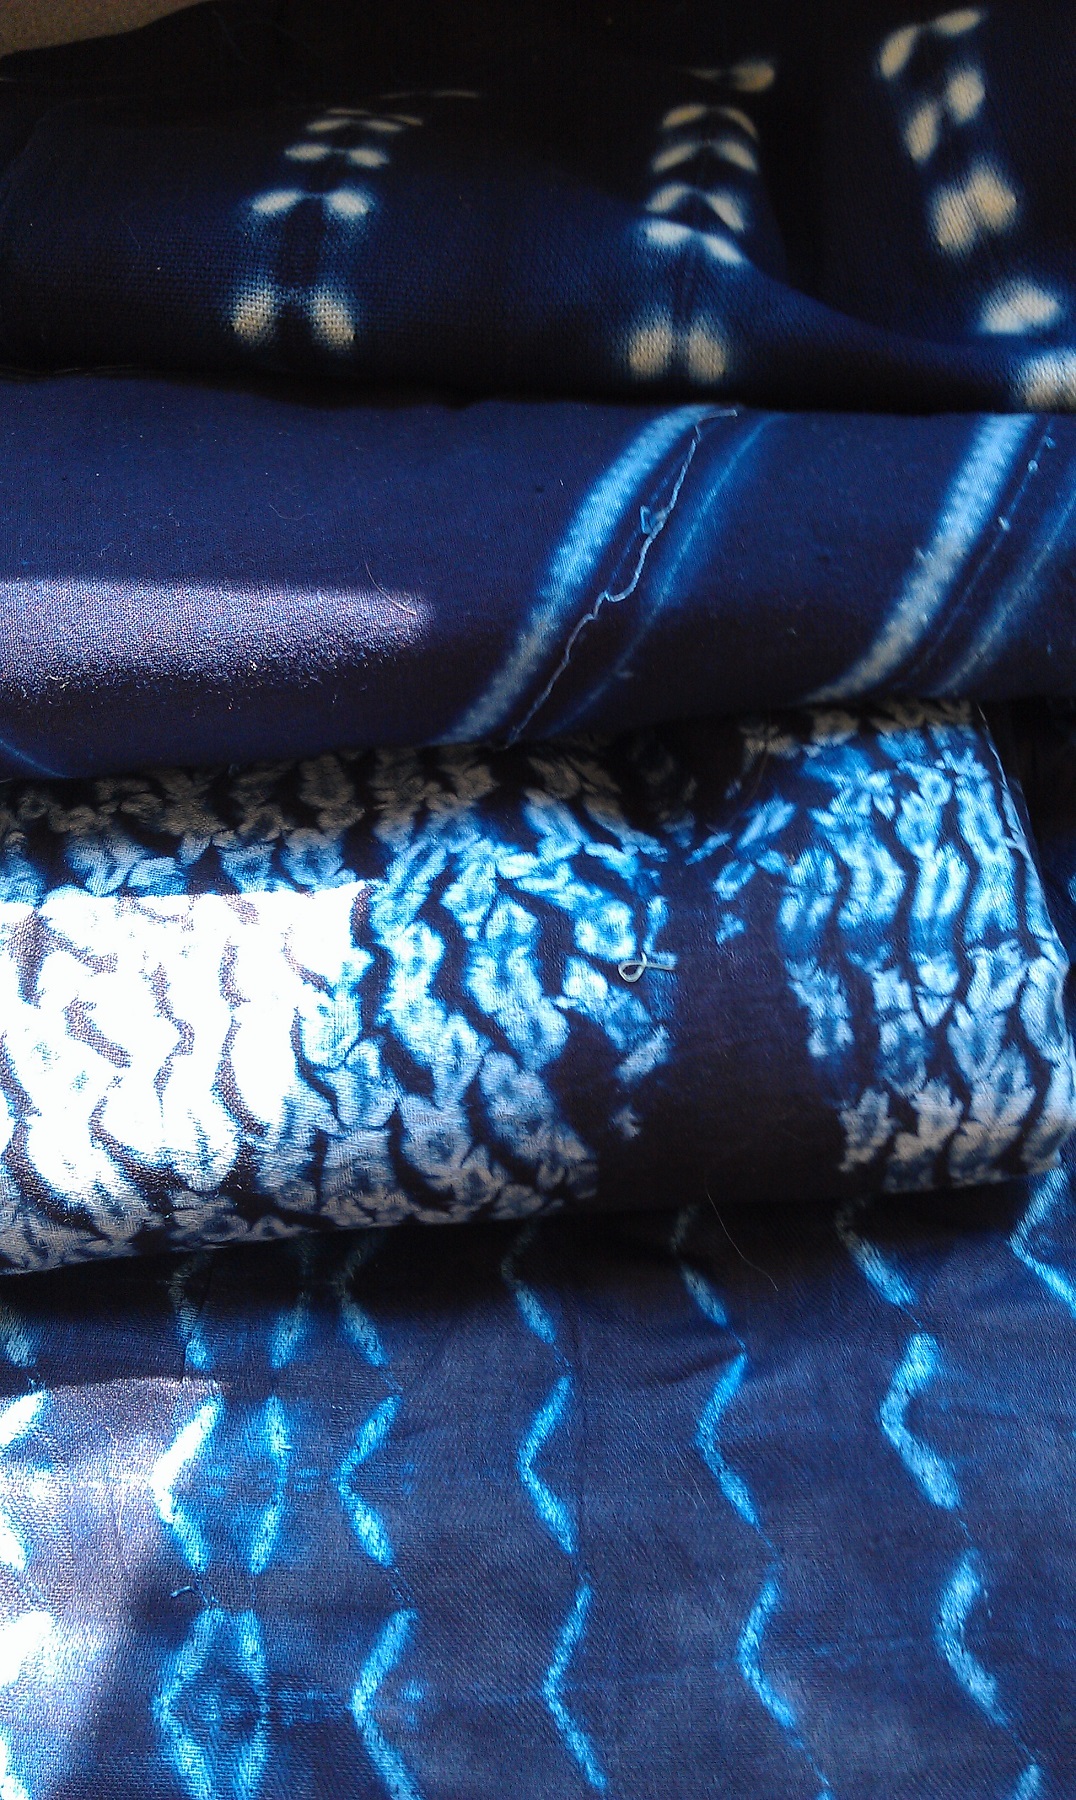
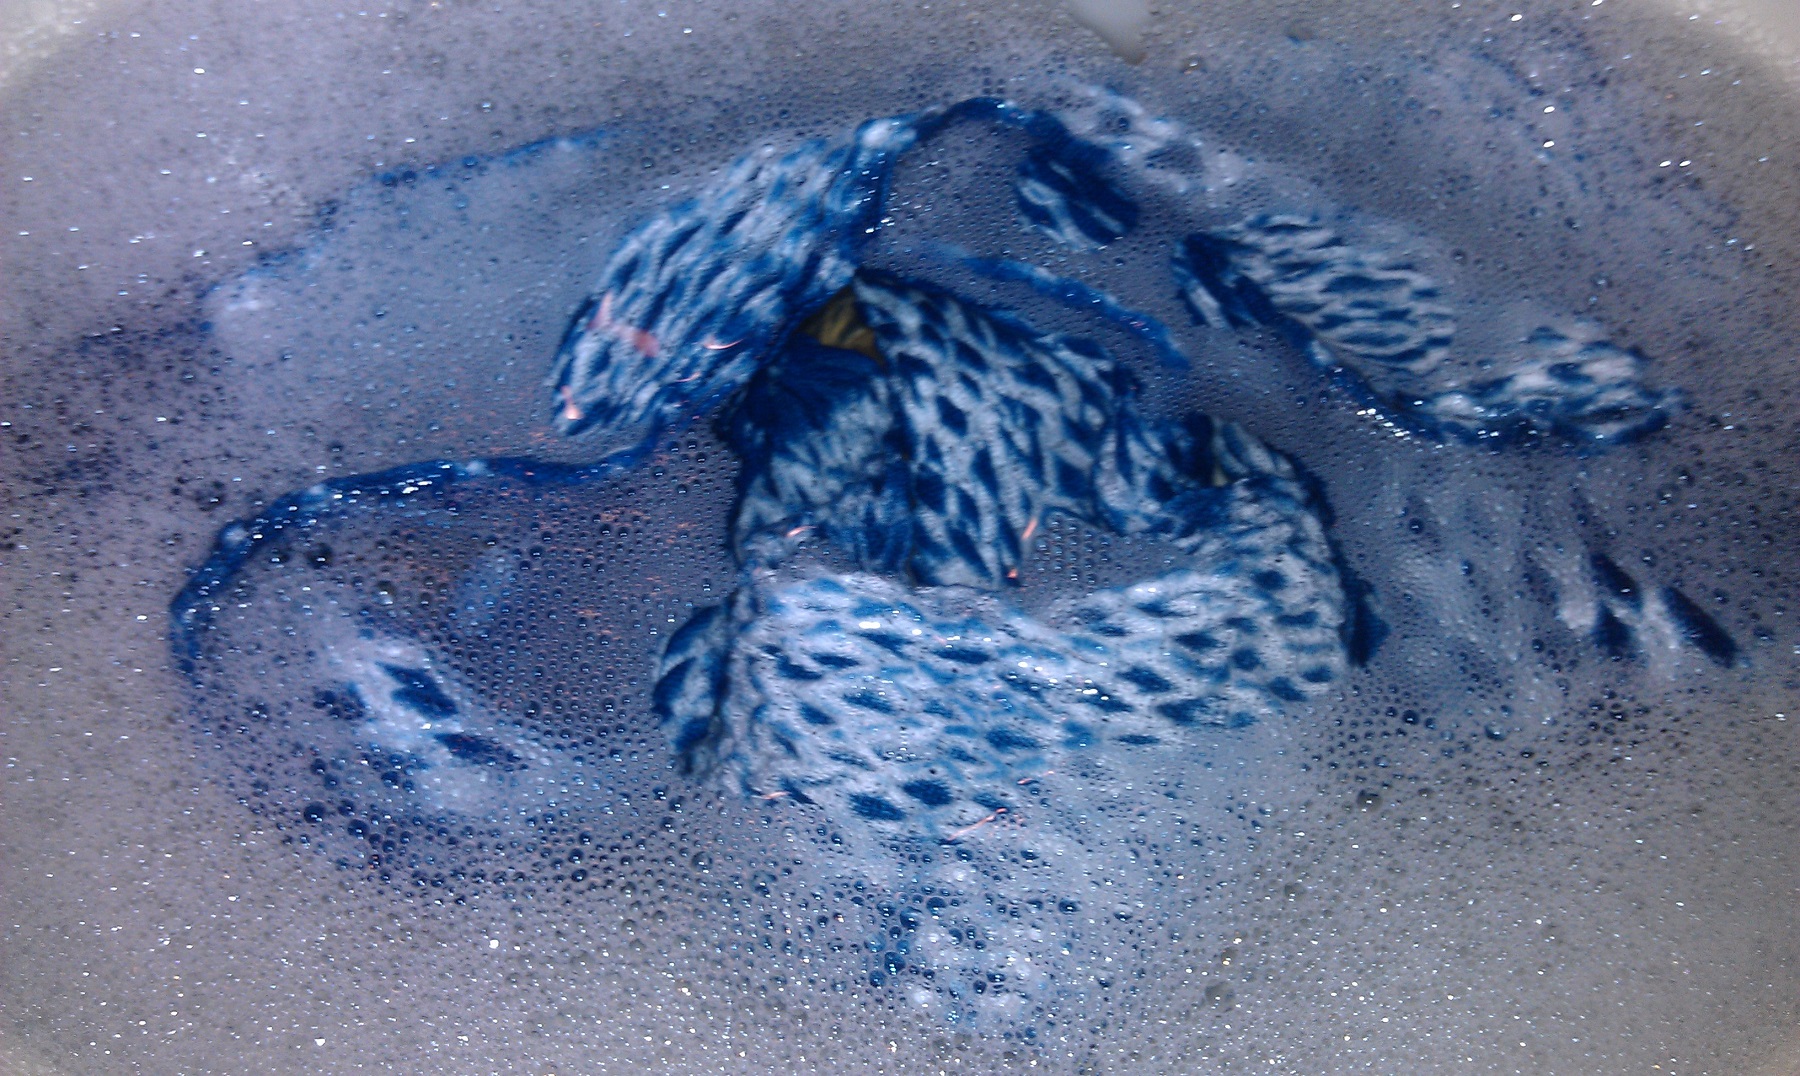
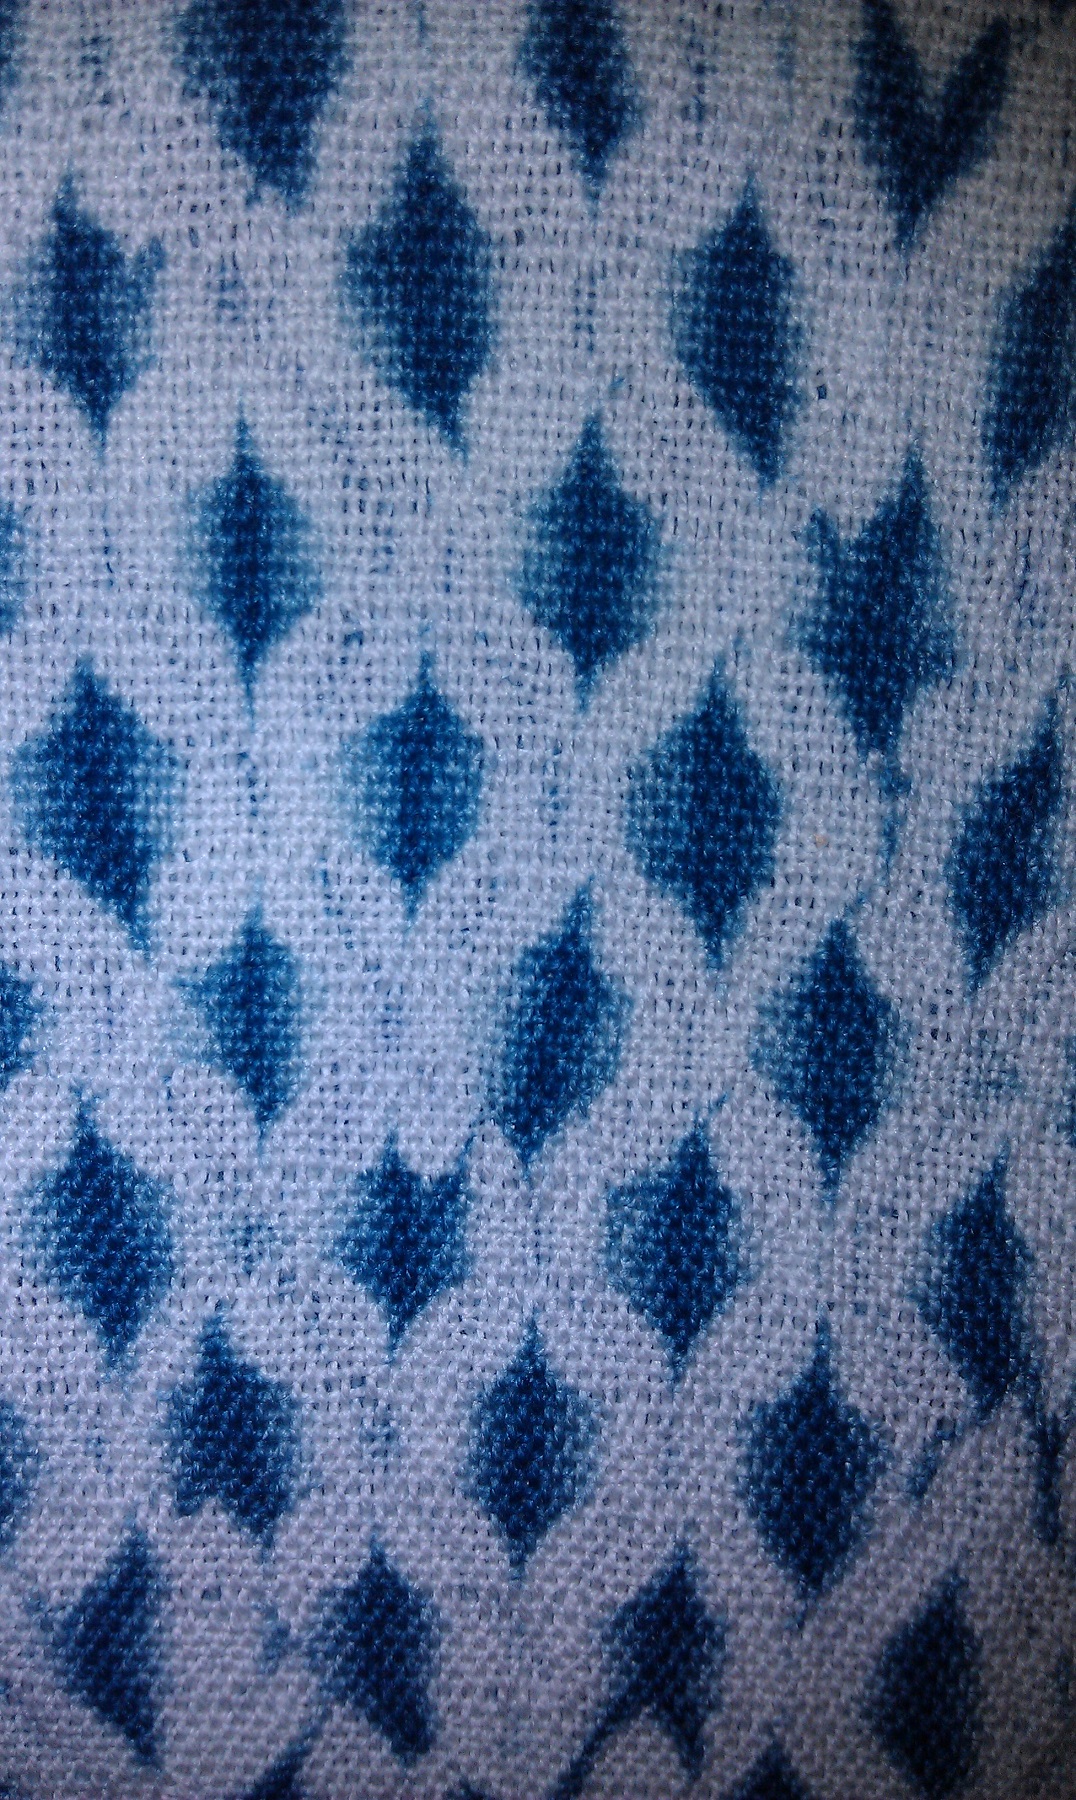
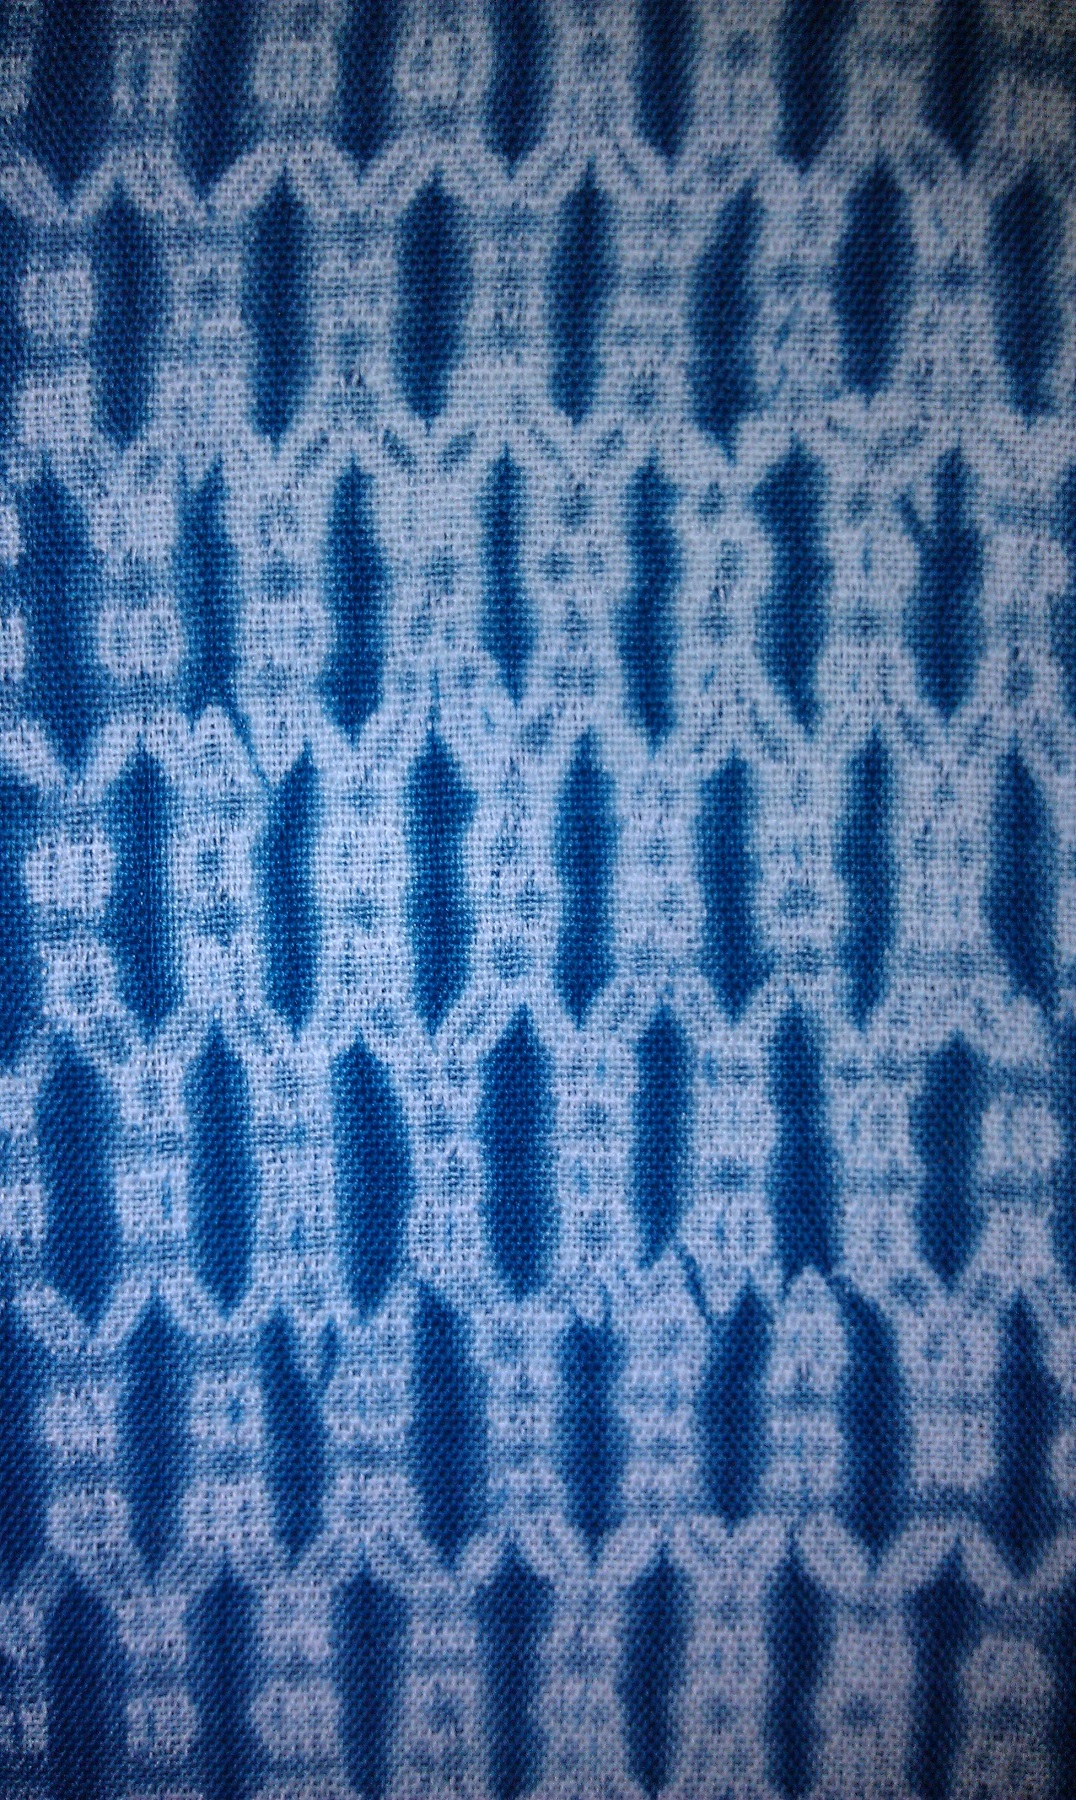
Before immersing my handwoven scarves and cowls in the indigo vats, I “test” the color with small swatches of PFD cotton.  These (above) are what I have left after using several for sachets.

Shades of indigo.
Shades of indigo.

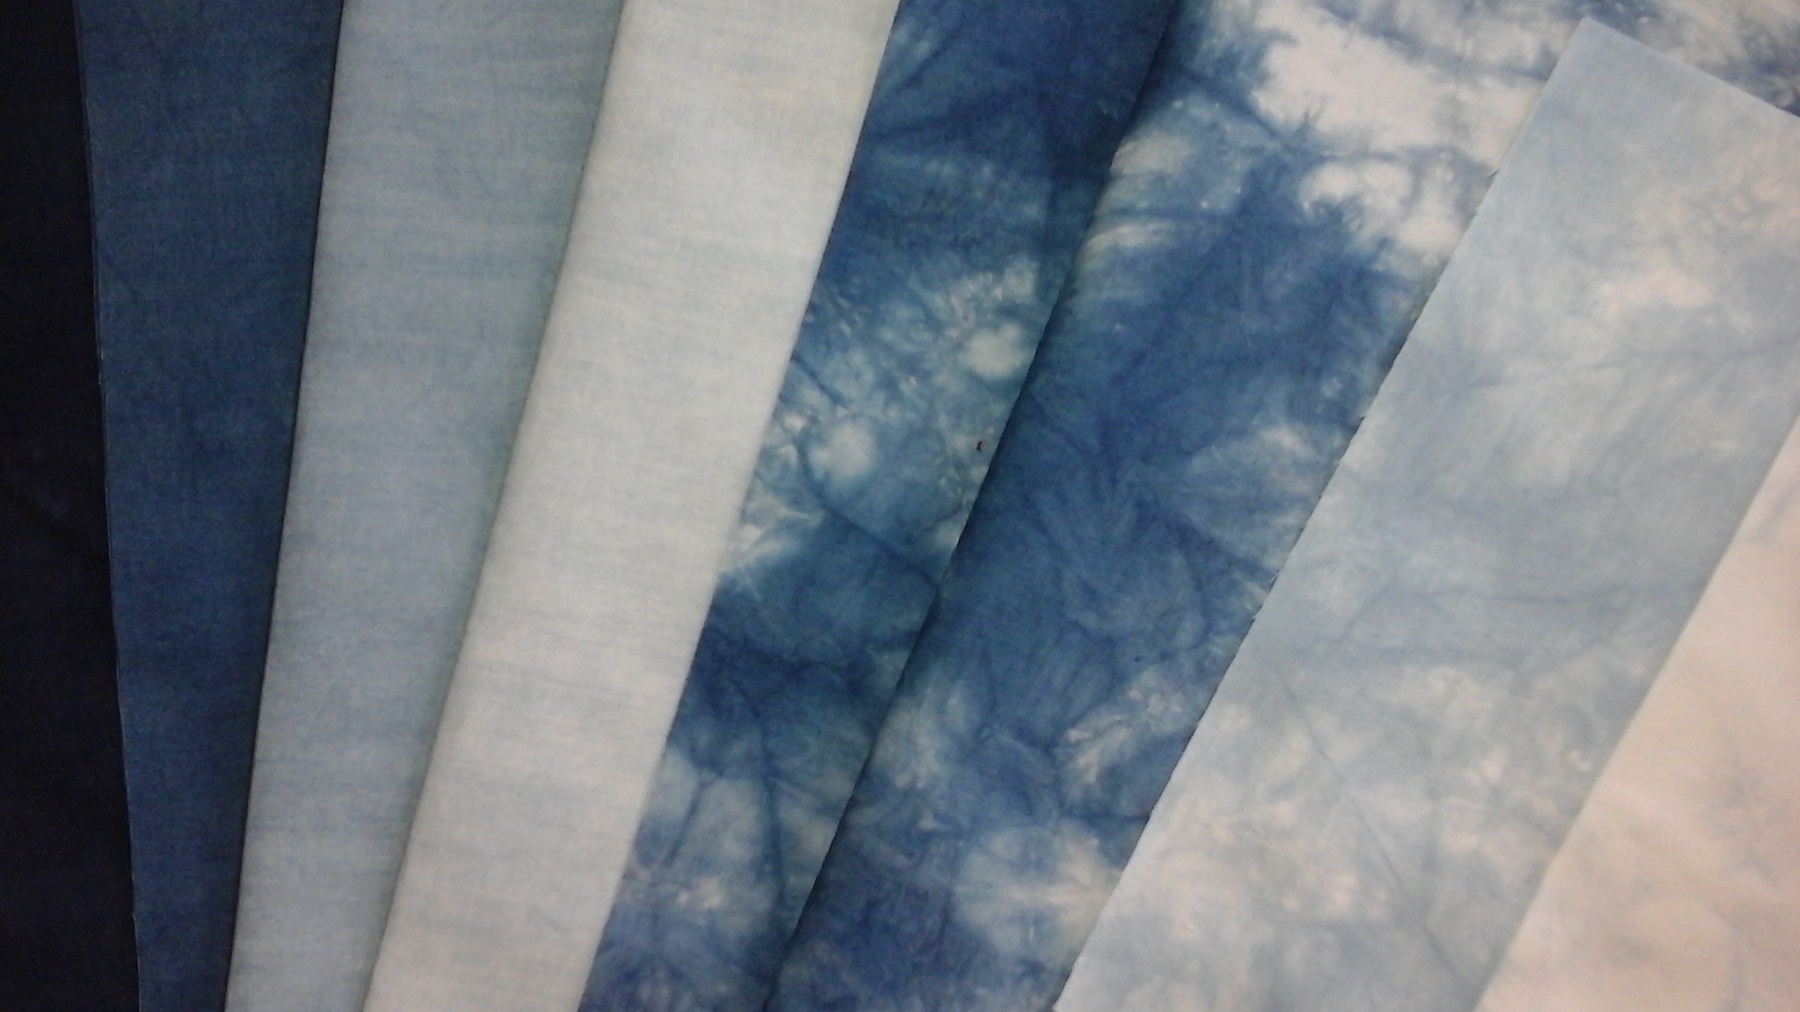
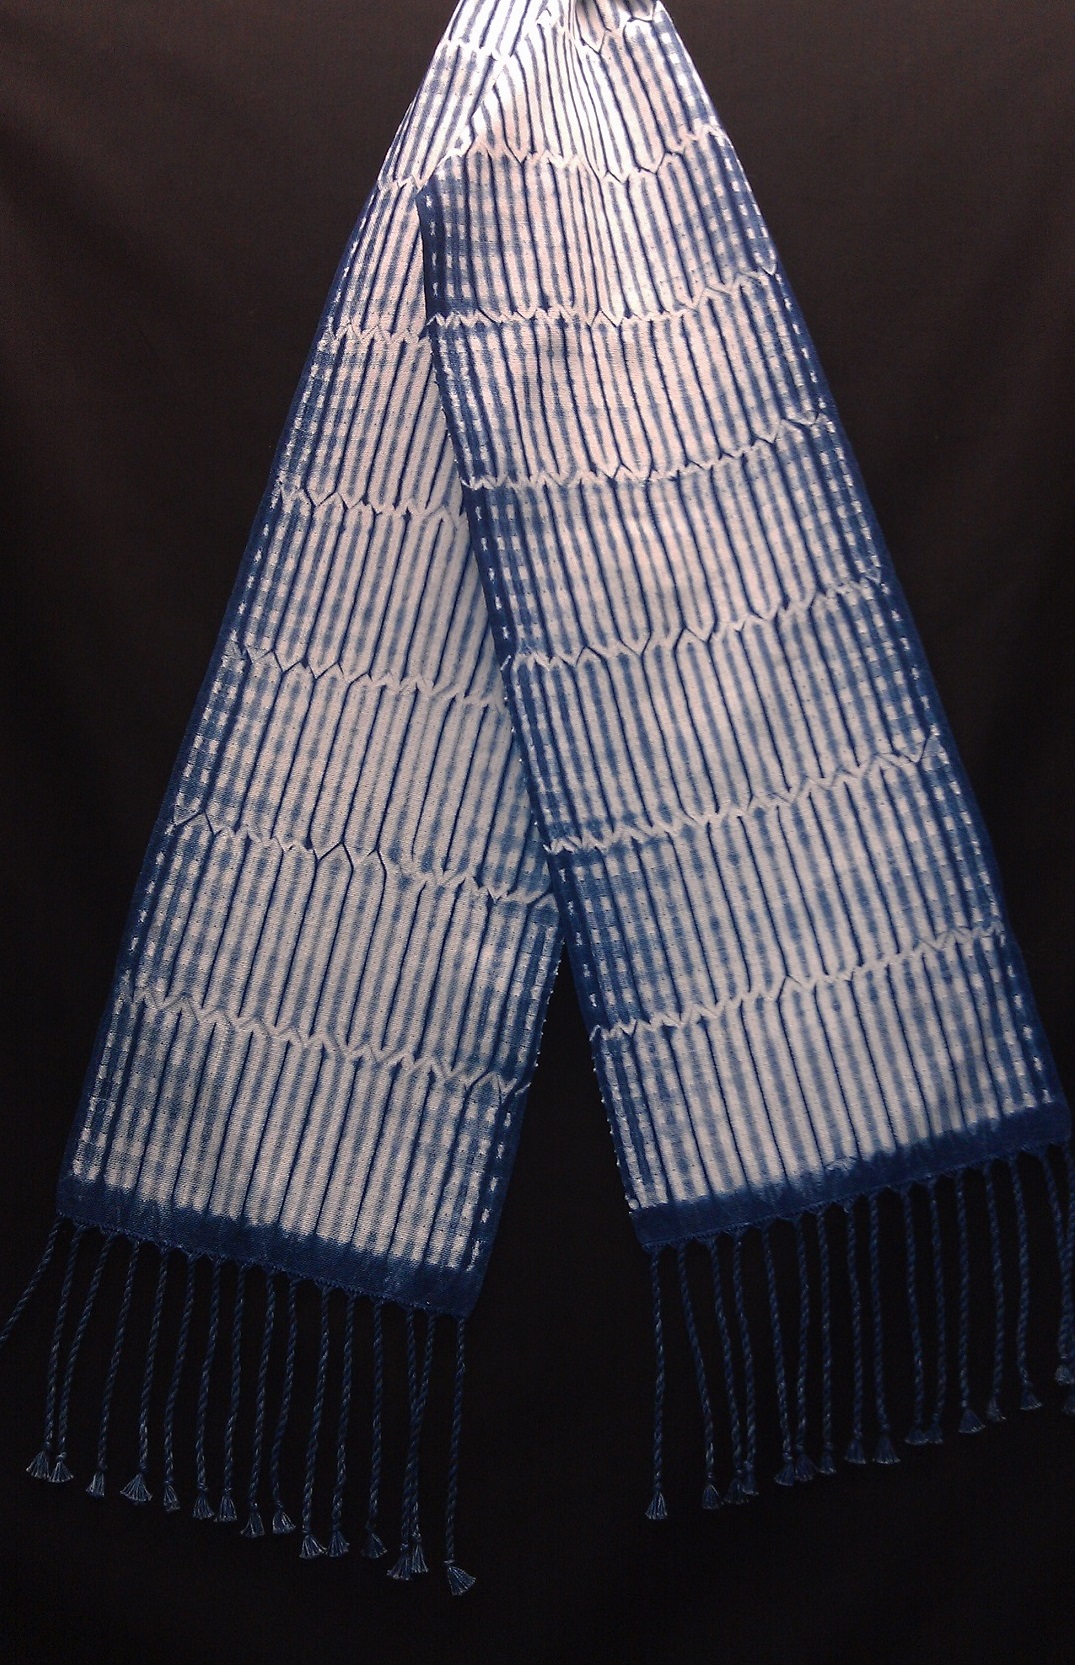
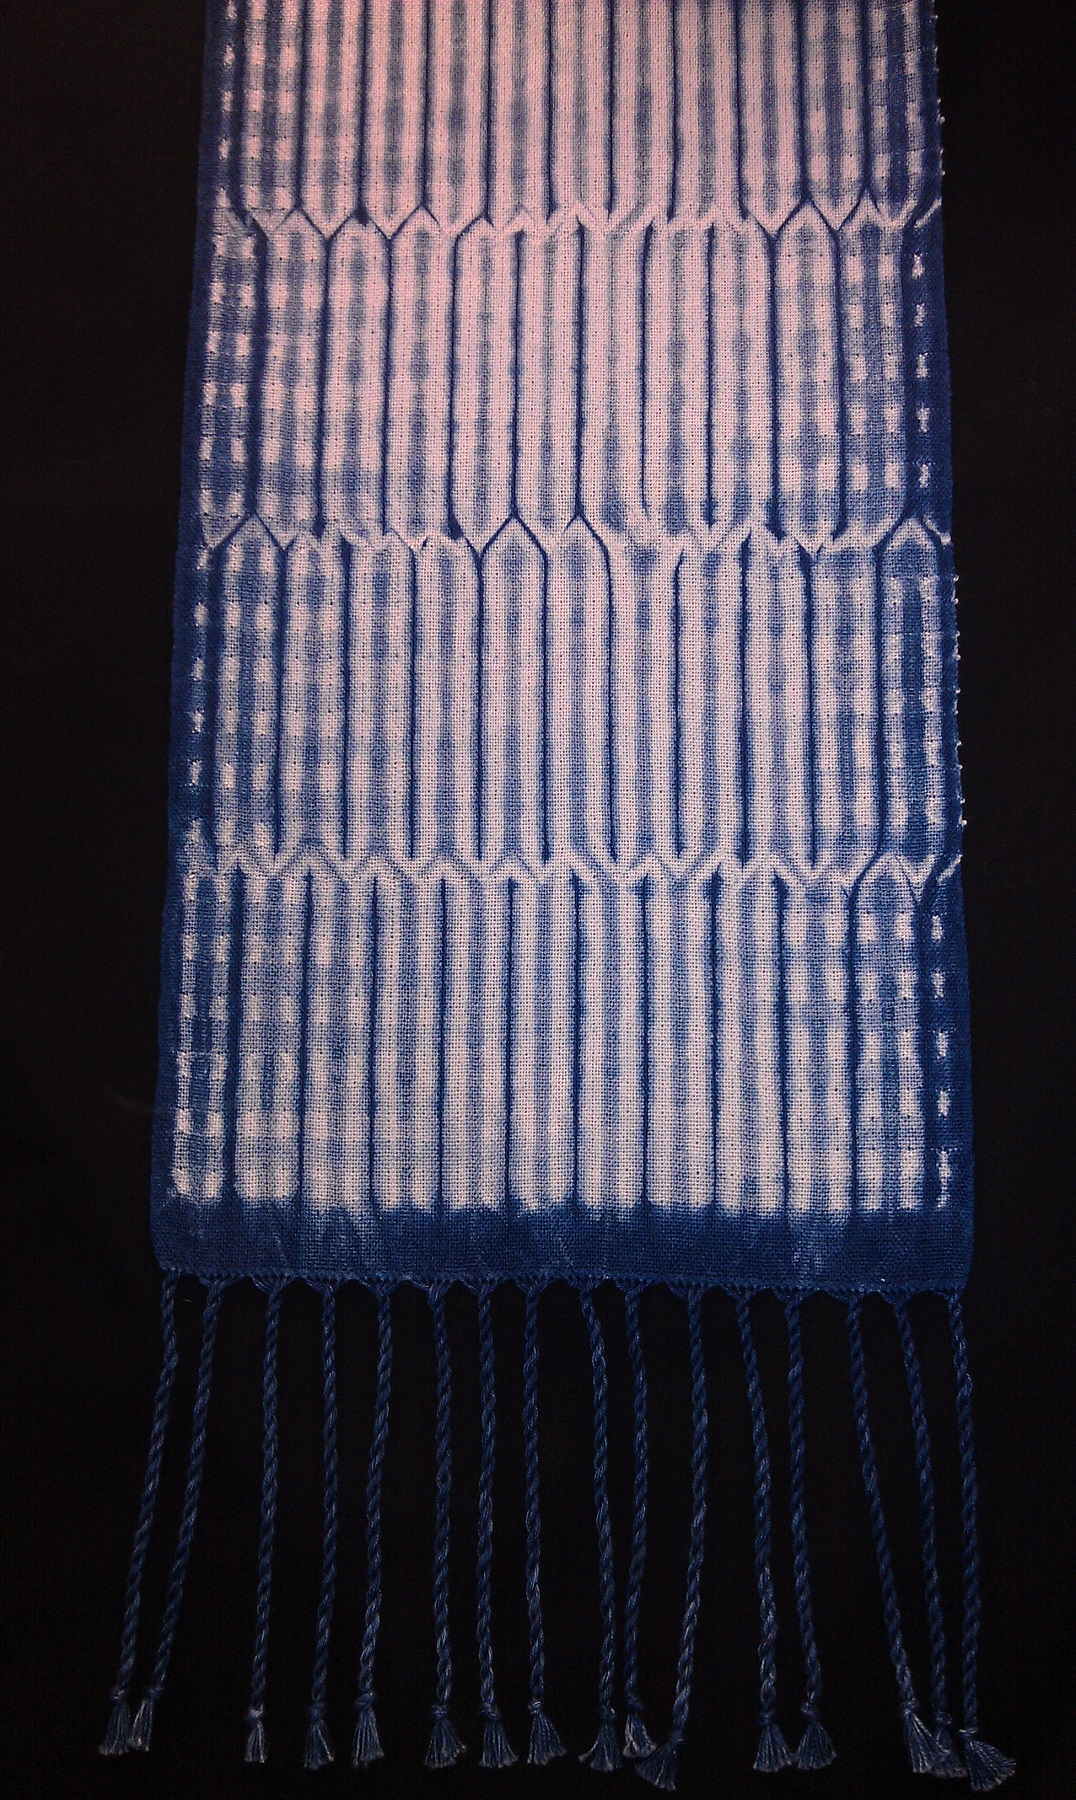
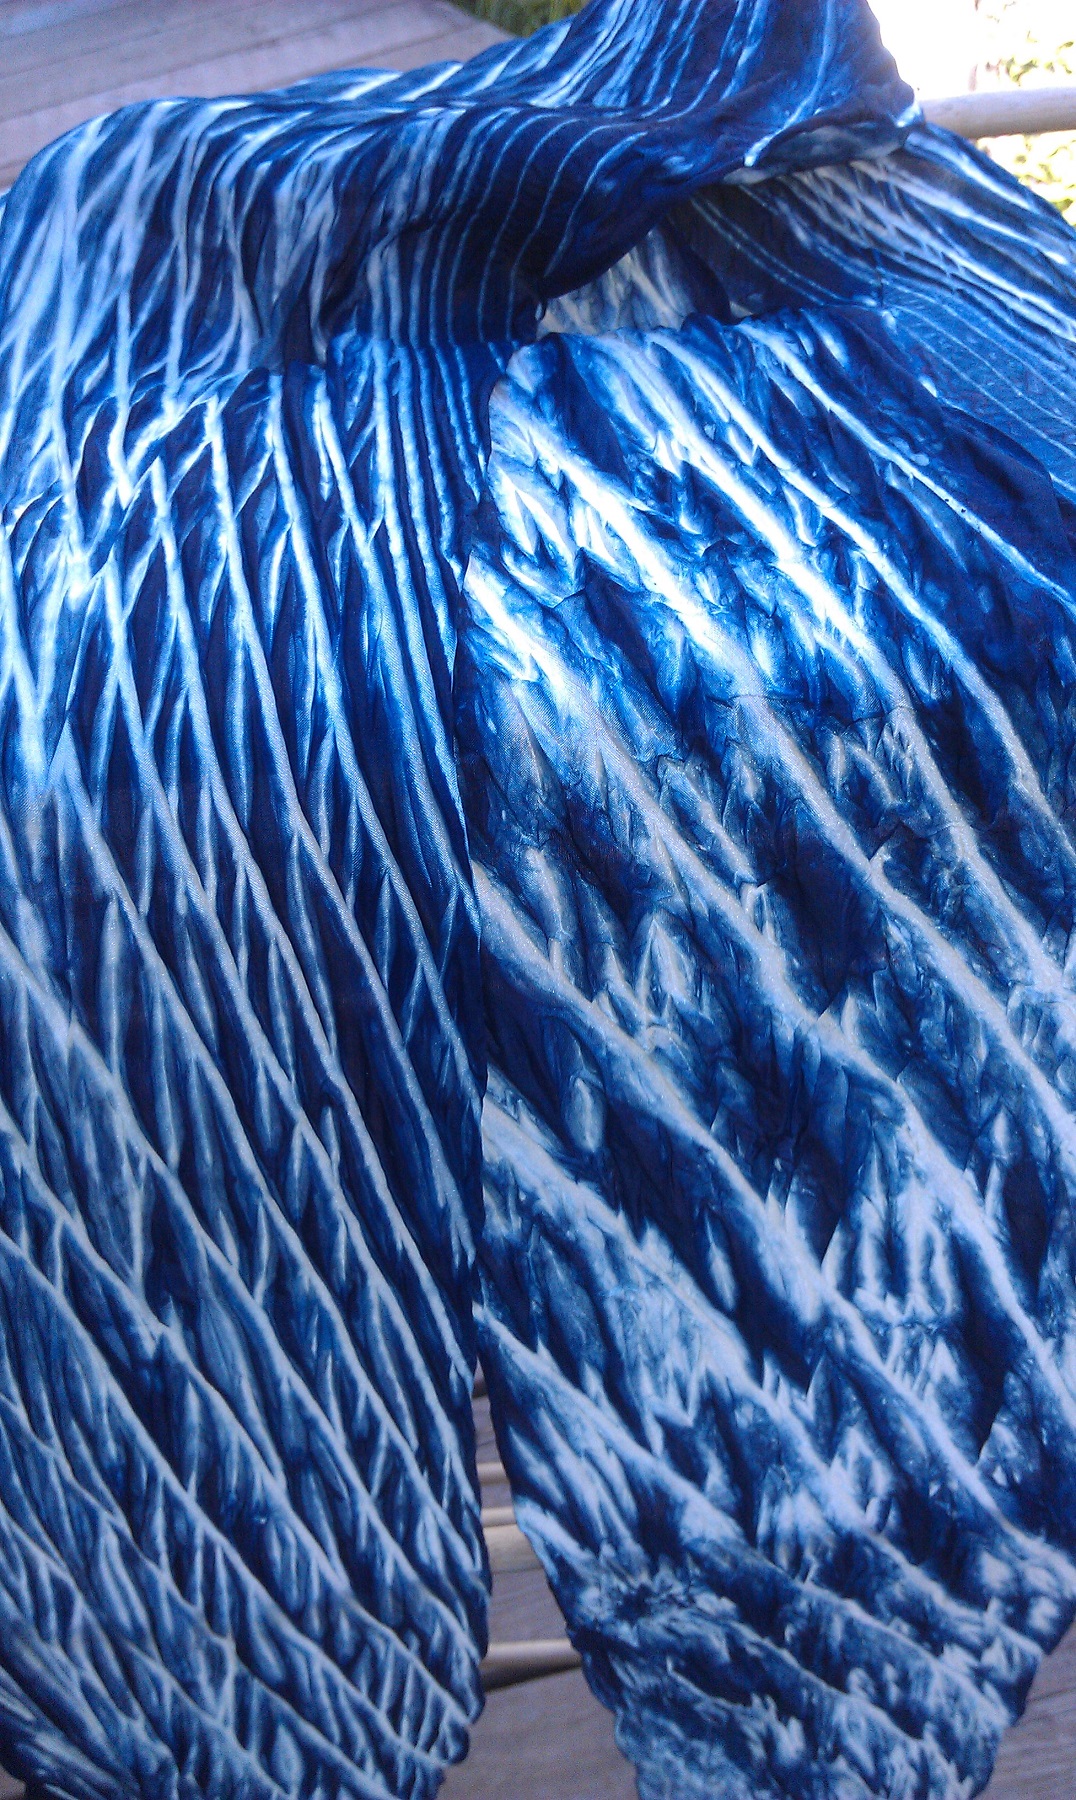
I try to get various shades of indigo, some solids, some mottled, by scrunching the fabric up in my gloved hand and immersing it once or twice, different lengths of time.  They are being used for smaller items.  When I have more specific ideas and plans, I’ll do some proper shibori.

I’m finishing  weaving a warp, hoping it is long enough for a scarf and fringe, so I can hand-stitch a design on, then indigo dye.  Hopefully I will get it completed before the cataract surgery and show it here.   If I do an overall free design instead of just on borders, it will take longer to stitch/gather/tie before dyeing.   I’d like to have a new warp on the Glimakra Standard before the surgery, too, so when I can see well enough, I can sit an weave again.  So that warp and ideas for the scarves are in the planning/sketching stage.

If you have followed my blog for three years or so, you know I have a lot of Coopworth roving that I was spinning during two Spinzilla’s. With that, I knit a cowl for myself.  About three weeks ago, I looked at a partial ball of that 2 ply yarn, wondering what I could do with it. A hat!  I’d o the same “pattern” from the cowl pattern but make a hat.  I started it, making it up as I went alone, and it was a little too small, so unraveled and started over.  Now, it might be a little too big. If that is the case, I’ll have the pleasure of knitting it twice.

Coopworth roving, spun into 2-ply, becoming a hat.

I knit until I ran out of yarn, and need to search my studio to see if there is another skein of this 2 ply.  If not, I’ll be spinning more and plying more.  Yes, there is still more roving.  It was a big, clear, trash bag filled with beautifully coiled roving.  I’ve enjoyed working with it so much that I bought a Coopworth fleece a couple weeks ago.  Lighter in color, I need to wash it to find out exactly what it will be, and the staples are 3″ to 3.5″ in length so I’ll be able to hand card it before spinning.

Three weeks or so before that, I saw a Gotland fleece on a FB raw fleece sales group, silvery gray, and ordered it.  Before it arrived, another was listed, similar in color, by the same seller, an that was ordered, too.  I’ve never washed/carded/spun/knit with Gotland before so I’m looking forward to that.  There will be photos in future blog posts.

Tape Loom Weaving book.
“Handwoven Tape” by Susan Faulkner Weaver.

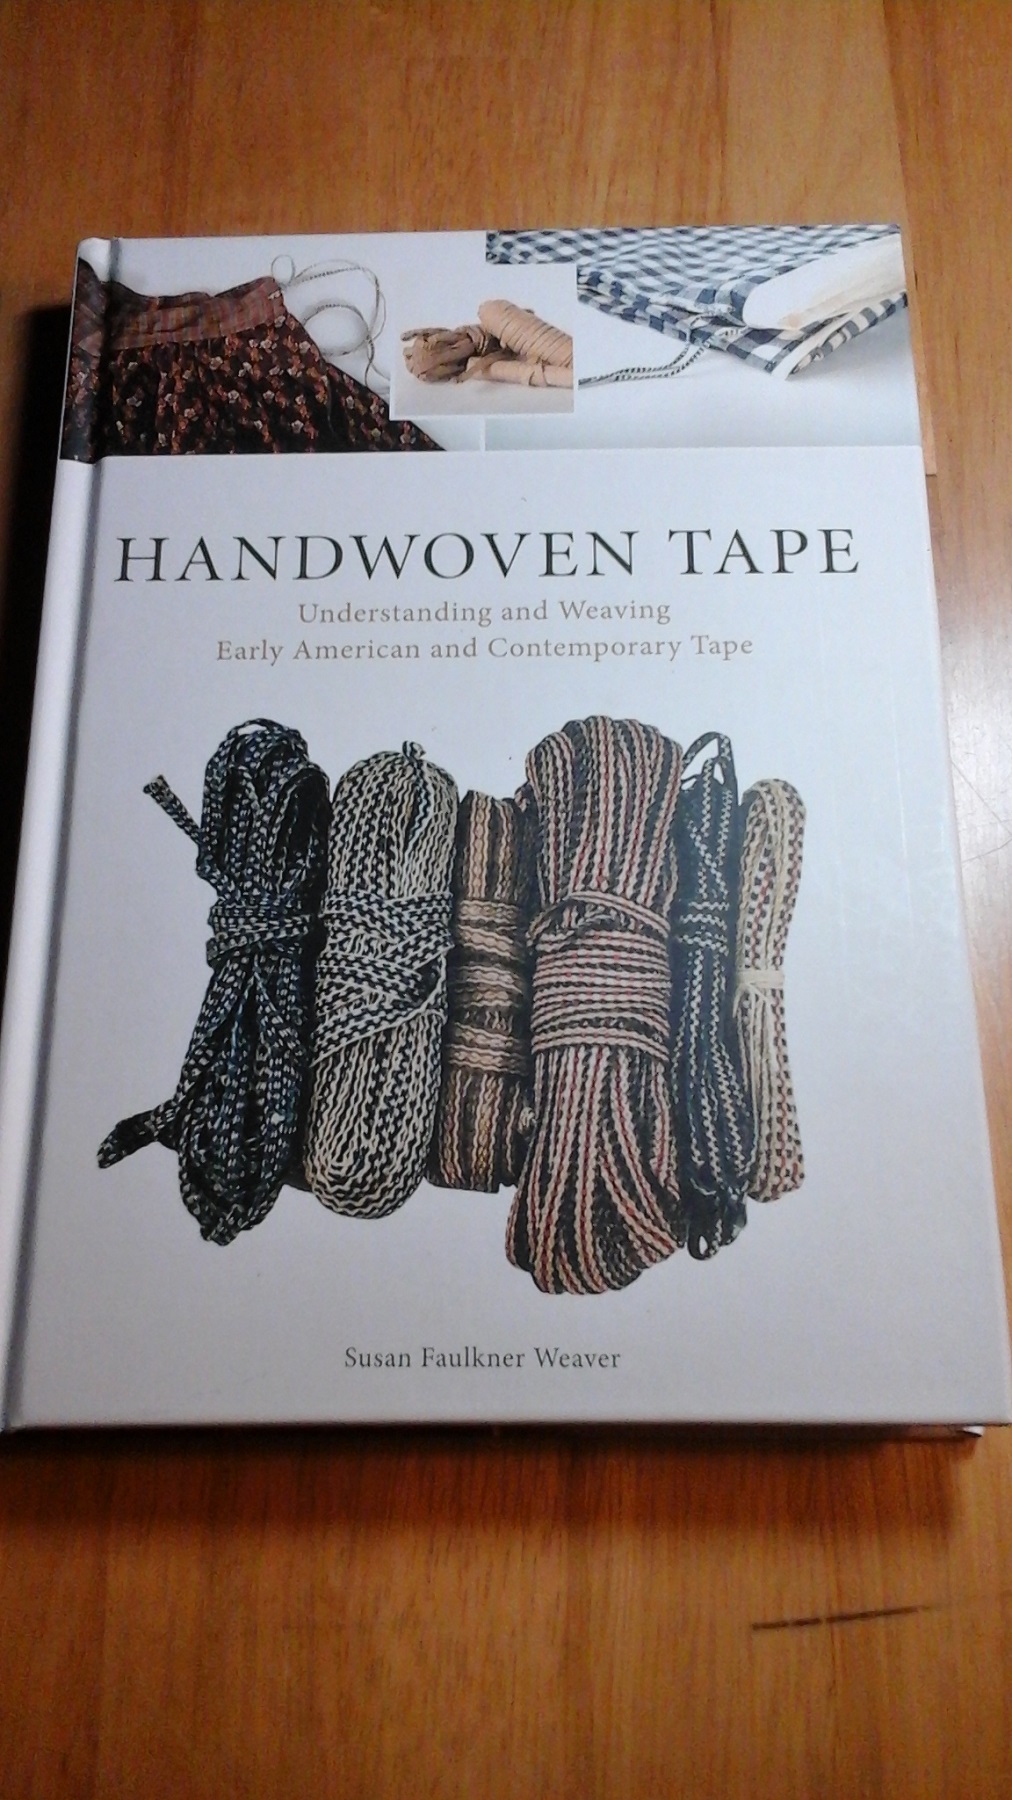
This book had been in my Amazon cart for months before publication and release near the end of December.  I wanted to learn about the history of tape looms, and because I’d bought a tape loom back in November because it was small and very portable.  It’s a lovely book, good history and photos of many different styles of tape looms, and I’m looking forward to reading it an putting it to use.

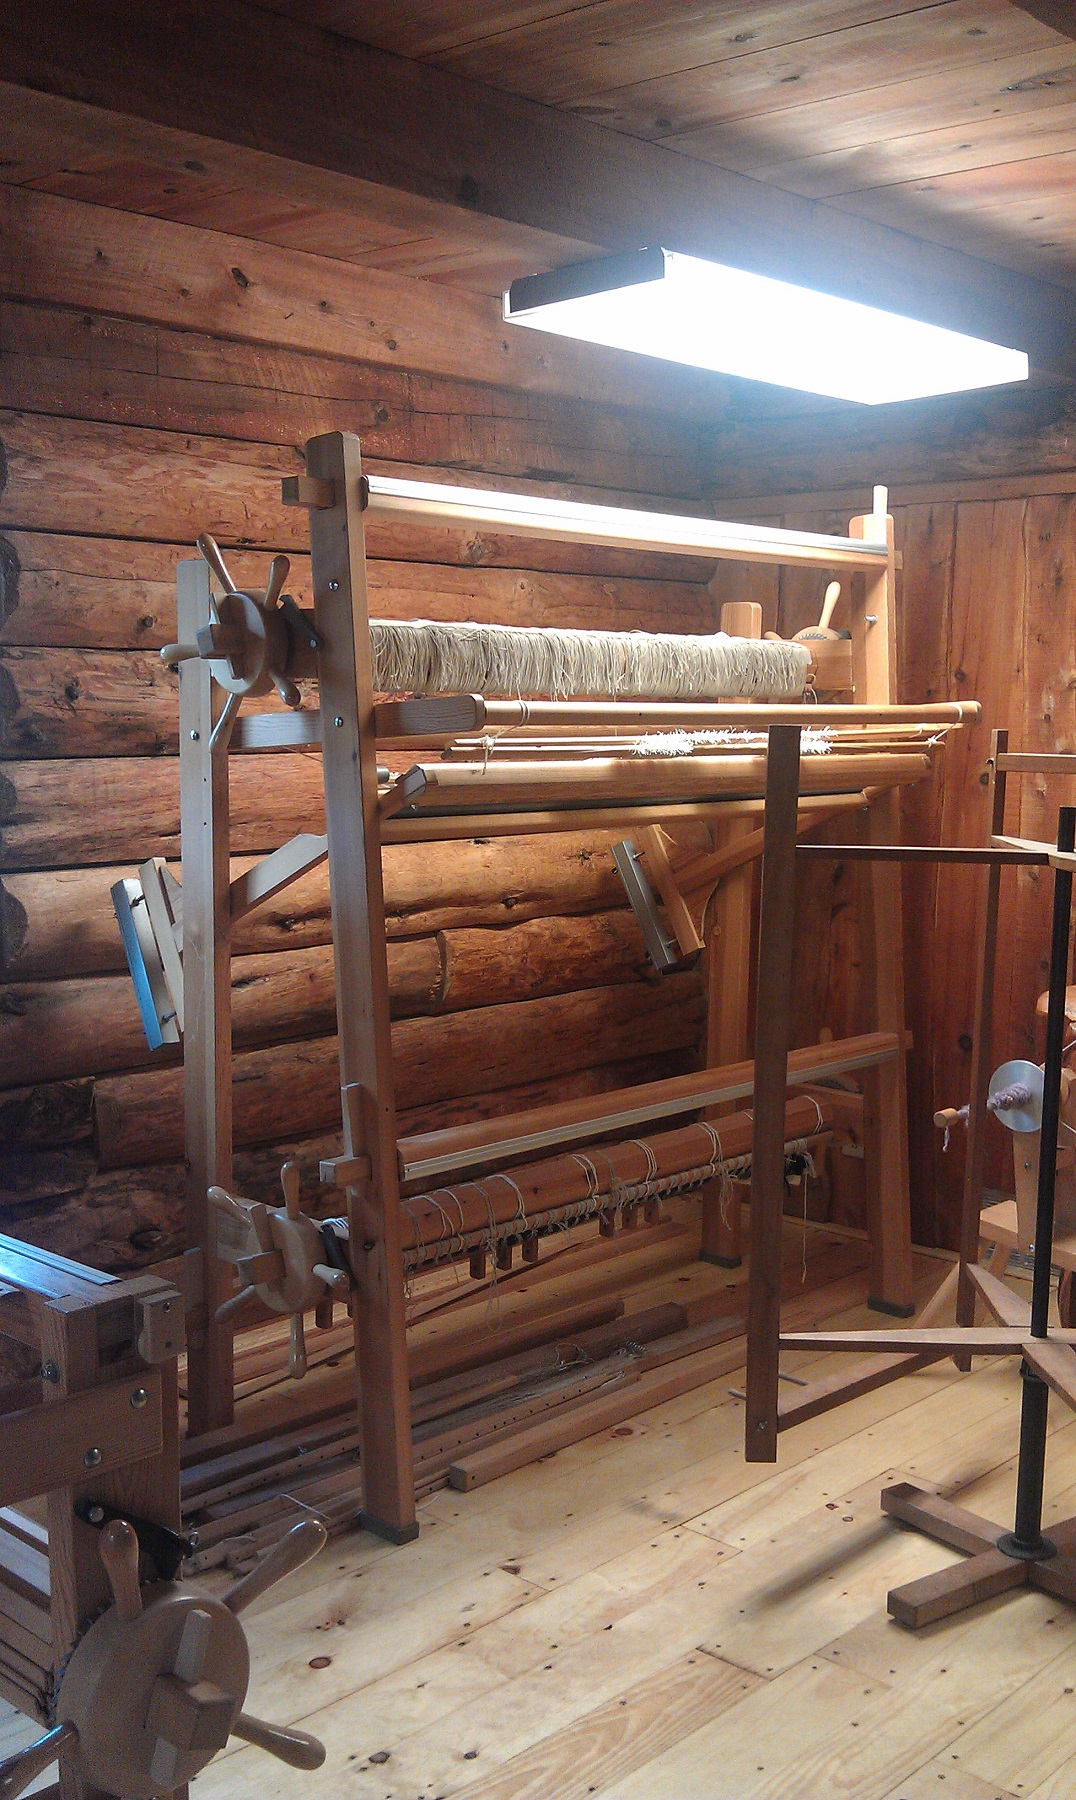
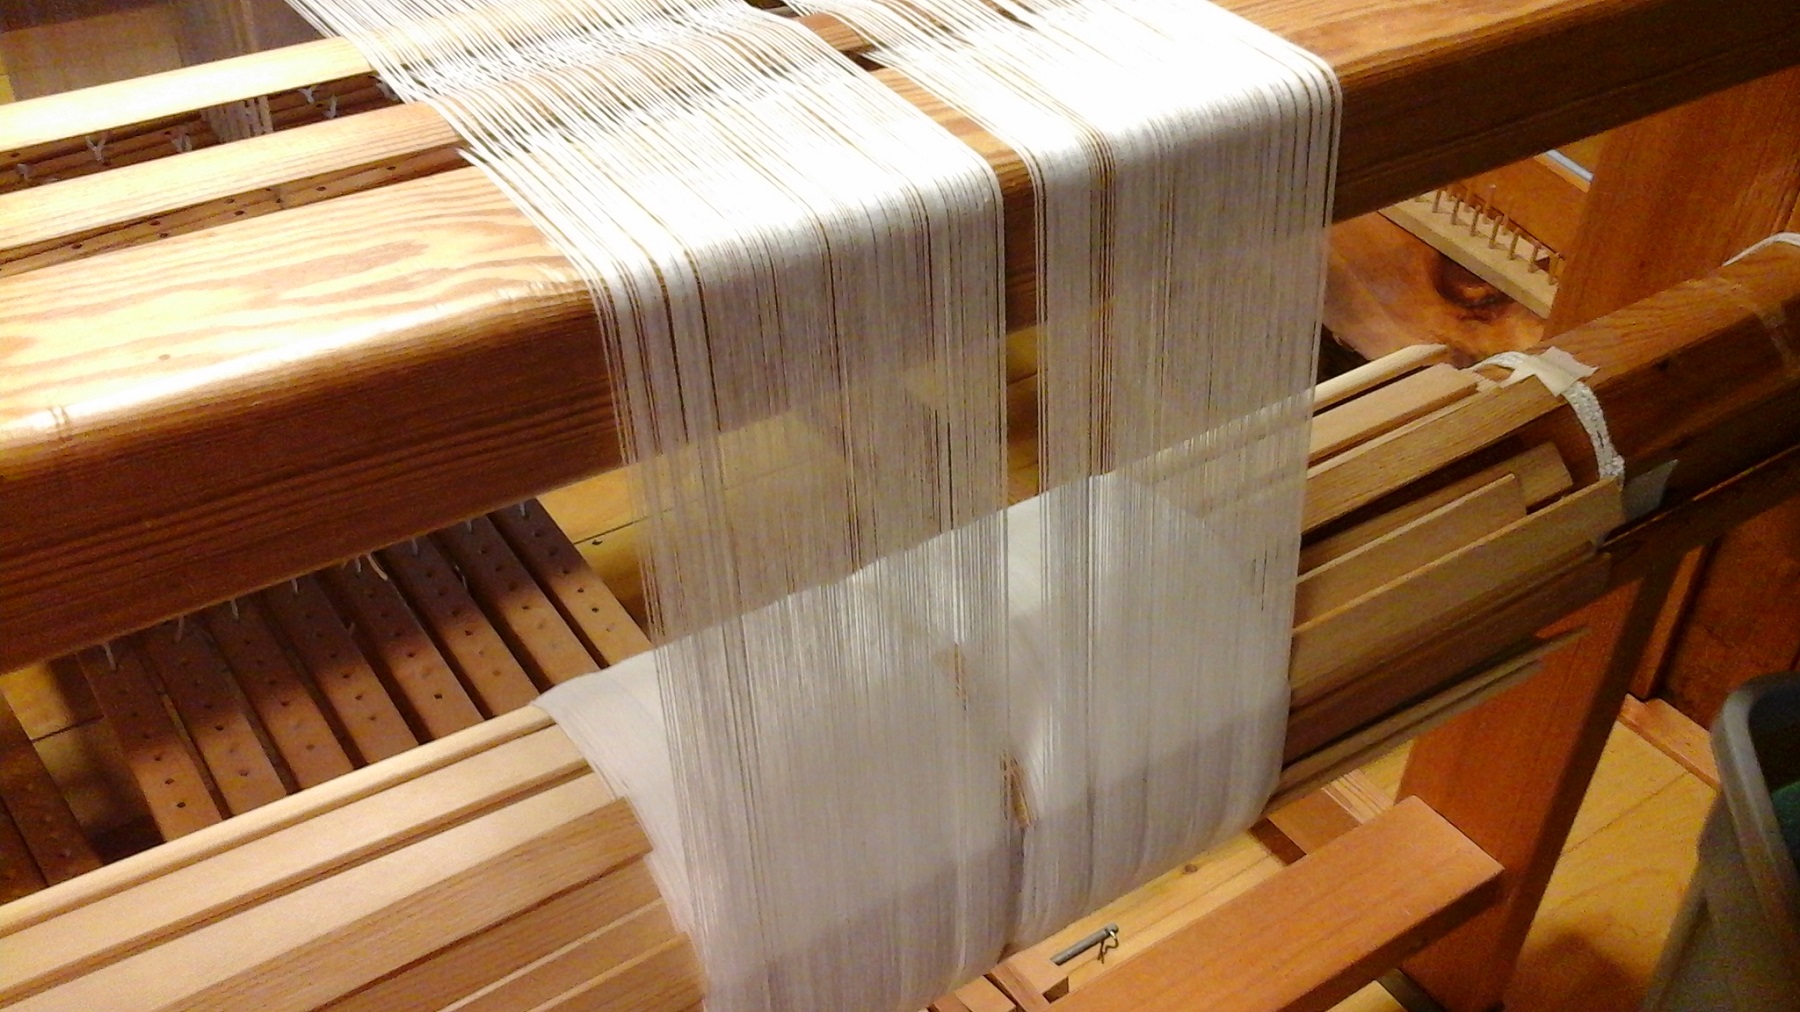
My Glimakra bandloom warp was finished about three weeks ago or so, and is in need of a new warp.  I recently added a warping trapeze to my weaving studio equipment so I will be able to warp my looms alone.  I recalled Becky Ashenden, at Vavstuga, had tied the uprights of her trapeze to the loom with handwoven bands.  I have one, now need another soon.   I know I can use clamps, or bungee cords, but prefer the idea of using handwoven bands.

Meanwhile, I am looking ahead to the weaving I want to accomplish in 2017, once I get past the cataract surgery, including a couple new (to me) directions to take my woven shibori in.  I’m very excited about the possibilities, and the learning curve!

Winter has also been keeping me busy, shoveling snow, clearing in front of my garage for doors that open out, not up, raking snow off the roof, and chopping inches of ice that has formed when it warms up.

I hope you are all doing well, wherever you are in the world, and are weaving up a storm!

Missing the Studio,… I’m Back!

Woven shibori, fresh off the loom.

Last Thursday or so, another woven shibori scarf finally came off the loom.  I also found another, in a plastic bag, which had a pattern row treadling error.   The offending thread was removed, and a new plain weave row was needle-woven in.  Thank goodness for my Ott floor lamp with magnifier!  Cataracts are making themselves known and without the magnifier, I would not have been able to see well enough to replace that row.  Both were now ready for the next step in the woven shibori process.

The start of gathering pattern threads on first long edge of scarf.

Before dyeing, the pattern threads (green threads, above in pic) were gathered along one long edge, then the loops on that edge are clipped and tied into tight knots.

Gahters made, now tying knots.
Gathers made, now tying knots.

When one side was completed the same was done along the other long edge, making sure both gathers and knots were very tight, as that is the “resist” to keep the dye from penetrating through.  This warp is 10″ wide at the reed, but when ready to dye was less than 1″ wide.

Saturday morning, a new indigo vat was mixed.  It was made with warm water, causing it to produce a great amount of “flower” which I had to continually be removing.  In the video above, made tonight, there is less flower as the temperature has gone down, both outside and inside my home/studio.  I’m stirring it twice daily and it continues to have both flower and the green color that  you want in the vat.

Air-drying (with help of fan) after indigo dye vat.
Dyed scarves and squares air-drying (with help of fan) after indigo dye vat.

After giving it time to work, I tested color with four squares of PFD cotton, followed by two woven shibori scarves.  I’m keeping those squares, setting them aside for a future, but as yet unknown, project.

Right after clipping knots on one edge, pulling pattern threads out from other side, revealing the pattern.

When the woven shibori scarves were almost completely dry, they were opened to reveal the pattern. They are about to be washed, well-rinsed, then air-dry again, followed by pressing and finishing.  I am hoping one will be a scarf with fringe, the other will be a cowl.

I had let guild members know I would be dyeing that morning, and Deb and Liz dropped by to watch the indigo dye process, and Louise (friend and guild member) was here to also indigo dye a few pieces.

There is still a bit of warp left on the loom, which I am weaving off in plain weave for pieces to hand-stitch designs on, along the lines of dragonflies, bamboo, done previously.

Meanwhile, I am deciding on the new warp,… more scarves? Less width for narrower scarves?  Or a few inches wider for a first garment?  I’ve been collecting a few patterns, and researching width needed for panels, and decisions on design, and pattern(s), in other words, threading and tie-up, need to be made.

White phlox growing near the apple tree.

Meanwhile, outside the studio, it has been a fairly rainy summer and early fall.  The phlox were better than usual this year, their beauty and fragrance take me immediately back to my childhood, and the phlox my mother had in a flowerbed.

Toadstool, early autumn.  Poisonous I was warned.
Toadstool, early autumn. Poisonous I was warned.

Another result of these rainy weeks has been more than the usual number of toadstools this year.  I posted this photo on Facebook, and at least a couple people warned me it was poisonous.  I never pick fungi of any kind, not being a fan (except for  dyeing in future), and leave them for the wildlife that can safely eat them.

Speaking of wildlife, Wild Instincts called me last Friday evening, could I pick up (and possibly catch) a seagull with a fishing lure through its beak.  Certainly, and off I went.  Before arriving, a call came to let me know the gull had been caught.  Thankfully, Mark N., rehabber, was able to quickly cut the small curved end of the lure, pull the larger part out of the beak.  The gull was only slightly underweight, and it was placed in a cage and put in a quiet space to recover and be cared for.

And where have I been since February?  I was emptying cupboards, drawers, closets, boxes, going through endless amounts of “stuff,” over 35 years worth,… giving some away, tossing quite a bit, and packing boxes.  Two family members moved out in early June so then I had the adjustment to make of living alone, again.  I am not done going through everything, summer flew by, and the year is nearing its end.  The new plan is over the winter, finish going through things, packing, finishing up work on the house, and do my best to be ready to list the house by May 1st, 2017.

With all this, very little weaving was getting done, which was expected.  I had been missing weaving and dyeing, and will be making it a priority again.  I’ve joined ArtizanMade and will also be part of the ArtizanMade Market  so I’m looking forward to a more time in the studio.

And not is it autumn!  There is a woodburning range in my kitchen, providing about 60% of my heat from mid-to-late October through mid-April, except there is no firewood ready!  I had someone here last week to cut the 8′ lengths of wood (3-4 loggers cords) for me. Now it is my turn to spend a lot of time outdoors at the log splitter, and stacking wood in racks in my garage, and then the woodshed.  A year ago, our first light snow was October 16th!  That gives me very little time to get a big job done.

I’ll be back in a day or two with photos of the finished scarves, and the tiny bit of recent progress with the Regina loom.  See you then!

Old and New Challenges

"Bamboo 2," woven shibori scarf. (Sold)
“Bamboo 2,” woven shibori scarf. (Sold)

It has been a couple weeks of challenges,… design, dyeing, time, energy, mechanical, and more.

After the circle/cowl scarves were finished and delivered to Artistree Gallery, along with the sachets, it was time to weave the custom scarf ordered by a woman in WI.  She had seen a different “bamboo” scarf during the fall art tour, and after looking at a number of scarves, decided she wanted one with a bamboo design on it.   The photo above, “Bamboo 2” was just completed and mailed this week.


A closer look at "Bamboo 2."
A closer look at “Bamboo 2.”

Weaving was begun, hemstitching, the border with a center area for the design to be hand-stitched on.  Then the center plain weave, and repeat the border.  It takes awhile to hand-stitch the design, and even longer to gather/tie all those stitched lines.  While working on this, I was also reviving the indigo vat by placing it (in a 5 gal. stainless steel pot) on the woodburning range in the kitchen to warm it up a bit, and added more indigo and Thiox, stirring it well a couple times that evening and letting it work overnight.  I’d forgotten how long, and it was a very long day and late evening, and finally ready to indigo dye the next morning.


Indigo dye vat ready to go (flower removed).


"Flower," set aside in a bowl, and returned to the vat after dyeing done.
“Flower,” set aside in a bowl, and returned to the vat after dyeing done.

The dyeing was done, three dips in the vat, and after giving it plenty of time to oxidize, it was rinsed, water squeezed out, and draped over a wood drying rack in front of a fan turned on high.  By early evening, it was dry and I sat down with scissors and my new OttLite (LED with magnifier) which has been saving my eyesight, to very carefully snip the knots and pull the pattern threads out.  Then down to wash and rinse (multiple rinses), and let it dry overnight.  In the morning the scarf was pressed and I took it to the gallery to hand-twist fringe while I spent the day working there.  Mid-afternoon a lot of sleet came down, and after the rug hooking group left, I closed up and went home to finish the fringe.  Another pressing in the morning, and the scarf was mailed to the client.


Close-up of hand-stitched design.

I received an email from her, she is VERY happy with the scarf and will be wearing it over the upcoming holidays.   Enjoy wearing it, Jill!

I took a couple days off after the intensive hours on that scarf, and the other day set up the sock machine in the afternoon.  I had the machine ready, the lights focused down on the needles, the yarn standing by, the scrap yarn threaded, was about to turn the crank to start a sock, when,… the lights went out!  The timing was incredible.  It was all put away and I took a nap.

This morning I set it all up again, knowing I had to work on an issue with the tension knob,… the last time I made socks, the last two pairs ended up too big and were returned to me this fall (local guild member).  I’d made them the same number of rows, leg and foot, as I always do for her (repeat customer).  So I need to figure out if the whole knob had somehow been turned so the old setting wasn’t going to work?  If so, I’d need to figure out where it should be set to achieve the stitch size/rows for each size (S, M, L, X-L).  I wasn’t expecting the sock machine to have every problem it had ever had plus a new one.  The machine was taken apart three times today, cleaned, greased, reassembled, new needles swapped in for any that showed a problem.  But this new problem?  When I start the heel, the yarn doesn’t knit and all the needles for 3″ or so throw the stitches off, all in the blink of an eye.  I have no clue what is causing it and I can’t do heels/toes until it is resolved.  Tonight I described it on a sock machine list in hope someone might have an idea.  I’ll be back at the sock machine in the morning,… I think we need a little time away from each other tonight.

After those sock orders are finally completed and mailed/delivered, I’ll visit my father again for a few days.  We are hoping his two fractures will be healed by Jan. 4th, and he can leave the splint off, and return to his activities.


Glimakra Regina tapestry/rug loom in the studio.

When I return home, I’ll be focusing first on the online tapestry weaving class I am participating in, taught by Rebecca Mezoff.  The next time you see a photo of this loom, my tapestry “homework” will be on it, something I am really looking forward to.  In winter, I like to stay home where it is warm and cozy, there are fewer distractions and outside deadlines, and it is a good time for me to delve into new areas of weaving or other fiber areas.

It will also be a good time to take woven shibori in new directions, and there are many ideas and plans for that.  And I’m not forgetting the Norwegian style weaving I need to get back to, including drawloom.  I have weaving to do for Shuttle Works Studio (on Big Cartel), Artistree Gallery, and for TAFA.  As part of the changes I expect to take place in 2016, I took myself off the Northwoods Art Tour, my participation in Art Gypsies and Artistree Gallery are undecided, and I am re-thinking my goals.  A couple days ago I went to one of those Facebook “game” pages where you type in your name and it gives a word for the coming year,… my word was CHANGE.  How fitting!

We are also going to be working on the house again,… kitchen cupboards and counters will be refinished, a new kitchen sink put in, and hopefully new lighting.  Upstairs, the floors will be taken up, planed, stained, and finished.  I turned 65 a few weeks ago (how did that happen!), and decided I need to simplify some areas of my life to lessen self-inflicted stress, make upcoming changes easier, and make my creative life more pleasant.

In late September I started sponsoring a 14 year old Tibetan nun through the Tibetan Nuns Project.  A couple weeks ago I began sponsoring a second Tibetan nun, this young woman is in her mid-20’s.  I am a firm believer in sharing blessings, and through TNP, these women and girls have safe housing, food, clothes, and are getting an education in an area of the world where very few females are provided that.  I am happy to give up a few extras each month to make this commitment to them and TNP, and I’m hoping we will be able to exchange an occasional letter.  For now, their photos and information hang on a bulletin board in my studio, where I see them daily.  They are a good reminder to be thankful for what I have, to give, and to stay focused on what is important in life.

There is much to look forward to in 2016!

New “Dye Studio”

When I first began indigo dyeing three years ago, I set up a 6′ table out on the lakeside porch.  It worked well, until a porcupine and a black bear started visiting.

At that point, the table, indigo vat, and supplies were moved to a workbench and vintage metal cupboard in the garage.  That didn’t work quite so well as Char had her woodworking shop in the garage. Things were usually covered with fine (saw)dust.  And though the garage gets a bit of heat in winter, subzero temps made it too cold to work out there.  So, when I needed to dye with the indigo, I’d bring it in to the kitchen near the wood burning range, about 24 hours in advance of dyeing, so things could warm up.

Newly refinished pine floor boards.

A few months ago, the idea of my using part of the entry/laundry room for a dye area, year around.  So a few days before the summer 2015 Northwoods Art Tour, Char finished the remainder of the floor and trim (above).

Also discussed were wood shelves and a movable table, but the good possibility of putting my home up for sale put those ideas on hold.

Tables, indigo vat, and supplies now inside!

Instead, I added my 6′ well-used banquet-type table to the room, joining the oak mission table we use (shown above with sewing machine).  The washer and dryer are just visible on the right; a single utility sink is next to the washer, and next to that, a storage closet. Chemicals, etc., will be kept in 2 cupboards above the dryer.  And, a light was added over the 6′ table.

First indigo vat in new-to-me dye area.

Is it my dream dye studio?  No!  But it is working fine for this weaver/indigo dyer.  For now.  I am thankful to have this space!  I put it to use a couple days before the art tour, dyeing four new scarves. One even sold, unfinished, during the art tour!  (Fringe was hand-twisted, the scarf was pressed, and mailed.)

New 15 yard warp of 16/2 cotton.
Threading the new 16/2 cotton warp.

About the same time all this was going on, a new 15 yard warp was made, beamed, and threaded, so I’ve be able to demonstrate and explain the woven shibori process to visitors.

As I write this and the next couple posts, I’m visiting my dad who just celebrated his 88th birthday two days ago.  I’m enjoying time with family, and also looking forward to getting back to my loom and weaving!

Before leaving home, I did finish the new scarves, managed to snap a few photos, and they were delivered to Artistree Gallery.   Photos will be in an upcoming post, so please check back!

Three Scarves, One Threading

Knots cut on along one selvedge, opening the pleats.

Knots cut on along one selvedge, opening the pleats.

Opening the pleats to get a first glimpse of each scarf is always exciting.  This was the vertical stripe scarf.

Vertical stripes scarf.
Vertical stripes scarf detail.
Dragonflies border scarf, in rinse water.
Dragonflies border scarf.
Dragonflies border detail.
Dragonflies close-up.
Half-tone scarf.
Half-tone scarf.
Half-tones detail, light & dark.

Three very different looking scarves, all from the same warp and threading,… and a couple more to come before a new warp.

Art Gypsy show.
Art Gypsy show.

June 13th was our Art Gypsy show.  I invested in a new tent, tables, tablecloths, and took my wood sign with. Since it rained most of the day, the woven shibori screen spent the day under plastic.

Variations on a theme from a previous warp.
Promotional materials.

Space on a table for a mirror (for trying on scarves), guest book, business cards, along with Northwoods Art Tour, Artistree Gallery, and Shuttle Works Studio brochures.  The columbine plant added a nice touch of color.

Enjoying my grandson's 1st Birthday party!
Enjoying my grandson’s 1st Birthday party!

December 2014

Most of December was spent cranking socks, successfully getting all but two pairs done and either mailed or delivered before Christmas.  I estimate between those socks, the ones tossed, and those sitting on a counter that have small issues where I won’t sell them, I made somewhere around 140 socks in November & December, a record for me!

In the midst of the sock machine problems (see the previous post), I had an email requesting a woven shibori scarf.  I had developed severe pain in my right wrist and hand from all the cranking, In December, and had to stop working on socks for four days, but by day 3 figured I could last on the warp, tie up the treadles, and see if I could weave without causing additional pain.  I could!  So I spent two days weaving the scarf, and doing the gather/tie preparation, and making up a new indigo vat.

New indigo dye vat, working in my kitchen near the woodburning range.

The vat was ready quickly, lots of good “flower,” and the dyeing went smoothly, putting the scarf into the vat twice.  It was then rinsed and allowed to air-dry.  When nearly dry I started clipping the tight knots and opening it up.

Woven Shibori scarf, 100% cotton, indigo dyed.  (SOLD)
Woven Shibori scarf, 100% cotton, indigo dyed. (SOLD)

It was a beauty!!!  After washing it twice, rinsing well, air-dry, pressing, hand-twisting the fringe, and taking a few photos, I had to package it up and get it in the mail to hopefully arrive before Dec. 24th.

Woven Shibori scarf detail.  (SOLD)
Woven Shibori scarf detail. (SOLD)
Woven Shibori Scarf, SOLD.

Starting Christmas Day, I took five days off for family and rest. Now, it’s time to get back into the studio and create more.


Indigo and Shibori Workshop

Deb Ketchum-Jircik and Mary Hark, at Circle of Life Studio.

Last weekend I was at a basic indigo and shibori workshop. Taught by Mary Hark, a professor in design studies at UW-Madison, WI, she is also a paper artist and proprietor of Hark! Handmade Paper Studio, also in Madison (http://maryhark.com). The workshop was held at Debra Ketchum-Jircik’s Circle of Life Studio outside Eagle River, WI (http://circleoflifestudio.com).

Mary Hark (foreground) and artist Louise Engelbrecht (background).

There were five people participating in the workshop including Louise Engelbrecht, artist/painter/weaver; her friend Eugenie, a felter; Ann, a batik artist; Tim, a new UW-Stevens Point graduate and paper maker; and myself (weaver).

Deb and Tim.
Deb and Tim.
Indigo vat with arashi shibori.
L to R, Eugenie, Ann, Deb. and Louise.
My samples drying at the fence.
Arashi shibori silk scarf.
Linen, that was folded and clamped between pieces of wood.
Cotton that was folded and clamped with pinch clamps.
Examples of shibori, many from Ghana.


Mary Hark shared with us about her travels and living in Ghana and her work there.  The photo above and the next two are examples of shibori she brought with her most (or all) from Ghana.

Shibori from Ghana.
Shibori from Ghana.
More shibori from Ghana.

The workshop ended with a powerpoint presentation of Mary Hark’s experiences in Ghana as well as her beautiful handmade paper art.  She may return next summer for another workshop.

The weather cooperated on Saturday and we had a beautiful day to work outside, exploring a few basic forms of shibori and indigo dyeing.  A nice workshop and a wonderful group of artists!

Autumn Begins

Yesterday was the Autumn Equinox, and the beautiful northwoods of WI now has beautiful color.

Just down the road, on a sunny day.
Great color against the pines.


Woven shibori on the loom.

Meanwhile, I continue with woven shibori scarves since all but one were sold during the art tour.

The end of the warp was finally in sight!

It’s always good to see the number of warping sticks go down!

Warp completed, weaving off the loom.

I was hoping for three scarves and another long piece that would, after dyeing, be cut up and used for smaller items.  Unfortunately one of the scarves had a one row treadling error which I did not notice until after dyeing.  Happily, my daughter wants it and does not mind.

Time to gather and tie.

The next part of the process is to gather and tie, as tightly as possible, the “pattern threads” which are removed after dyeing.

Drying outside.
Drying outside.

The pieces were left to dry outdoors for a few hours, then brought inside.  They are not opened until dry, or nearly dry if I cannot wait to see the results.

Crinkly when first opened.

Due to the tight gathers, when first opened the scarves are quite crinkly, reminding me of collapse weave.  However, the scarves must be washed and well rinsed to remove any dye not attached.

Finishing begins.
Finishing begins.

Scarves are hand-washed in a mild soap, then repeatedly rinsed until the water is clear.  After air-drying they are pressed and fringe is hand-twisted.  The results are,…

Beautiful, one-of-a-kind woven shibori scarves.
Unique!
Unique!

The goal is for each scarf to be unique.  One more warp and it will be time to explore new ideas.

Always Magical

Woven shibori, with pattern threads in teal.

At last, I was nearing the end of this warp, threaded as an advancing twill on 8 shafts and using 8/4 teal rug warp for the pattern threads, and 16/2 Bockens cotton for the plain weave.  On these pieces, I was treadling in random order, and varying the number of plain weave rows.

The last of this warp, just removed from the loom.

The last of this warp consisted of two scarves, one sample, and a length that would be cut into four pieces and will be made into smaller items.

Soaking in water prior to indigo dyeing.

Later the next afternoon, I set up in the garage for indigo dyeing, setting the now gathered and tied pieces to soak in water while mixing up a new indigo vat.  I then measured indigo out into two more smaller buckets for “diluted” dyebaths for achieve a medium and bit lighter shades of indigo.

New indigo vat with "flower' forming on the surface.
New indigo vat with “flower’ forming on the surface.

The new indigo vat worked well, forming the “flower” on the surface, and after skimming it off (and setting it aside, to return to that vat when finished), the dyebath was the greenish color it needed to be.

A sample changing from greenish/blue to indigo blue when exposed to the air.

It is still magical, watching the wovens change from a green/blue to the beautiful shades of indigo blue.

Designs in one section of the long length of fabric.

After the wovens have been exposed to air and turned indigo, I give them a good rinse in a bucket of water, squeeze the water out, and hang them on a wood rack to begin drying.  When they are dripping, I move the rack into the house and turn a box fan on to encourage them to dry a bit faster.  Why?  Because I am a bit impatient to snip the knots along one selvedge, begin easing the gathers out, and pull the pattern threads out the other side so I can see the designs achieved from that particular threading and treadling.  Keep notes!

Detail of a shorter piece.

I then take and wash them, by hand, one-at-a-time, in Seventh Generation soap, and then rinse repeatedly until the water is clear. They are placed in a lingerie bag and run through a spin only cycle to remove excess water, and again, hung on a wood rack to dry. Before they are totally dry, I press them with a steam iron, hang to dry, then press again, and again, hang to dry.

Three of four pieces cut from the long length of fabric.
Two of four pieces cut from the long length of fabric, on the left, and a sample, on the right (dyed slightly darker).

I have two scarves left to finish, both needing twisted fringe.  Though it is early April, we have a snowstorm due tomorrow evening and overnight, a good time for that project.

Now, it’s time to decide on the length of the next warp, do my calculations, move the warping mill out, and get it made.  I’m thinking this time it will have the “pattern threads” run warp-wise.

Indigo dyer extraordinaire, Glennis Dolce (Shibori Girl) had shared a sample of warp-wise indigo dyed fabric with me, perhaps a year ago when I first started this learning adventure, and asked when I would warp up my loom for it.  I believe the time has come!  I will be using 16/2 cotton again, not as fine as the sample she sent me, which was likely machine woven, but should be another good learning warp, and if it turns out I must send a sample to Glennis.