All posts by janicezindel

Weaving Journey and Small Related Detours

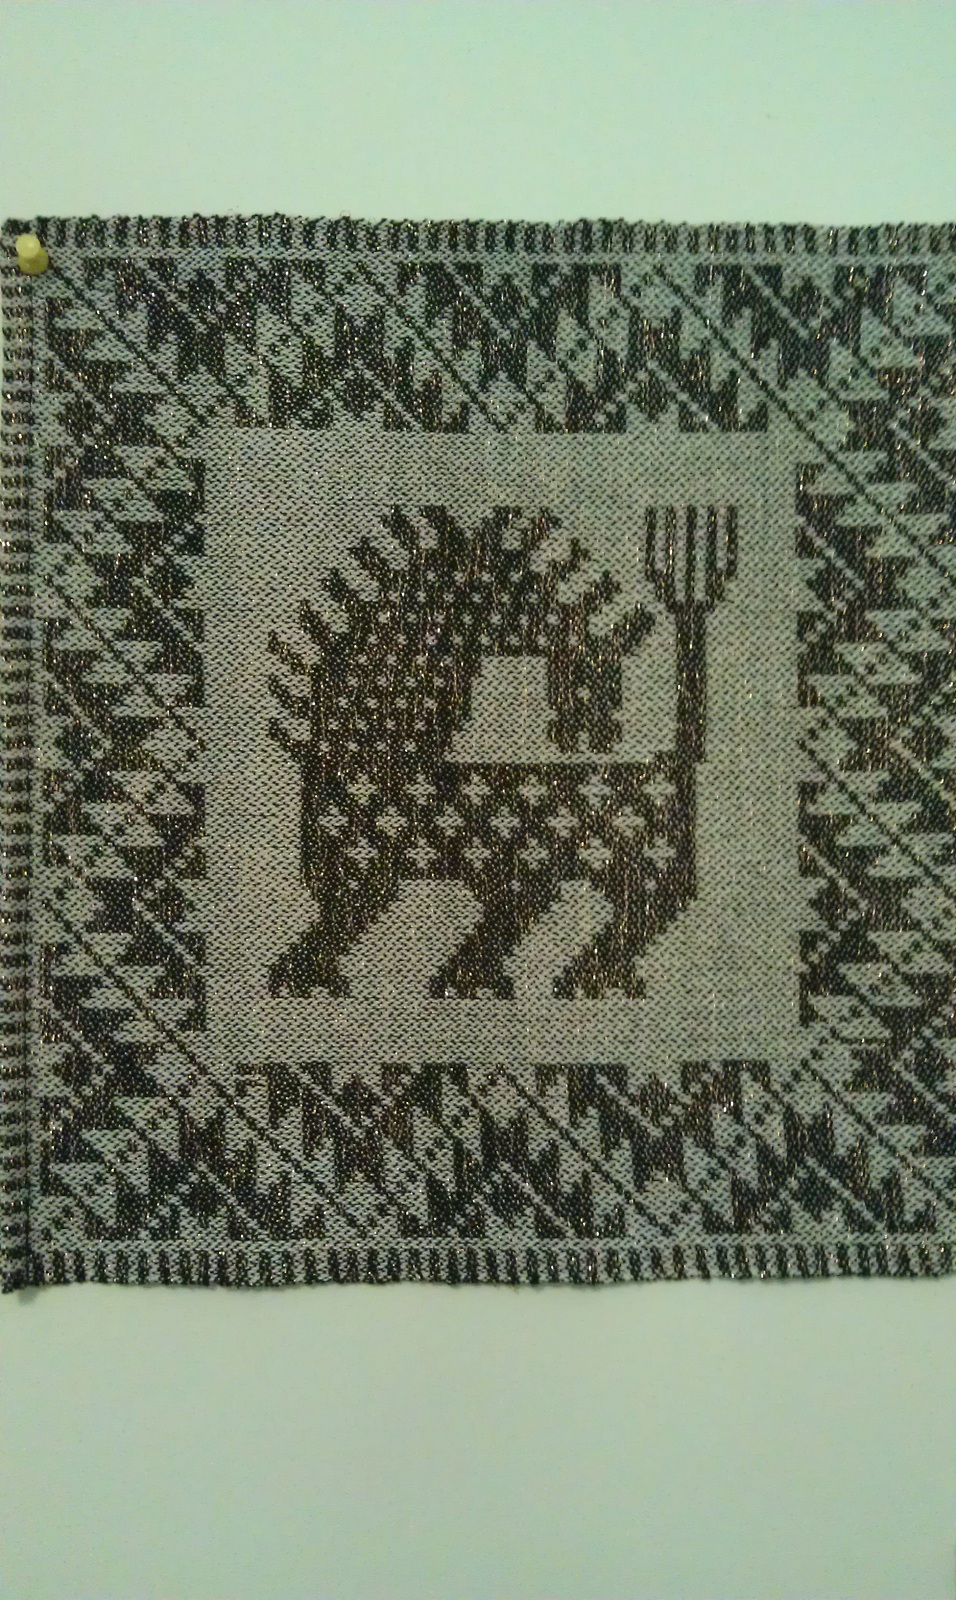
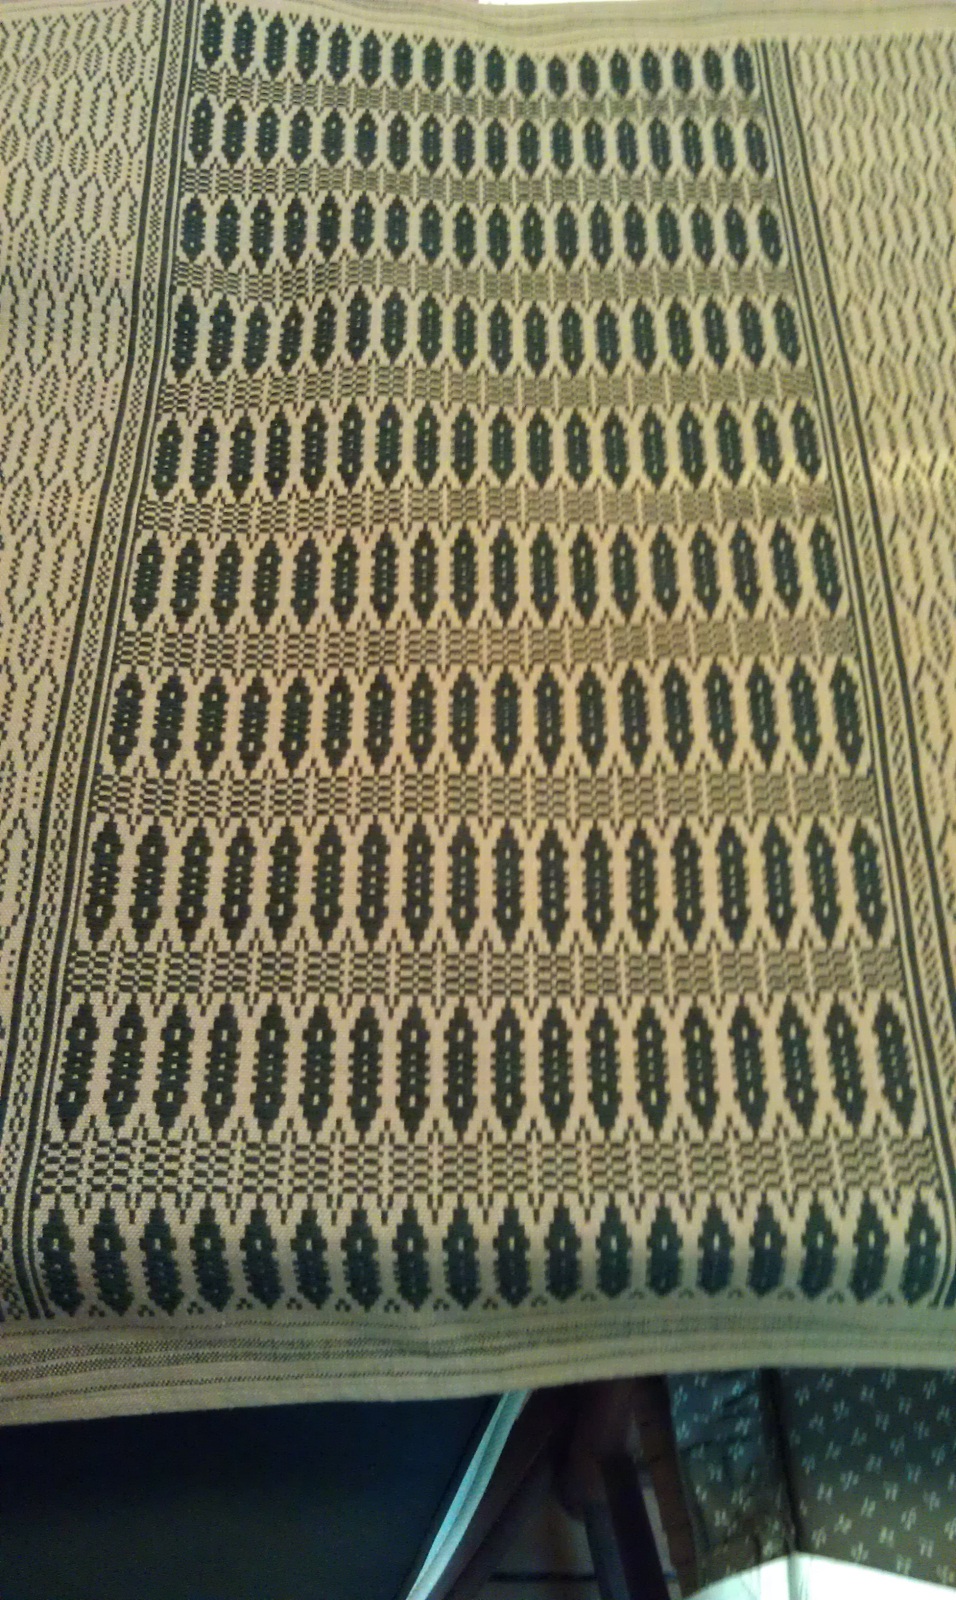
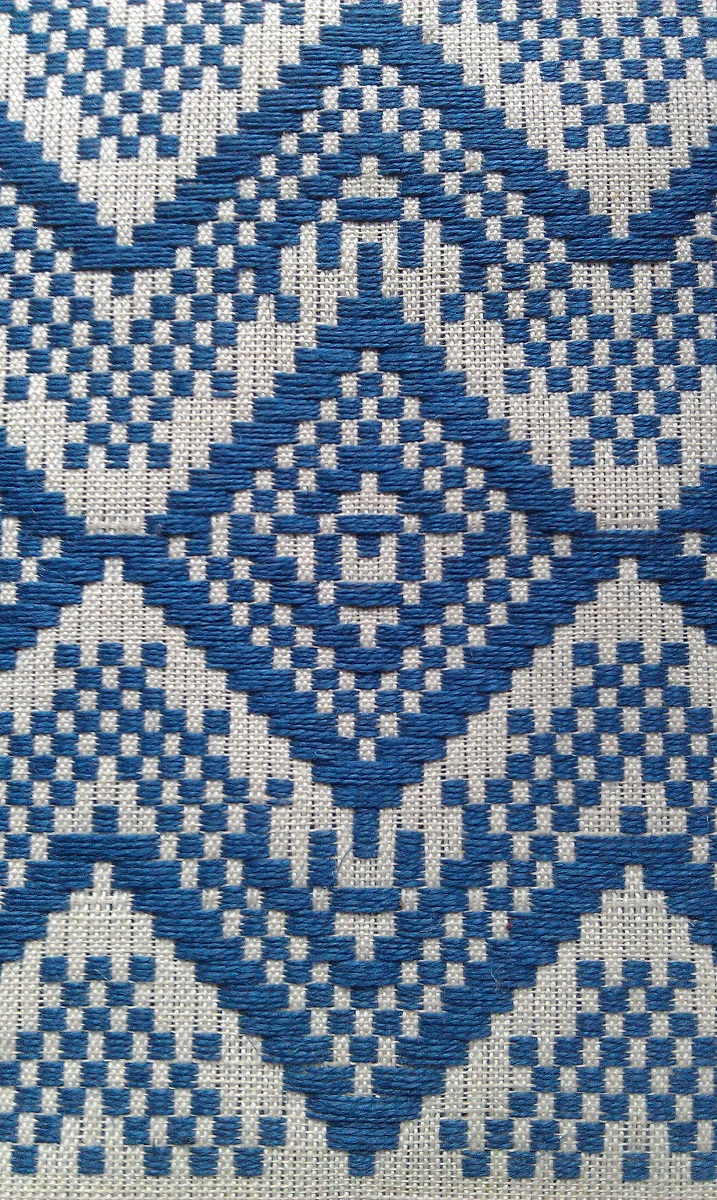
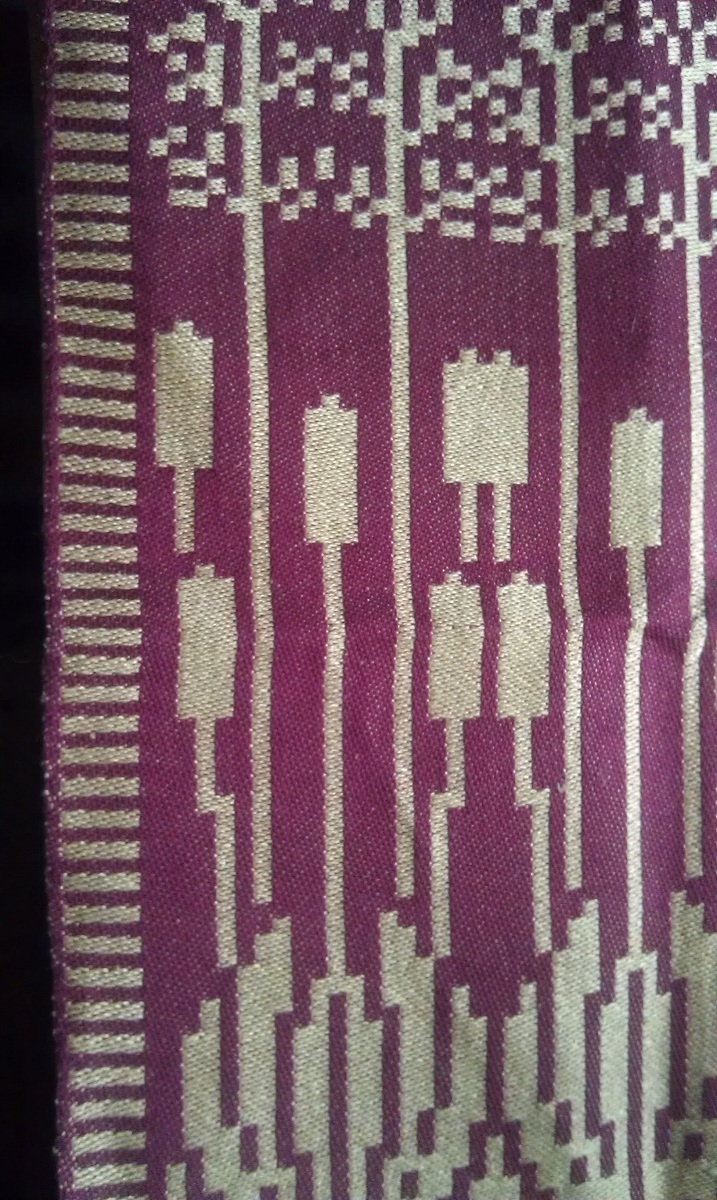
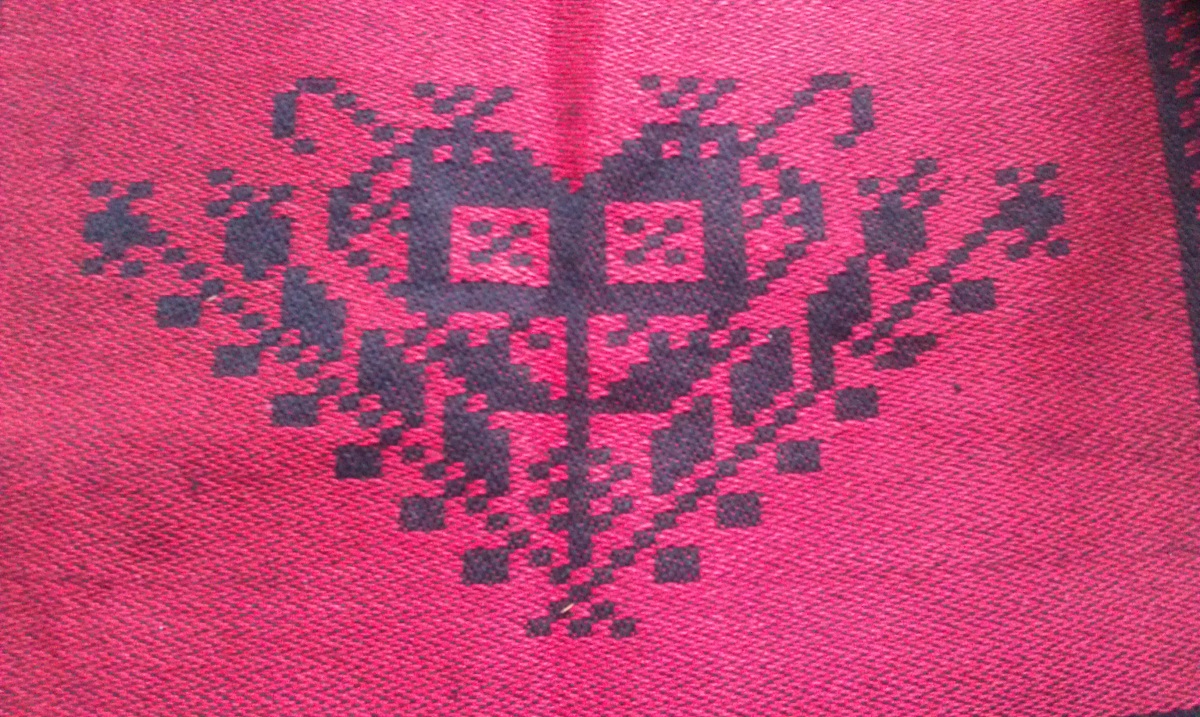
“Skinnfeller” by Britt Solheim


I had written awhile back that I would like to weave a Norwegian coverlet, likely a small Christening size to start with, and one that would have sheepskin on the other side.  But how to do that?  About a year ago I posed that question on ScanWeave, and was told of a book that had been available at Vesterheim Norwegian-American Museum.  I contacted them and was told they were out, and trying to get more.  In February I received an email and a phone call from them, the book had been reprinted and they had obtained copies, did I still want one?  Yes!  The book is very pricey, and written in Norwegian, but I wasn’t going to let that stop me.

So “Skinnfeller du kan lage selv” (Leather Traps You Can Make Yourself) by Britt Solheim.  The book seems to be about a type of bedcover that is tanned sheepskin that is also sewn with techniques that give flat seams, with designs printed on the tanned hide, not the woven type with sheepskin on the underside.  But since it is the sewing part I am interested in learning about, and the pleasant surprise that this type of cover would be a fascinating project, I am still happy with the purchase.  To that end, I have just started translating the book (for myself) using Google Translate, a dictionary, and two Facebook Friends in Norway who have offered to help me if translation doesn’t make sense or needs refining. 

If you Google “www.skinnfell.no/, then click on Translate Page, the website will come up in English.  Then, on the left, click on “Skinnfell blogg” and the blog will come up in English.  Enjoy!  (Added to the post Friday evening.)

And now while typing this, I just arranged to get another book, same or similar topic, that will be in Swedish. The newest VAV Magasine had an article, “Kalder Sheepskin,” pp. 36-37, and notes about a book “Lammskinn.” I had emailed the address given at the end of the article, twice, but no reply. When I mentioned that to one of the Norwegian FB Friends, she offered to order the book and have it sent to me.  So now I am looking forward to seeing that book, also, and then translating it as well. Never a dull moment!  I will post more about this book after it arrives.

Meanwhile, I am working on my woven shibori samples, and definitely need to pick up the pace.   And, a dye area still needs to be set up. My first deadline, May 1, is coming up fast, when Amy needs photos of the new work so our postcards can be printed and mailed out for our Aug. 10th Art Gypsy art show in Land O’ Lakes, WI. 


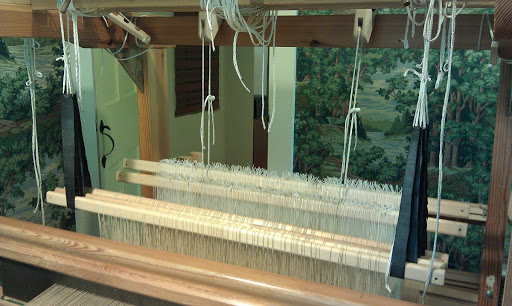
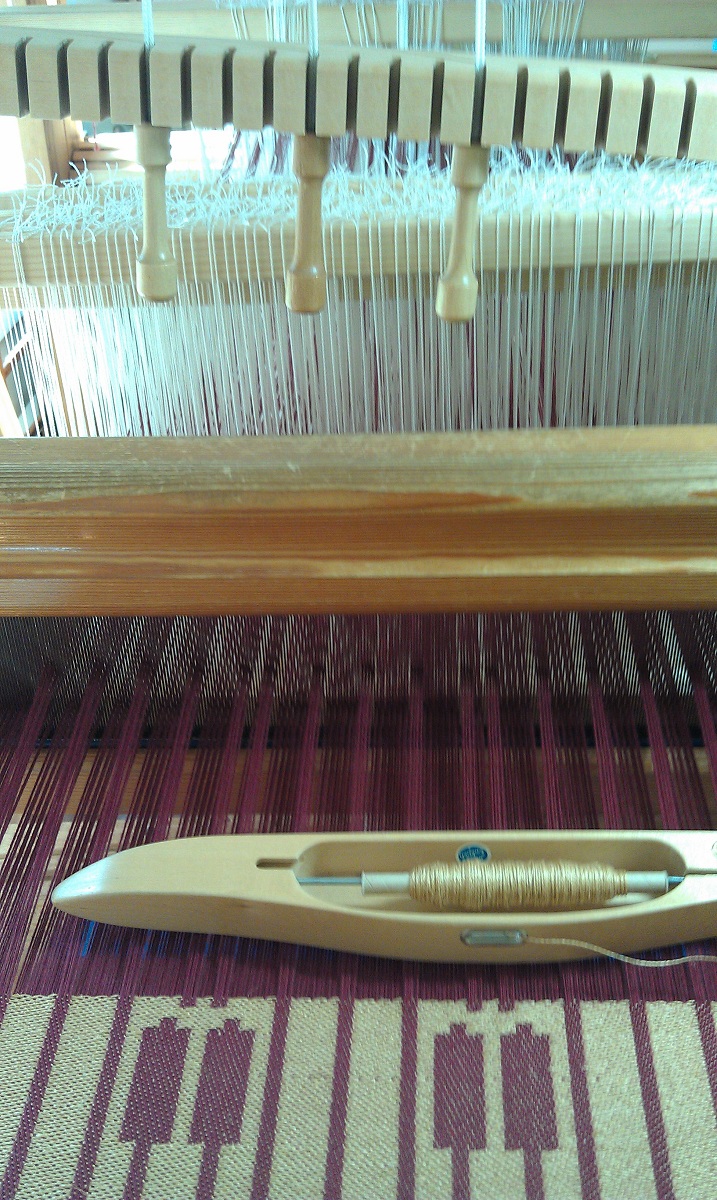
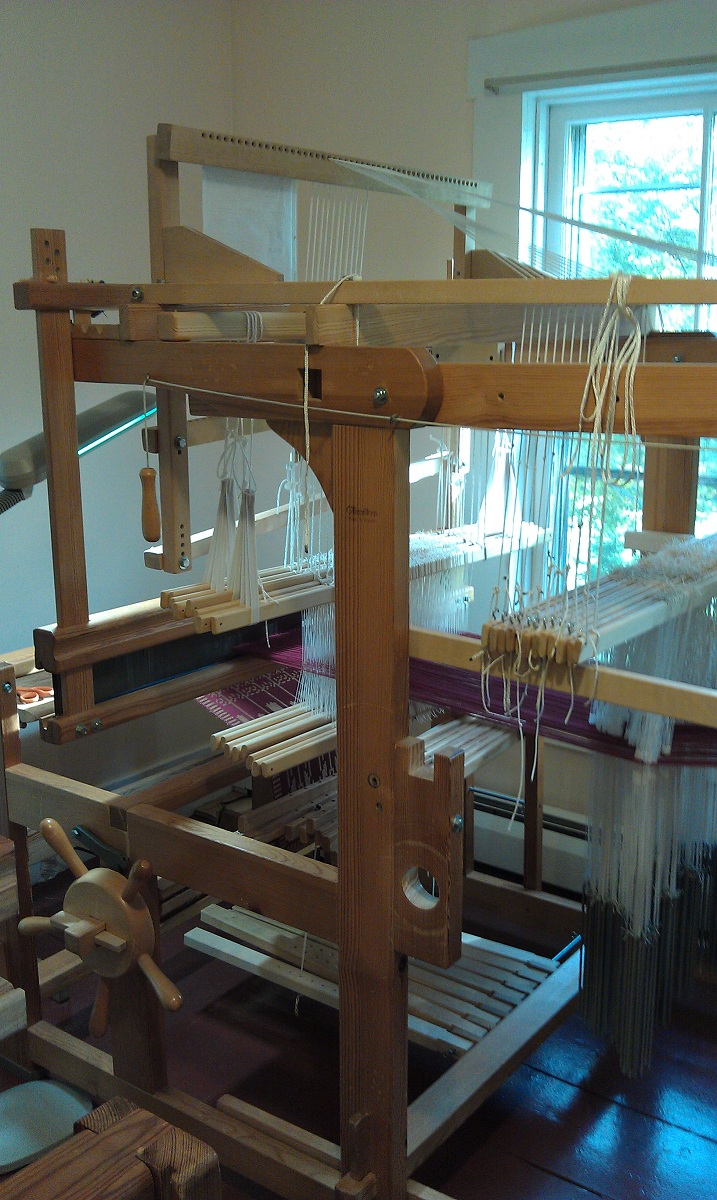
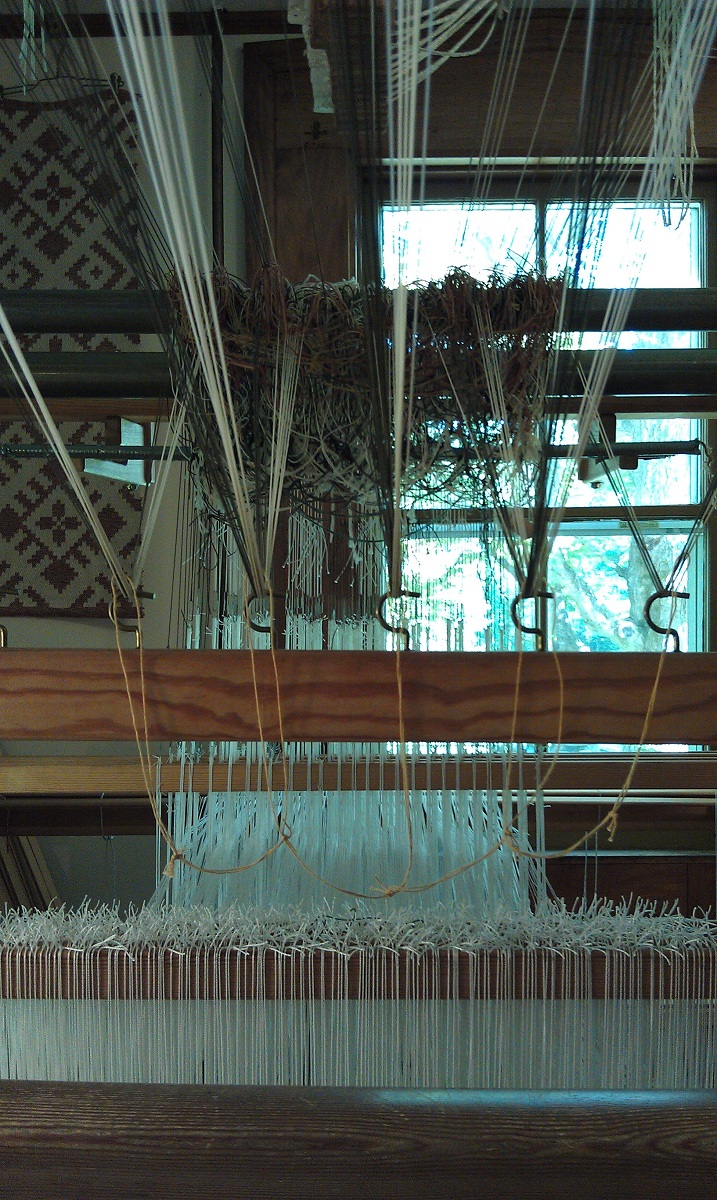
Woven shibori samples on the loom.

I hadn’t posted because at this point, these samples are still looking rather boring! These samples are Swedish cottolin, half-bleached, both warp and weft (plain weave). The pattern rows (twill, spaced out) Half-bleached cottolin with seine twine woven into the pattern rows.


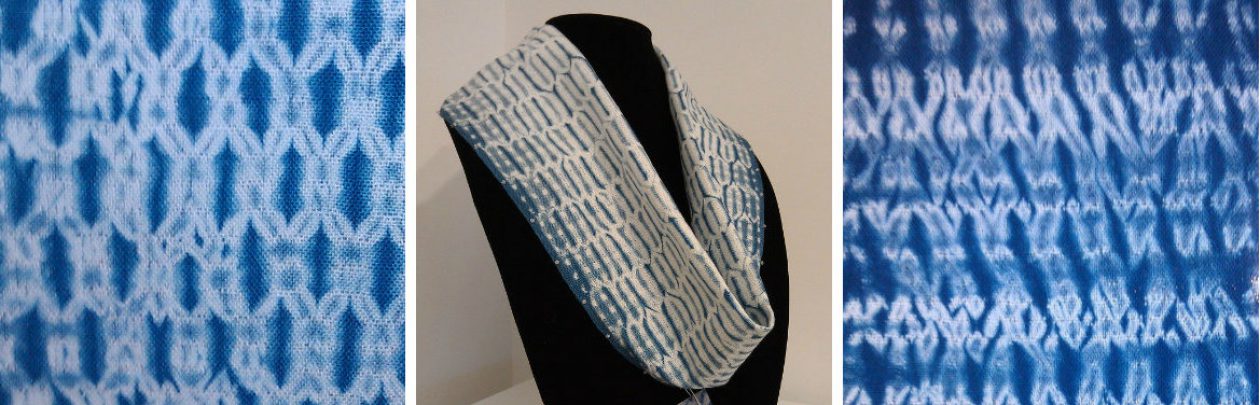
Samples off the loom.

After being removed from the loom, the loops are cut, pulled very tightly from each side, and tied tightly, to prevent dye from penetrating into those areas which is what gives design on the finished pieces. The pattern threads are removed after dyeing.  Until they are dyed, they are not too exciting to see, but I am enjoying weaving them!


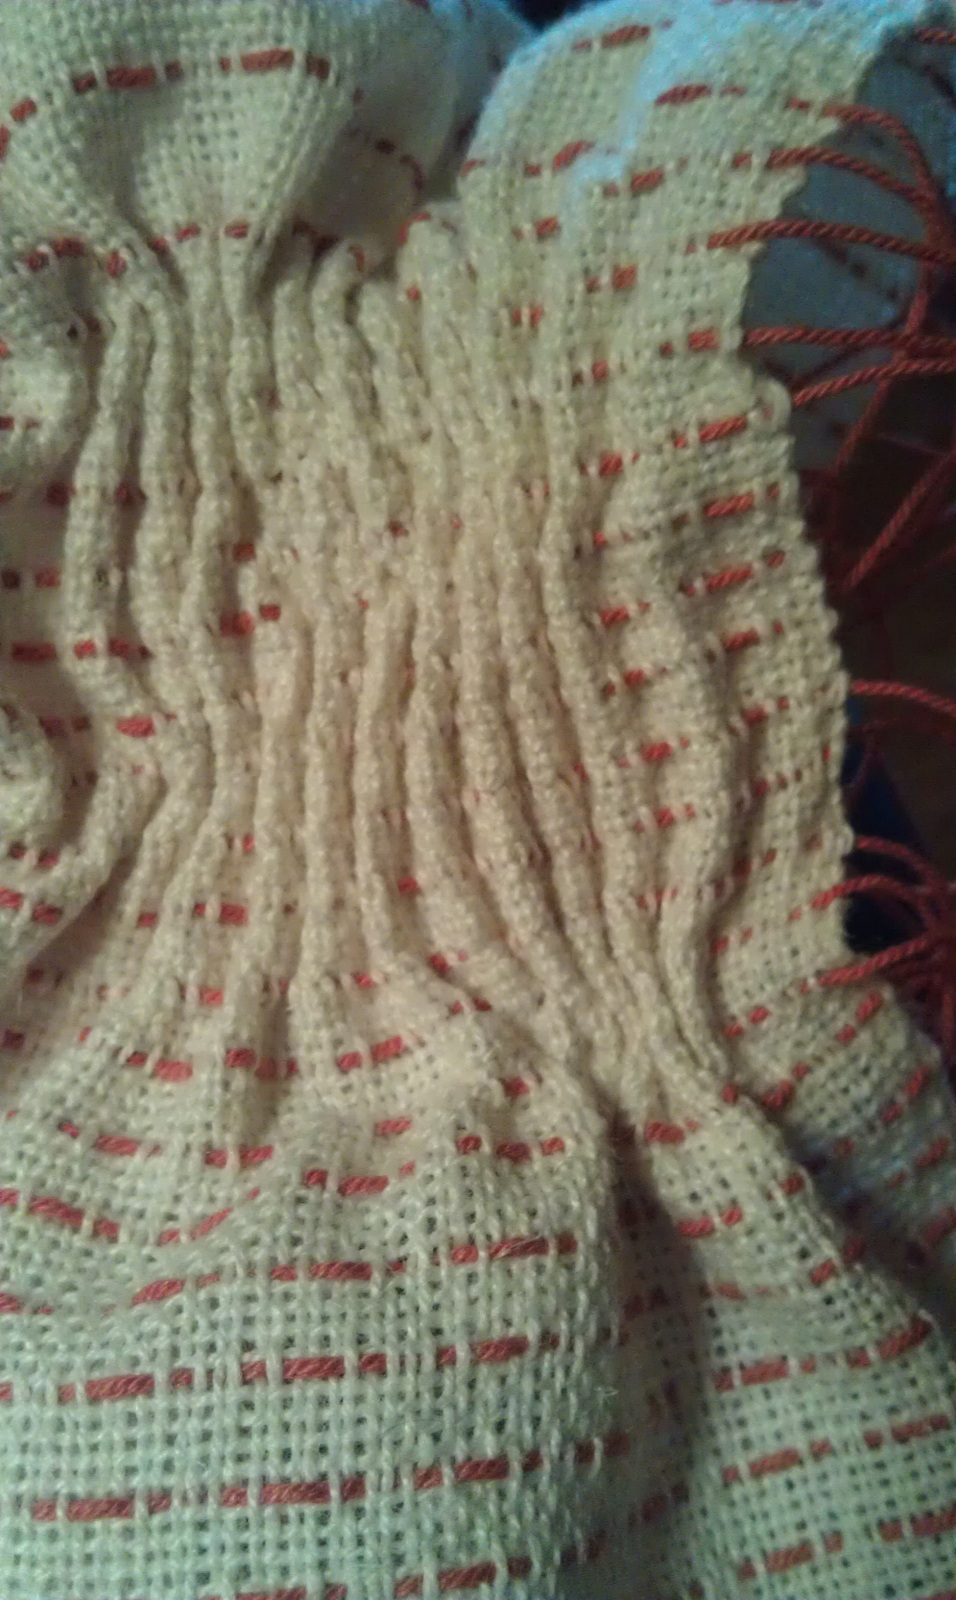
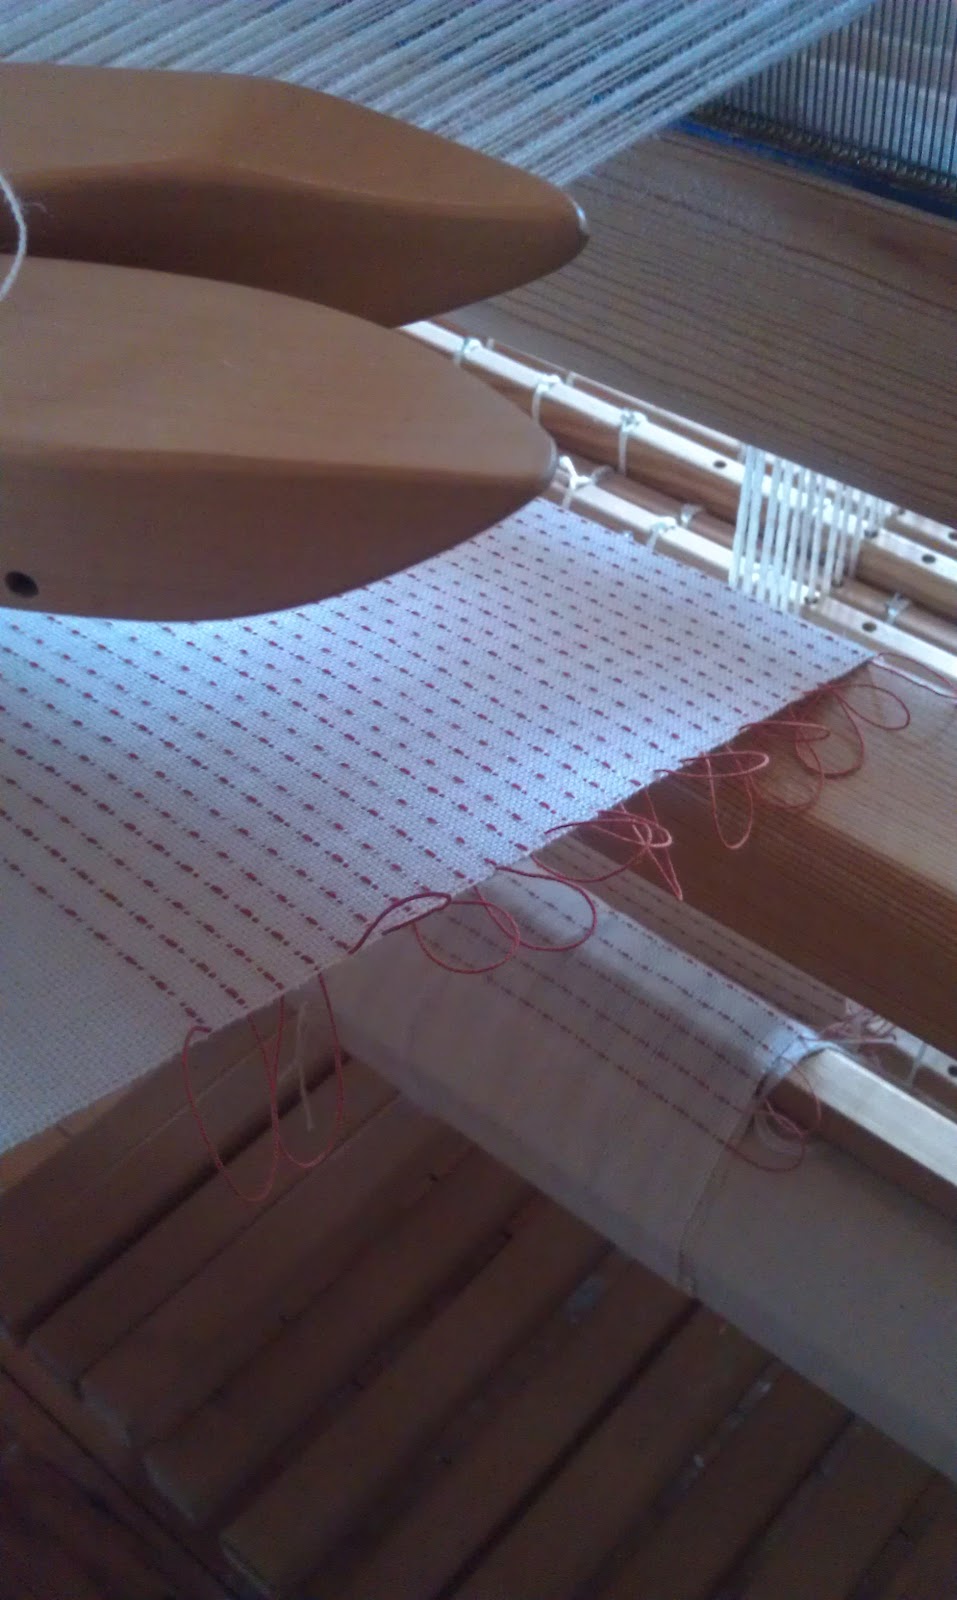
Sample after gathering.
 

Width in the reed is 8″ yet after being gathered (off the loom), it measures 1.5″ wide, and I think I should have pulled the threads even tighter.  Glennis Dolce (Shibori Girl and indigo dyer) suggested dampening the piece after some gathering is done, then pulling even tighter again before tying the knots along the side.  To test that idea, I made two identical samples, one will be gathered without dampening, one with, then both will be dyed at the same time to find out which method works better, or if there is little or no difference.  Thank you, Glennis, for the suggestion!  Results will be posted here on the blog along with photos.

Right now, before dyeing, I’m trying to figure out how I can lable each sample as they are each being treadled differently. Handstitch a number on each? Or just use a permanent laundry marker (not terribly attractive). So far, I’ve been keeping simple records of the samples,… the fiber, threading, tie-up, followed by the treadling of each sample. This way if there particular patterns or effects that I like, I’ll be able to duplicate them, at least as much as dyeing will allow.

While finishing up my samples, it’s time to research and decide on what size cotton I need to warp up for scarves, do my calculations, and get a warp or two made, ready to beam as soon as the samples are finished. 


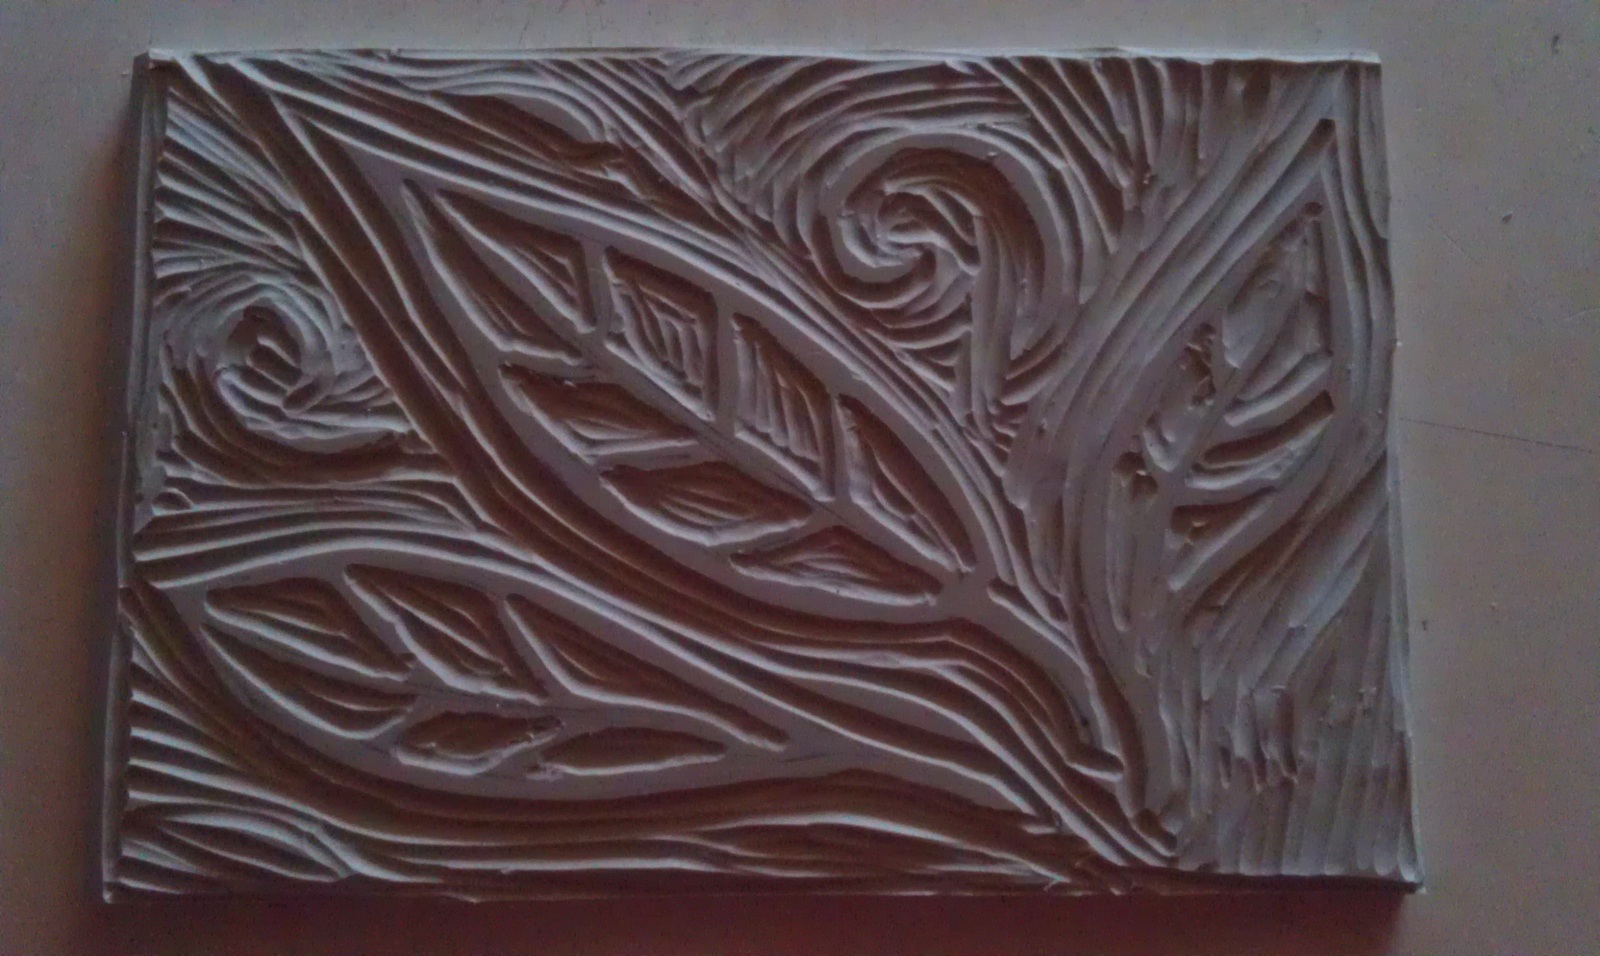
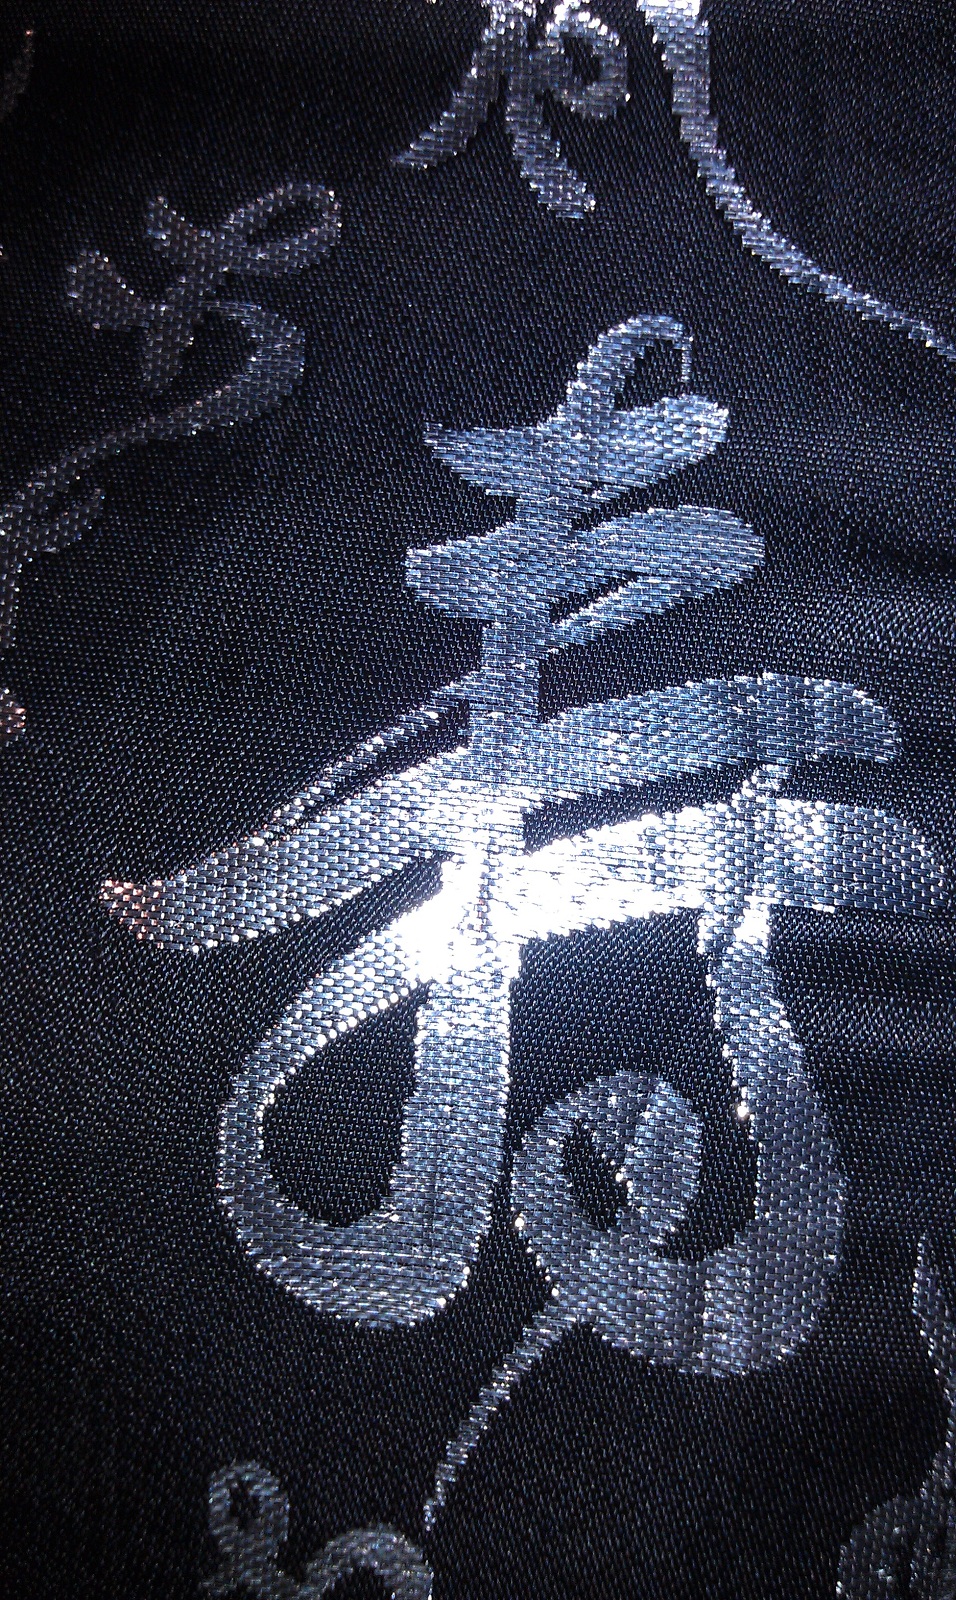
Carving for future printing.


Something I’ve been playing with late in the evening, occasionally, is a bit of carving.  I’m using Soft-Kut, and usually the “U” shaped tool.  Sometimes a spare “sketch” directly onto the Soft-Kut with a pencil, then carve adding more detail, or else carve freehand, just see where an idea goes.  Why?  For future printing on fabric! 


Drumcarding fibers for felting.

I needed a change of pace this afternoon, so drumcarded some white roving, adding in bits of royal blue and navy.

Spots of color, ready to felt.
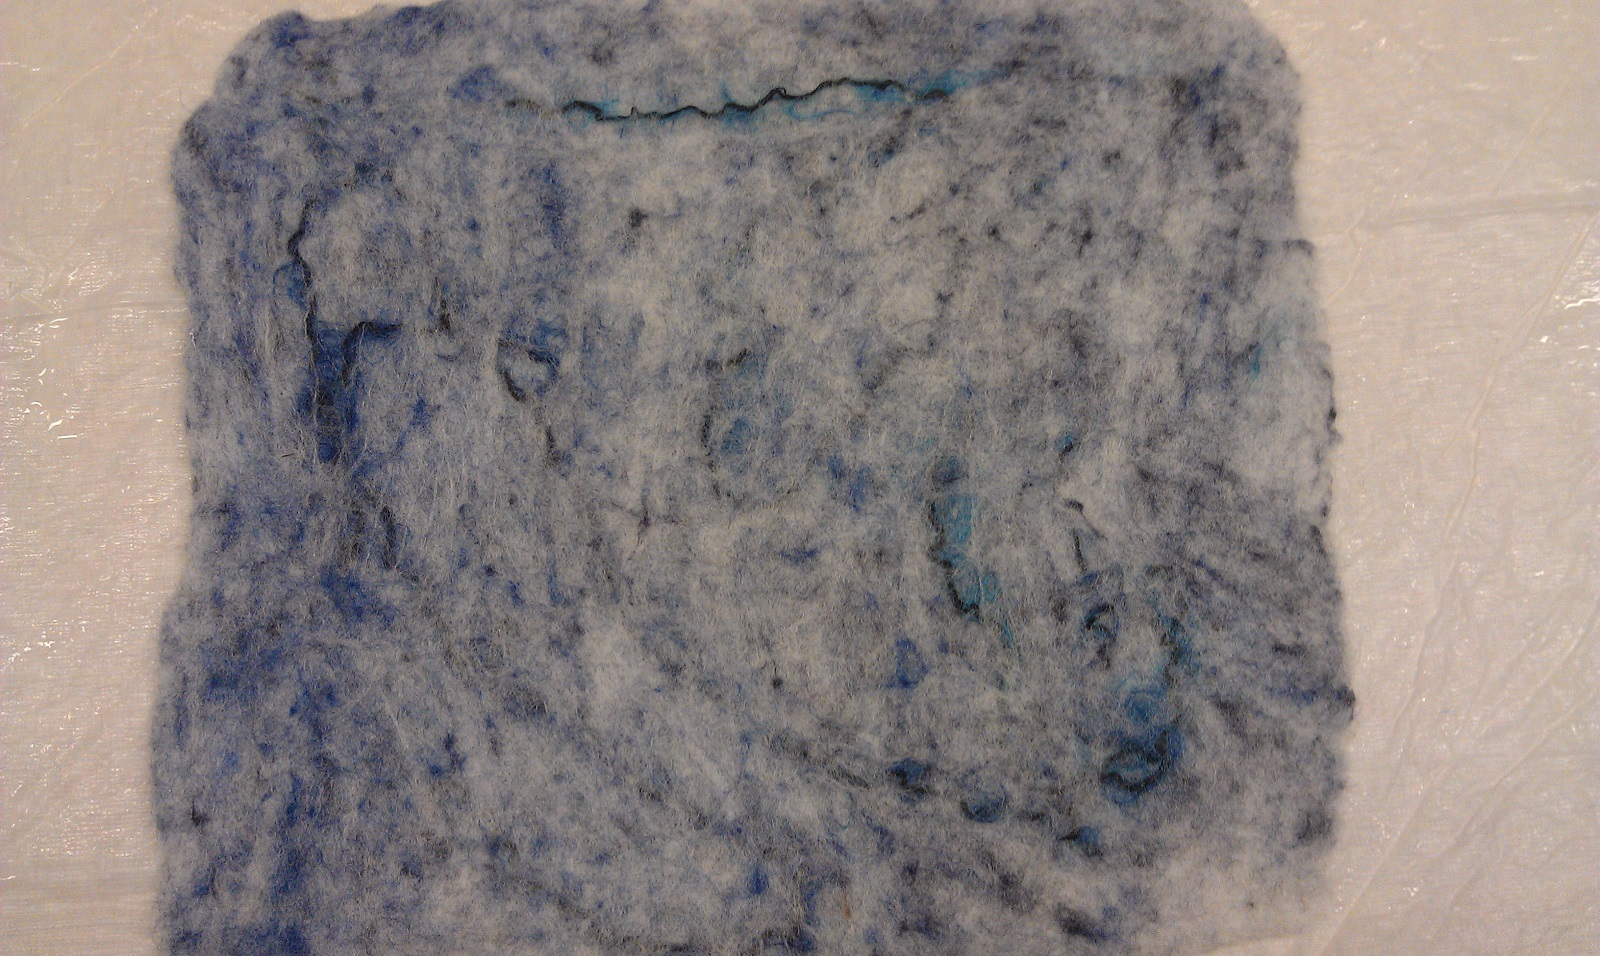
After felting.


After finishing this blog post I went down and felted this piece, which early next week will be made up into a couple small items.  For now, it is laying across the top of a wood drying rack near the woodrange.  It’s very possible I’ll go back down tonight and card up a couple more different colorsways to felt tonight or tomorrow.  Sometimes you just need to do something out of your ordinary routine!


Woodsmoke drifting across the lake early one February morning.


A young pine with its burden of snow.


Like many other places, we are in the end of winter slump here in the WI Northwoods, tired of snow and cold, and looking forward to the change from white to green, the return of songbirds, sunshine, and warmer temps, knowing full well cloudy days, spring rains, and the “mud” season will come first.  However, more snow in the forecast over the next three days or so.  Time to return to fibers!

In December and January I had gotten several requests for custom order socks, which I accepted even though I knew how badly I wanted to set out on my new direction in weaving (woven shibori).  I had to set the weaving aside for a bit and work on socks, a bit of a challenge as the sock machine likes the winter cold even less than I do, and was occasionally temperamental. 

The photos below of socks that were delivered on Saturday.  (Little or no sun when I photographed them.)  I still have one order to go and one week to complete them as they will be delivered one week from tonight.


Men’s socks (balsam, evergreen, chocolate brown).


Closeup of socks above.


Men’s socks (bordeaux, celestial blue, true navy).


Closeup of socks above.


Women’s socks (balsam, celestial blue, scarlet).


Closeup of socks above.


Women’s socks (balsam, green, scarlet).


Closeup of socks above.

For now, I am not accepting custom orders for weaving or socks.  I have deadlines weaving (and dyeing), and a home I need to work on, so am having to set some things aside. 

And now, I’m going down to the studio to weave another woven shibori sample, then crank a pair or two of socks.  Check back for progress on both!

Adventuring Into Woven Shibori

My first woven shibori sample is woven and off the loom.

Woven shibori – twill sample #1.

As the loom was set up for 10 shaft twill from the last couple towel warps, I left it as it was, deciding to start my woven shibori samples with the same twill setup.  After 1.5″ of plain weave, I began with 4 rows of plain weave, Row #1 of twill, 4 rows of plain weave, Row #2 of twill, and so on, through row 10 of twill.

Then I changed to 8 rows of plain weave, Row #1 of twill, through all 10 rows; then changed again to 12 rows of plain weave, Row #1 of twill, through all 10 twill rows, ending with 1.5 inches of plain weave, then removed it from the loom.  I wanted to see the difference between the closely set twill rows and those set further apart when it is dyed.

Why take it off the loom?  Before weaving more samples, I needed to know if the sett was going to be too close and need to be changed, and if the seine twine I was using for the gathering thread, would actually allow the cottolin to gather.  


Beginning to pull the gathering threads.

I’m just beginning to pull the gathering threads, starting where the twill rows are closest together.  This is where I thought the seine twine might not work, but as far as I can tell, it is working.  Of course, the proof will be when it is finally put in a dyepot, whether I am able to pull and tie them tight enough to prevent dye from penetrating, but I’m not there yet. 

This evening, I’ll pull all the threads, and figure out how to knot them all.  I’m already thinking of the next warp, likely finer threads, which means a finer gathering thread, perhaps perle cotton.

I’ll be weaving another 3-4 twill samples, then re-thread/re-tie the loom for a huck weave, then again for Monk’s Belt.  Then a new warp, different size thread, probably a little finer, and more samples.  Then I will be warping the loom for some scarves.  First, though, samples, to gain a little experience both with the weaving, the gathering, and dyeing.

I have to tell you, this is SO COOL!  I fully expect to spend several years exploring woven shibori.

January "Blues"

I seem to be sensing the beginning of a theme here,… I’ve got the blues!  My mind is filled with new weaving, indigo dyeing (beginning soon), sashiko, Japanese Boro fabrics, even cranking “I’ve Got the Blues” socks.  This blog was given a new “Blue” look, too, and more changes and additions are in store.

This year, in addition to the woven shibori and indigo, I’ll be focusing on my interest in Scandinavian weaving.  Louise is waiting for me to call with news of a warp or two ready to be beamed.  And, I need to get back to re-sleying the reed on the drawloom, then we’ll see what happens.  Before that, I have a newsletter to get out for the Complex Weavers Double Harness Study Group.  I did have an article in the International Damask Weavers Newsletter about my week this past Sept. at VavStuga, and their Basic Drawloom class. 


Beginnings of woven shibori.


Woven shibori had been on my Must Do list for a long time, since I happened upon “Woven Shibori” by Catherine Ellis.  So a warp was made and beamed.  I decided to use what I had on hand, not too fine to start, so stayed with 22/2 half-bleached cottolin, about 8″ wide in the reed, and sett at 24 epi.  I am using seine twine for the gathering threads as I know it is strong.  I plan to remove the first sample and try the seine twine to see if it works for gathering, and expect I’ll also discover if the sett is too close.  If the seine twine doesn’t work, I will change to fish line or other. 

The loom is still threaded for twill, and I will weave 3-4 or so samples, varying them, then plan to re-tie and re-thread for huck, more samples, then re-tie and re-threada again for Monk’s Belt, all weave structures in Scandinavian weaving.  Meanwhile, I am reading to find more weave structures that will work with this technique.

While weaving these samples, I need to clean up my garage, clear a “work bench” and set up an area for indigo dyeing.  Yes, it’s winter here, but my garage gets a bit of heat and stays around 46 to 50 degrees, unless we’re in sub-zero temps as we are now.  

Once an area is set up, I can get my first indigo dyepots going and start dyeing the woven samples and see what results I get.  I have the indigo dye, and supplies, including those for for safety.  I am hoping I’ll start dyeing samples later in February.  Something prepare for and look forward to during another long northwoods winter.


Page from Japanese sashiko book.

 It must be the indigo dye, but it bought to mind a book I saw years ago at a quilt shop (and did not buy, but now wish I had), about Japanese Sashiko, and the indigo woven fabrics.  So in addition to my handwoven samples, I have 14 yards of PFD cotton fabric to experiment with.  Books on shibori have been waiting patiently on my shelves, and I am looking forward to where all of this will take me!


Japanese silk obi.


A few weeks ago, a 2 DVD set arrived, “Creative Cloth” with Anita Luvera Mayer (Interweave Press).  I have watched it a few times now, and as always, find Anita Mayer, and her work, inspiring!  It must have been under her influence that I obtained this Japanese silk obi, which I plan to incorporate in a future jacket for myself.  Ideas are simmering!


“Got the Blues” socks.


I thought Christmas and January would be quiet times for me, with plenty of weaving.  Wrong!  The phone rang a few times, emails came, people wanted socks!  Then a tooth infection struck before Christmas and I was done doing anything for almost two weeks.  Just me, my antibiotic, and glasses of water and juice.  So now in January I am trying to catch up so I can get back to my looms!  More socks to do and I’ve given myself a deadline of four days from now. 


“Maddy,” the new addition to my feline family.


Earlier in January, I had been missing pets whose lives had ended a little over a year ago, and started haunting critter shelter lists.  After three or four visits, Maddy and I met and she came home with me.  She is adjusting well to living with three male cats (all quite gentle).  Maddy is a real sweetheart!


Wood supply in my garage.


There is a big, black, woodburning range in my kitchen, about 14 years old, Amish made, the kind with the warming oven on top.  I get close to half my heat in winter from wood, which of course, requires a LOT of wood in the woodshed, and hauling it into the house all winter long.  Every few days, this rack is filled, along with one half that size that is inside my house.  I keep an eye on the weather and on warmer days, fill the back of my Honda CR-V with wood, 3 to 4 times, to fill these racks.  My inside rack is empty after three nights of around -18 F., and I’m now carrying in wood from the garage.  Guess what I’ll be doing for a couple hours on Sunday?


Jan Zindel, at Shuttle Works Studio, January 21, 2013.


A couple months ago, a small northwoods publication, “Baby Boomers and Beyond” contacted me about an article for an upcoming issue, and sent a writer for an interview and photos. The article was sent to me for any changes or corrections, and then I received word there were problems with the photos and could I supply a couple. What to do but ask a friend to come over and take a few. Artist/weaver/friend Louise Engelbrecht (yes, the same Louise I traveled to the tapestry exhibit with), arrived Monday AM, a VERY COLD, well below zero morning, and snapped a few pics. The one above was not sent to the magazine. It took a little time for Louise and I to get our timing together, as you can see, I would move and/or talk, while she snapped! Great fun, though, and I finally have photos of myself at a loom.

It’s nearly midnight, 0 F. outside, and snowing, and I’m looking forward to bit warmer temps Sunday and Monday, and a lot more time in the studio!  There is a lot to look forward to!

"In Our Nature: The Tapestries of Helena Hernmarck"

I think it was back in September I learned of an exhibit of Helena Hernmarck tapestries at the American Swedish Institute, Minneapolis, MN (exhibit now over).  It seemed this would likely be the best chance I would ever have of seeing any tapestry of Helena Hernmarck.  I called a friend who is an artist (watercolor, collage, paper) and weaver, and asked if she would be interested in driving to Minneapolis together before Oct. 14.  We finally settled on Wed., Oct. 10th as weather would be good and roads dry.


Louise Engelbrecht, WI Northwoods Artist and Weaver.


American Swedish Institute, Minneapolis, Minnesota.
Exhibit banner outside ASI Park St. entrance.

We were advised, when paying our entrance fee, to start in the old mansion, and end with the large exhibit room in the new section, that would “blow us away,” so we did.  Photos (without flash) of tapestries were allowed in the old mansion.

“Envelope from Sweden.”


“Kari’s Leaf” and process.

Sorry, but I didn’t catch the title of the above work.  I liked that it was small squares put together as one work, something do-able for a weaver with smaller loom(s).

In addition to the tapestries, there was a 40 minute video we could watch showing Hernmarck at work and her process for creating and weaving the tapestries.  I was hoping it would be available on DVD, but alas, it was not.  Perhaps someday?  And while I’m hoping, I’ll hope for a new book of her tapestries since the publication of “Helena Hernmarck, Tapestry Artist.” 


“Geranium.”


“Folk Costume Details.”


The inspiration for “Folk Costume Details.”

Sample for visitors to touch and examine.


“Linnea Borealis” by Lis Korsgren.


Last, we went into a large, semi-darkened room holding four large tapestries,… “Poppies,” “Waterfall,” “Leadenhall Market,” and “Moss-klyftan.  In photos, they are fabulous, in person, stunning, they take your breath away.  I had taken only a few photos (some didn’t make it as I must have turned my phone off too soon, trying to save battery), waiting until the end, only to find out No Photos Allowed in this room.  Ah well, we could stand or sit and bask in the artistry.  I couldn’t get over how, when viewing each one up close you saw color, and the further back you moved, the more detail stood out.  It was amazing! 

Note:  The above photos, taken by myself, are published here with the very kind approval of Helena Hernmarck.  

There were also two other smaller exhibits at ASI, including one on Swedish lace, the following three photos were taken the same day.


Bobbin lace.

Variety of bobbin designs.


Lace in fine linen.

As we were getting ready to leave, we decided seeing anything else on this visit would “dilute” the experience of seeing the Helena Hernmarck tapestries, so we left for home.  It made for a very long day, but seeing this exhibit made it very worth while.  Altogether, a very satisfying day.


Looking Back, Looking Forward


Black Bear cub at Wild Instincts, Rhinelander, WI.

A little catching up,… I am a volunteer for Wild Instincts, Rhinelander, WI, a wildlife rehab facility.  As a rescue driver for them, I rarely get a call, in winter, to go out and bring in wildlife in winter, so knowing they were working hard to get their new building ready for the spring “deluge,” I went over to help paint walls for a day in January, and again in February.  While there, it was time for Mark Naniot, registered rehabber, to feed two baby black bears.  After he fed the first one, he asked if I’d like to hold it while he fed the second.  A once-in-a-lifetime opportunity for me, I happily held the now contented baby for a few minutes.  Of course while holding him, he peed on me, so I spent the afternoon smelling like baby bear urine, and yes, I tossed my clothes when I arrived home.  A month later, I was able to hold him again, this time I had a paper towel under his little bottom, and thankfully, no “accident.”  I am happy to report the two cubs were placed in a den with a mom and her two cubs. 

To read more about these and other black bears, go to the Wild Instincts blog, http://wildinstincts.wordpress.com.  There are some amazing videos there!


WI Northwoods, Autumn 2012.

We had quite a beautiful autumn this year, good color as we’d had more rain than we’ve had over the past few years. 


Milo, watching me work outdoors.


Sock machine demo on Oct. 6, 2012.

On Saturday, October 6th, the Lake Country Weavers had their fiber arts demonstrations and sale in Eagle River, WI.  As I am currently the only sock-cranker in the group, and the sock machine is more portable than my looms, that is what I usually demonstrate on.  Then a call came from an area gallery, would I like to have my socks in their gallery for November, so I got busy cranking again to have socks to take over.

A few of the socks made in October.

Detail of “School Days Plaid” socks.

Cranking socks on an sunny autumn day.

Socks at the gallery.

Time to get back to my sketchbooks.

It feels like I’ve been doing the same kind of weaving for far too long.  I’ve been thinking and asking myself for the past year, “what is it I really want to weave?”  I finally came up with answers, and bit by bit, pieces of it have been falling into place.  

So, with the new year it almost here, I have a lot of learning and exploring to do at Shuttle Works Studio!


Shuttle Works Studio on an early winter morning.


Drawloom Weavings at VavStuga

This post is of photos of drawloom or double harness weavings, all but two taken during the Sept. 17-21, 2012 Drawloom Basics class I attended at VavStuga.  These photos are posted here with the knowledge and permission of VavStuga, and my thanks to them for sharing these and so many more examples with their students, and allowing me to share a few of them here.


Opphamta weaving.


Shaft draw weaving.


Shaft draw blanket.


Shaft draw blanket.


Single unit weaving.


Smalandsvav coverlet with sheepskin backing, woven by Becky Ashenden.


Becky’s coverlet, larger view (photo taken Nov. 2011).


Smalandsvav coverlet, by Susan Z. Conover, quilted, with handwoven band trim.


Susan’s coverlet, prior to finishing, with reverse side shown on the right.  (Photo taken Nov. 2011)


Smalandsvav coverlet by VavStuga apprentice Terry Slagel, Sept. 2012.


Smalandsvav weaving.

Smalandsvav weaving.

Smalandsvav weaving.

Smalandsvav weaving.

We were shown so many other examples of double harness weavings, and I wish I had photos of all of them.  (Any errors in identifying the types of weaving shown here are mine.)  So, now it’s time to learn more and begin weaving my own.

Drawloom Basics Class, Part 3 of 3 ~ Samples

The photos and basic information are shown in the order they were woven, and unless otherwise indicated, the side you are viewing is the side that was up as woven.


Opphamta.

Opphamta weave has a plain weave ground, with pattern floats.  You work from a chart, your own design or one you found (be careful of copyright).  This sample has a warp of 16/2 cotton bleached (plain weave), and 16/2 linen for pattern.  Warp is 14 ends/cm., and 14 picks/cm.


“Double Dragons.”

The “Double Dragons” were woven on an Oxaback single unit drawloom with the charted design saved in pattern lashes.  This piece is 5 shaft satin.  The warp is 28/2 line linen, half-bleached, and the weft is 12/2 line linen, natural.  Warp is 16 ends/cm, and 16 picks/cm.


Smalandsvav sample.

Smalandsvav is a double harness weave, and can be set up on a standard loom.  This particular loom had a small extension for the warp beam to improve the shed.  The warp is 16/2 cotton, 12 ends/cm, and has 16/2 cotton (single) for the plain weave, and 16/2 cotton (doubled, a shuttle with two bobbins), 12 picks/cm.


“Cattails” woven on shaft draw.

The “Cattails” were woven on an Ideal loom with Myrehed shaft draw system.  This photo only shows a portion of the piece but I wanted to include a bit of the border.  The weave structure is 8 shaft satin.  Warp is 8/2 cotton, 14 ends/cm, and weft is 16/2 linen, 14 picks/cm.


Charted design (underside when on loom).

For this piece, I had chosen a charted design that would not be too difficult to weave given the time allowed, and I added a simple border.  It was woven using a Myrehed single unit attachment on, I believe, an Anderson floor loom with long extension.  The warp is 22/2 cottolin, doubled (black), 20 ends/cm, and 16/2 linen (I chose bright red), 10 picks/cm.


This photo shows a bit of the border (underside when on loom).


This side was up as I was weaving.

When weaving, or researching a weave, I like to keep notes on warp and wefts used, sizes, fibers, sett, and so on, to help in future weaving projects.

The samples have not yet been hemmed or washed, so you do see a few wrinkles from being folded when shipped.  How I wish I had a cold mangle for pressing pieces as the iron does not seem to get the wrinkles out.  Even when I think they are, a photo shows they are not! 

The next post, coming mid-week, is of drawloom pieces woven as examples for students, and pieces hung for display.  I was particularly taken with the Smalandsvav and Opphamta pieces.

Drawloom Basics Class, Part 2 of 3


Smalandsvav sample.

My next weaving experience that week was Smalandsvav.  We had gone over basic design possibilities, and with that sheet in hand, and a bobbin with two shuttles, I decided to weave two colors at once.  It must come from my using three colors when cranking socks? 


Smalandsvav is a double harness weave.


Smalandsvav is not woven on a drawloom but is a double harness weave, requiring two sets of shafts.  The above photo was taken to help me with setting up a loom at home when I weave this at home.


Small extension added to the loom.

Smalandsvav was set up on an Glimakra Ideal loom with a short extension added to help with achieving the shed.  A double-bobbin shuttle was used.

Cattail design being woven on a shaft draw system.

For weaving on the shaft draw system, also set up on a Glimakra Ideal, I chose a design of cattails.  What I did not realize (and still need to understand) was there was an “x shaft” in the design.  Though I worked from the center of the design when pulling the cords, you can see there are “double” cattails in the photo above that should be single.  I need to get “Damask and Opphamta” out to read and understand what was going on here.

Loom with shaft draw system.

Shaft draw systems are for weaving designs that repeat across the width of the fabric.  (The opphamta attachment also produces designs that repeat.)


A better view of the weaving, nearly completed.


My last weaving was on a loom with the Myrehed single unit draw.  With that setup, you can do freeform designs, though the design I had chosen (the first day of class) was a balanced design, with border I added. 

Drawcords are in front of weaver instead of overhead.


This loom had the newer Myrehed single unit attachment with drawcords coming down in front of the weaver, instead of the older style single unit drawloom with drawcord warp overhead (as in the single unit with lashes in the previous post).


The charts/designs used at the looms were kept on a magnetic board that sat on the bench next to you.  Pull the cords according to the chart, weave the required rows (depending on structure), release the cords, pull the new cords, weave,…. until design is completed.

A better view of the weaving in progress.

The warp was black, and I chose a bright red weft.  The only issue I had was getting used to focusing my bifocals on the cords so as not to have errors in the weaving.  I did end up with one error, but there was not enough time to cut it out and re-weave.  At home, I would never have left it in no matter how far back I had to go.  However, it was the last afternoon and I decided having a finished design was more important at that point.


Looking at the shaft draw piece.


Class Photo from Drawloom Basics, Sept. 17-21, 2012.

Part 3 will have photos of my samples (off-loom), and brief information on fibers used, sett, and so on.

Next will be one or two posts with photos of woven samples we viewed during the week as well as woven pieces on display.

Following those will be a post on the Helena Hernmarck tapestry exhibit “In Our Nature,” at the American Swedish Institute in Minneapolis, along with a few pics from Swedish handknits and Swedish lace exhibits that were on at the same time.

Drawloom Basics Class , Part 1 of 3

Bridge of Flowers, Shelburne Falls, MA.

I returned to Shelburne Falls, MA to take another weaving class at VavStuga, this time “Drawloom Basics,” Sept. 17-21, 2012. Arriving early afternoon, first I checked out the Bridge of Flowers.


Bridge of Flowers, in bloom!

I had been here last November, and most of the flowers were no long in bloom. This time, the bridge was a riot of color, something you need to see!


VavStuga, Shelburne Falls, MA (photo from Nov. 2011).

I travelled back to VavStuga to take their Drawloom Basics class, September 17-21, 2012.  Though we would be weaving off-site, most students stayed and had meals here (see three posts from January 2011 for photos from VavStuga Basics class, including the wonderful accommodations).


Susan Conover & Becky Ashenden at the start of a VavStuga lunch.

Breakfast, lunch, and dinner are available at VavStuga and are delicious!  Meals are served in the room at the back of the building with a wall of windows looking out onto the river and foothills.  At each meal, the table is set with different handwoven runners, placemats, and napkins, making each meal even more special.  Conversation and laughter accompany each meal with Becky, Susan, and the apprentice.

Accommodations at VavStuga are very confortable.  Each room has handwoven curtains, rugs, blankets, coverlets, and table covers, that make you want to go home and do the same!

During Drawloom Basics, we would have the opportunity to weave on  several different types of drawloom setups including opphamta, single unit with lashes, Smalandsvav, shaft draw, and single unit (Myrehed).


The VavStuga Drawloom Annex (as I call it).

The drawlooms had previously been set up when needed at VavStuga, but late last year the drawlooms had been moved to a farmhouse (above) about five minutes away, belonging to Becky’s father.  The looms fill several rooms on the first and second floors in the right side of the farmhouse.  


You can clearly see I am enjoying the week!

One room has two long tables and chairs, used for lecture, drafting, viewing many, many samples, and where we worked on designing. 


Weekly Schedule.


Copy of schedule.

Becky had prepared a weekly schedule showing what loom each of us would be working on each day, and for how long.  A daily schedule was also available.  Some projects were allowed 7.5 hours, others were 3.5 hours.  Days were broken up with lecture, explanation of looms and how they work, drafting, and designing.  It was always a treat to be shown many examples of the different types of weaving done on the various drawloom setups.  Photos of those as well as older pieces on display in the rooms were will be in the third post.

The first day began with designing.  We could design our own or use a design from any of the many books/charted designs available.  I chose a design from a book, and that evening added a border.  This design turned out to be the last project I did, on Friday of that week, woven on the drawloom with a Myrehed single unit setup.  Photos will be in the next post.  More designing went on during the week as well as drafting.


Loom with “opphamta attachment.”

On Day 2, I started weaving Opphamta, on a loom with a 20 shaft attachment (not all 20 were not tied up and being used).  This was a 3.5 hour project.  I didn’t have much time and may have made an error on my charted design, but this is what I came up with.  Opphamta has a ground of plain weave, and the design of floats.


My weaving, in progress.


My weaving after having rolled under the warp as another student was weaving.


Single Unit Draw with Lashes.

My next weaving session was on an Oxaback single unit drawloom with the design we would all weave saved in lashes.  This was a BIG loom, heavy, beautiful,… and I found it physically a bit more challenging to weave on simply because I am 5’4″, shorter arms and legs, and as I say, this was a big loom.  I tried weaving standing up, but that didn’t work.  Sitting on the bench, I couldn’t move the lashes far enough to the back and ended up using the cloth protector piece to push them to the back of the loom.  Where there is a will, there is a way!

Here you see the lashes hanging down and the cords pulled for a particular line on the chart. 


My view while weaving.


Completed “double-dragon” weavings.

On this loom, because the design was saved in lashes, we all wove the same double-dragon design, linen warp and weft, and name tags on each so we would have our own to take home.

Tomorrow, I’ll photograph my weavings, meanwhile, I’ll get to work on the photos for Drawloom Basics Class, Part 2.