All posts by janicezindel

Northwoods Life, In and Out of the Studio

 
Woven shibori scarf.


Woven shibori has turned out to be a fascinating weaving technique, and my experimenting with weave structures and tie-ups continues.  The scarf above is the last from the most recent warp.  16/2 Bockens cotton sett at 30 epi, advancing twill threading and freeform tie-up.  A new warp is on the loom, and though the tie-up will remain the same (perhaps one or two treadles changed a bit), the threading is another advancing twill and I’m looking forward to seeing the differences.  I need to update my records before I start forgetting details.

A bit closer look.


The dyeing on the scarf is actually fairly even, but the photos appear lighter on the top than the bottom.  The photos were taken outdoors early this afternoon, on the lakeside porch, and I believe the porch roof is giving a shaded or shadow effect. 

Later in October, I’m looking forward to being able to branch out into larger works, as well as try one or two wearable pieces.  It’s always good to have new learning and challenges to look forward to! 

Norwegian coverlet book.


A few days ago I was looking at the 2014 class schedule on the VavStuga website, and saw mention of a Norwegian coverlet book, “Om fellen kunne fortelle… akletradisjon til inspirasion” by Randi Breiset ($44.00 US).  It was originally published in 2001, and perhaps has been reprinted.  The book is being carried again in the VavStuga shop.  Of course, I sent an immediate email asking a copy be sent to me.  What a treat!  Beautiful photos, a bit of history about each, and drafts and weaving information provided.  There is also an abbreviated English supplement in the book. 

I am looking forward to the coming winter and continuing my woven shibori studies, and attempting a small version of a Norwegian coverlet.

If you read this blog you are probably aware I am a volunteer rescue driver for Wild Instincts, a wildlife rehab facility here in the WI Northwoods.  After doing this volunteer work for 12+ years, it has been a real treat to be able to be present at the release of a few of them.  If you’ve ever wondered what the release of fawns was like, the following photos will show you!

Don’t worry, they are alive.

The previous day, five fawns were released; on this day, the last six were going to their new location.  The fawns were tranquilized, carried over near the transport vehicle and laid on the ground, where Sharon tagged them (required by State of WI).

Four of the six fawns ready to go.

After being tagged they were each placed in the vehicle.  Ken is one of many volunteers for Wild Instincts.

After arriving, the fawns were again placed on the ground.


Mark gives each an antidote to help them wake up.


One by one, heads started to raise, and when ready they were helped to their feet.


This fawn laid down again, wanting more rest.


They still have their spots.

 
Fawns were moved off into their new lives, back in the wild.

Next month,… I hope to be there for release of five bear cubs.  Stay tuned!

And now, back to the weaving studio, where another 12 yards of warp for more woven shibori scarves awaits me, and three or so sock orders, and getting ready for the Oct. 5 art show/sale.  Yes, I’m back to cranking socks again,… cooler autumn temps and another winter are on the way!

Stash Crisis Averted!

A new “freeform” woven shibori scarf.

After a bit of time away from the loom, it’s back to another “freeform” or “random” woven shibori scarf.  This is nearing the end of the warp in the previous post (advancing twill threading, freeform tie-up).  As I did not keep notes on treadling and number of rows of plain weave in scarf #4, this one will be somewhat similar but not identical.  Of course, the gathering, tying, and indigo dye all play parts in the outcome, too.

My new stash of 16/2 Bockens cotton!

Earlier this week I was starting to consider the next warp, whether to stay with this threading and tie-up, make it the same width or perhaps a couple inches wider, length of warp (probably 14 yards or so), or change to a new weave structure.  I looked and found I had 2.5 tubes of this cotton left.  I needed to order more thread right away, 2.5 tubes would not be enough to make another warp and weave it off. 

I called Glimakra USA to discover they were all out of 16/2 bleached.  Crisis!  I ordered 12 tubes of unbleached, then I sent an email to VavStuga inquiring if they had any 16/2 bleached on hand.  A reply told me they had 16 tubes of 16/2 bleached left, did I want them?  Yes!  Both packages are here now, and just for fun I did a little calculating,… if my math is correct, there are approximately 87,264 yards here!  That should be enough to keep me busy for awhile.  Oh yes, I also have several cones of bleached and unbleached 20/2 cotton waiting, too.

The next post should have another indigo dyed scarf, possibly a sample or two, depending on how much warp is left, and the new warp should be made and on the loom.  I’m also just starting on making wool socks again.  Yes, I know I said I wasn’t going to, but after getting four or five orders, and a small autumn show coming up (and cold winter weather will be here before long), I decided to have some socks done, too, in addition to the
weaving. 

Meanwhile, the WI north woods wildlife continues to keep me entertained and busy.


Young porcupine in my yard.


The porcupine family continues to visit, and on this day it was the young one, now growing up.  Here she is peering at me between the back of the empty salt lick and a red pine.  (They are trying to chew their way through the wood.)  Such a sweet face!

Little porcupine’s dangerous side!

As I was trying to take the photos, she kept her back to me, quills raised and gave a little jump and flick of the tail to keep me away.  It worked!

Eagle in tree, beaver trap on its foot tangled on a branch.


Yes, this is the same eagle as in the last post, a bit better photo (taken by someone on the scene, thank you!).  Traps can catch unintended victims.

Mark Naniot, Wild Instincts rehabber, eagle with head covered, and me.

As I wrote, the eagle came down, went into the lake, was caught by Mark, and in this photo, I am folding a wing (it was busy flapping and wanting to escape) so I can get around and hold it’s legs while Mark removed the trap.  This is the only photo of me, in twelve years or so, during a rescue, as I’m usually alone.  Notice the welder’s gloves, which only offer partial protection from beak and talons.  Update:  this eagle is alive, doing well so far, foot wrapped, but they are uncertain about whether or not the toe that was in the trap will need to be amputated. 

I think I may have written back in May or June about an eagle rescue, an eagle that did NOT want to be caught.  It had an injury, was starved, and had severe lead poisoning.  It also had a lot of attitude!  I am happy to report, he was released this past Wednesday afternoon, photos are below.  Happily, I was invited to be present for his release back into the wild!

Mark has transferred the eagle to the young woman doing the release.  He still looks grumpy!


Motion shot, at the beginning of “the toss,”  1-2-3-GO!
He made straight for an “eagle tree,” dark pine in center.

Wouldn’t you know, he made straight for a tree that already had an eagle pair, nest, and very possibly young.  You should have heard the squawking that went on for a long time!

Now, decisions to make on that next warp and calculations to do.  I have a smaller warping mill here to try out, on loan from a friend, and I need to return it to her.

Summer Weaving and Eagle Evenings

Aug. 16, 2013, four scarves to indigo dye on a beautiful day.


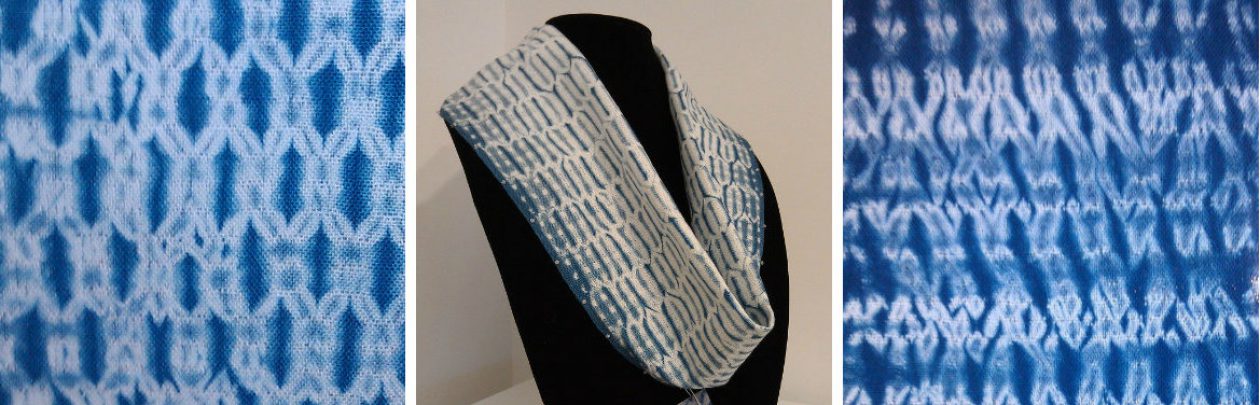
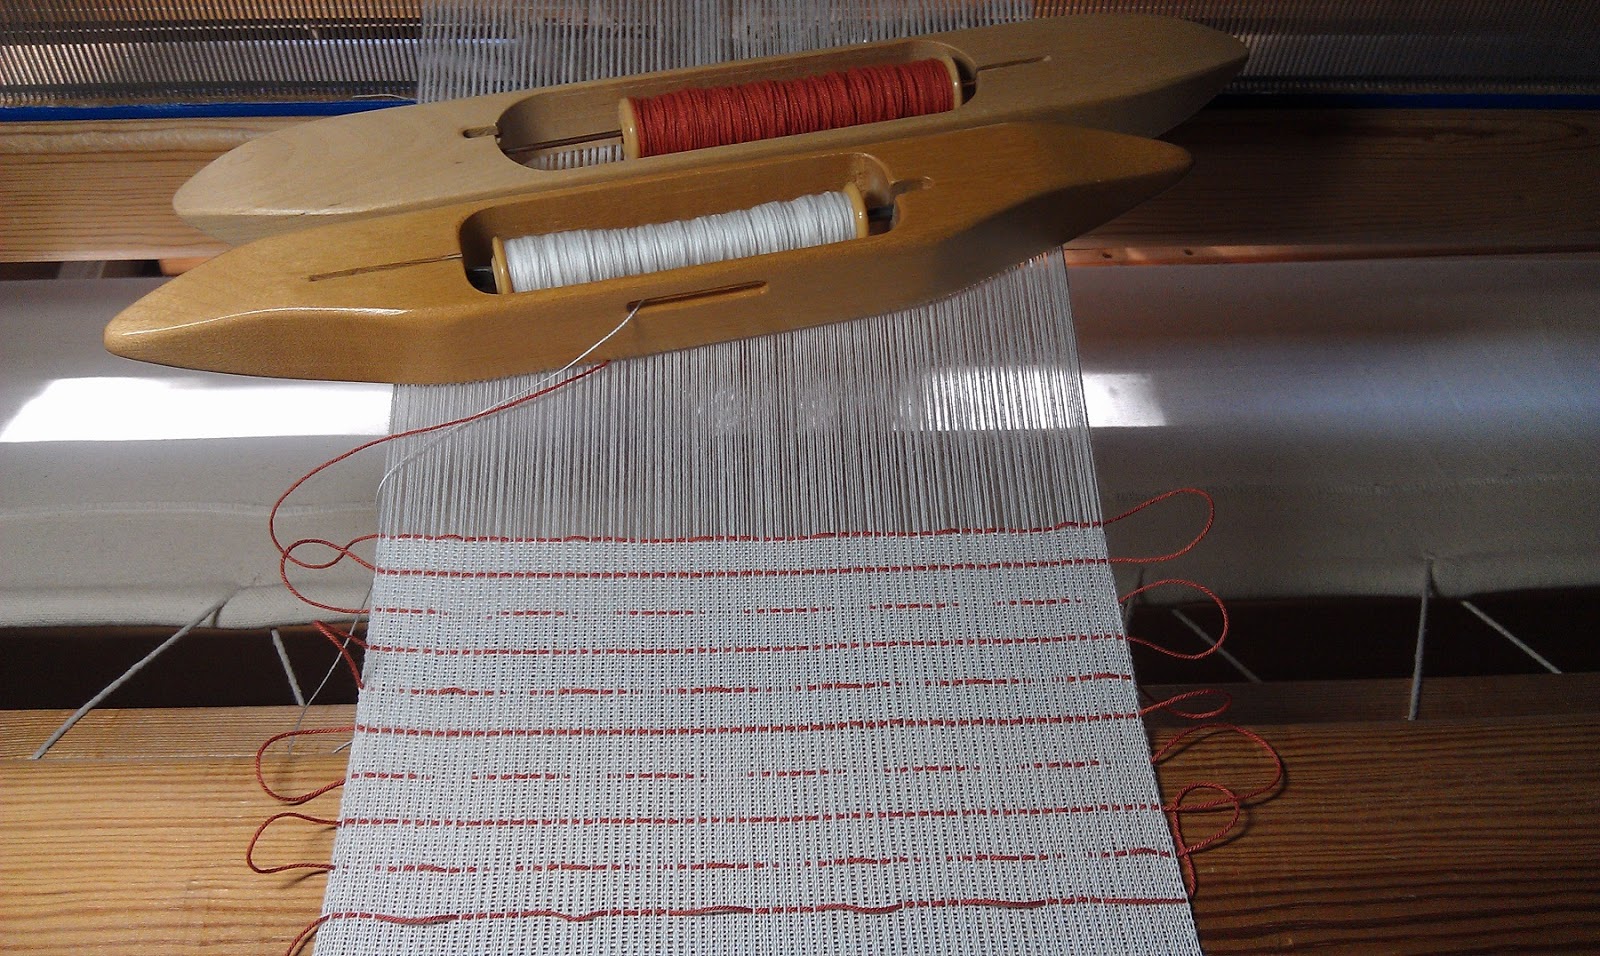
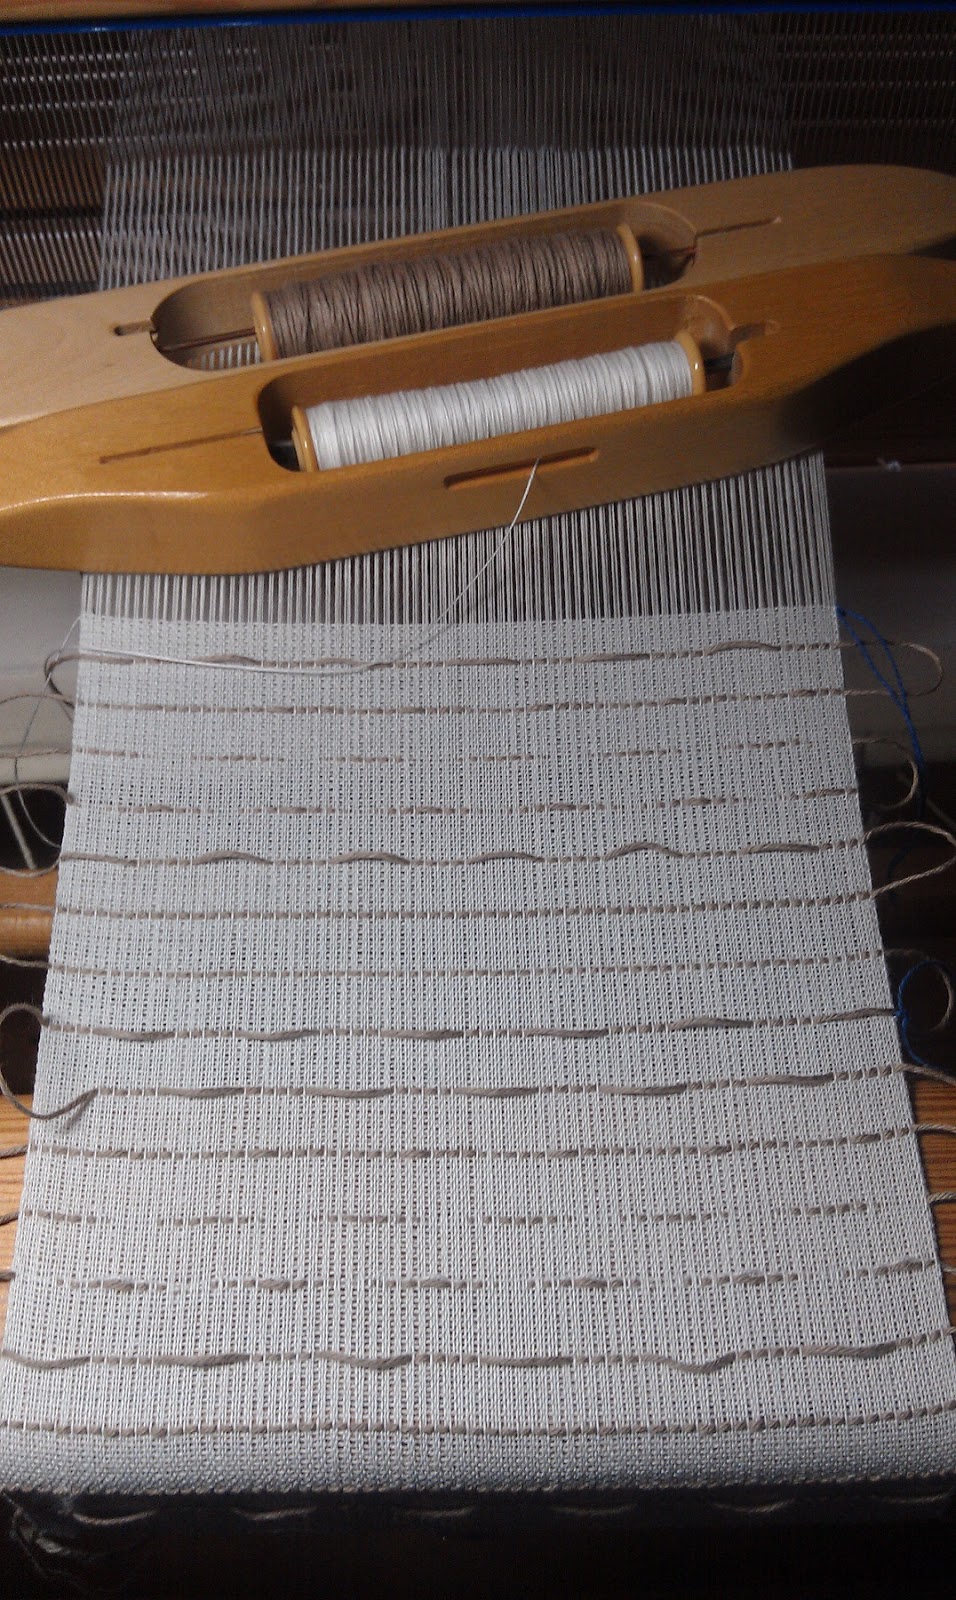
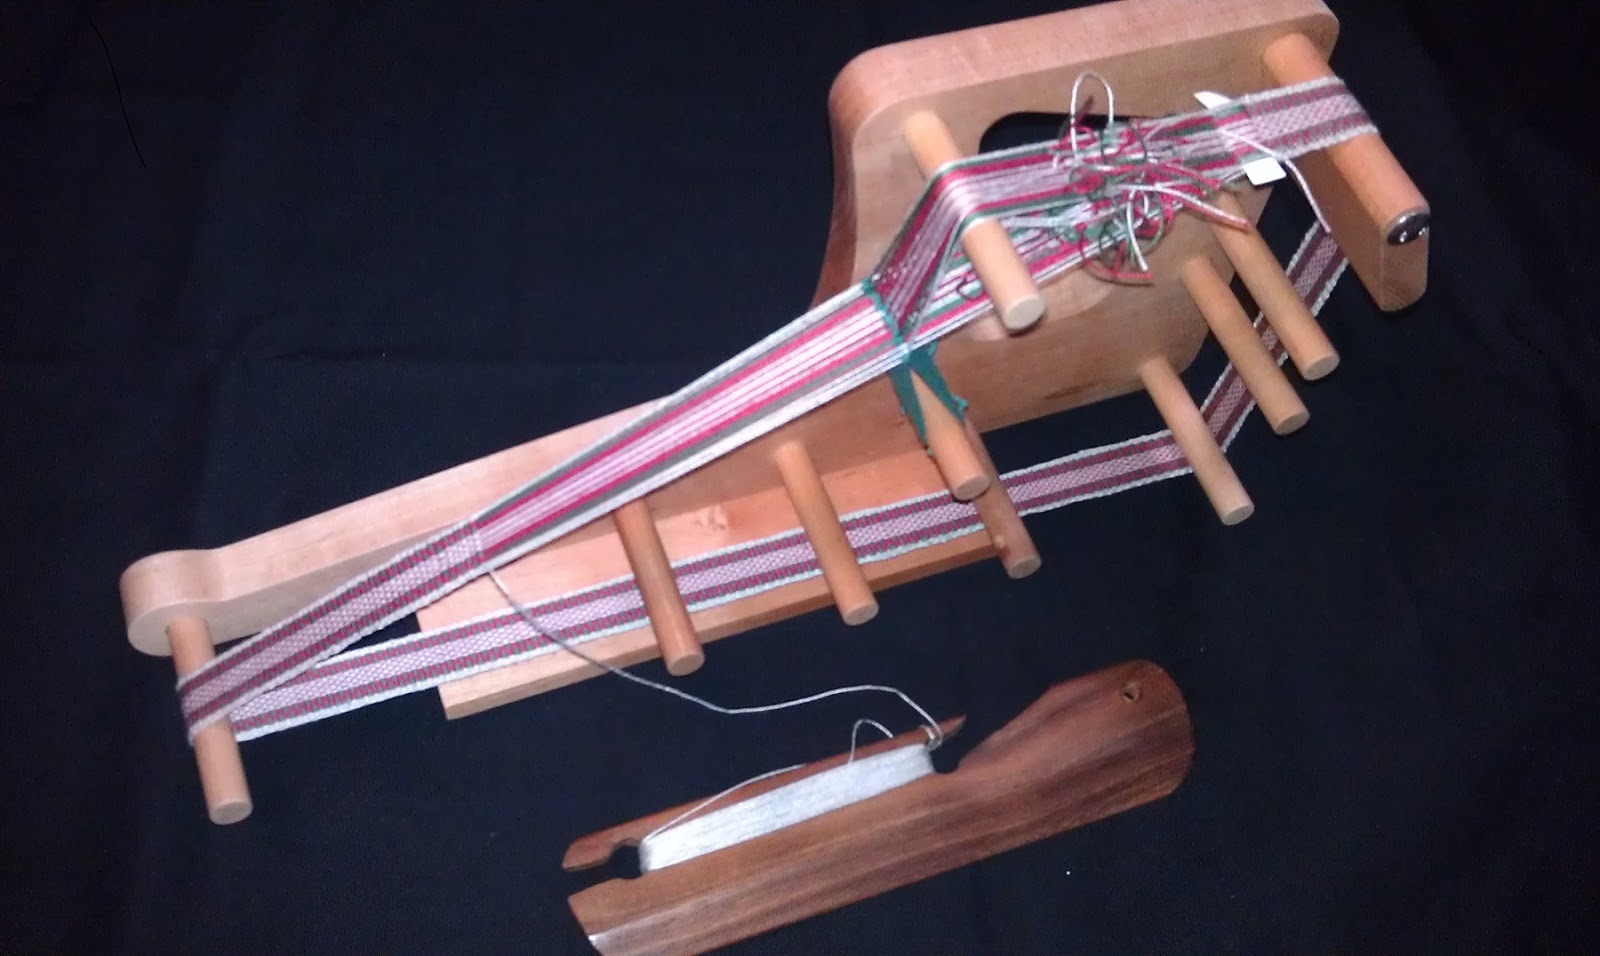
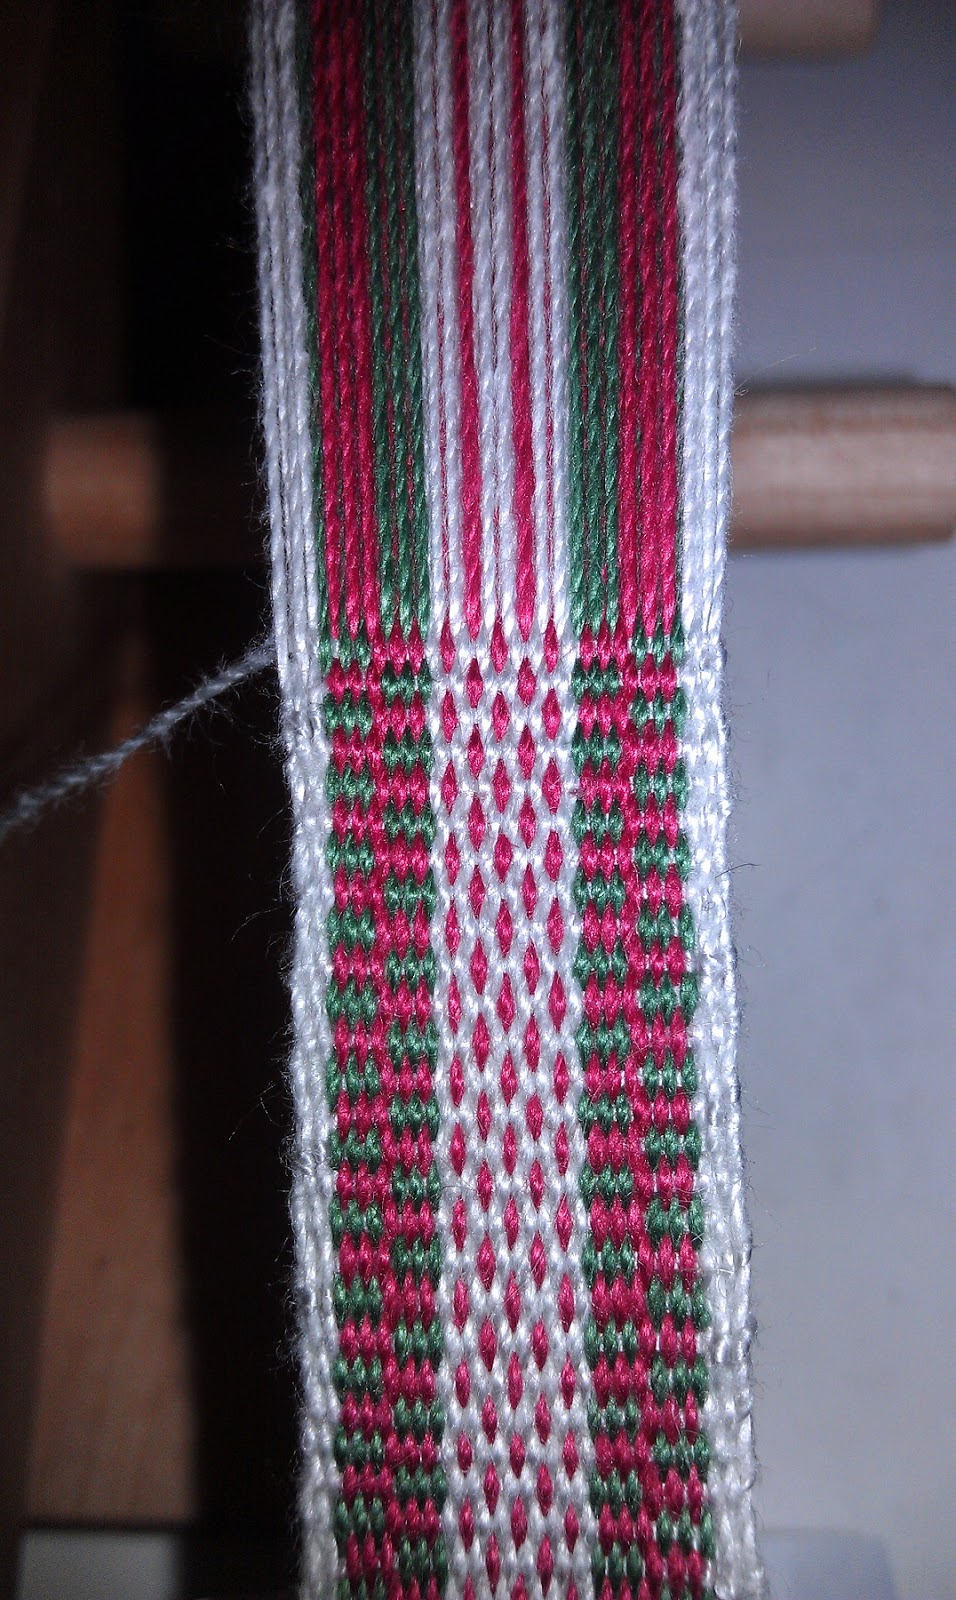
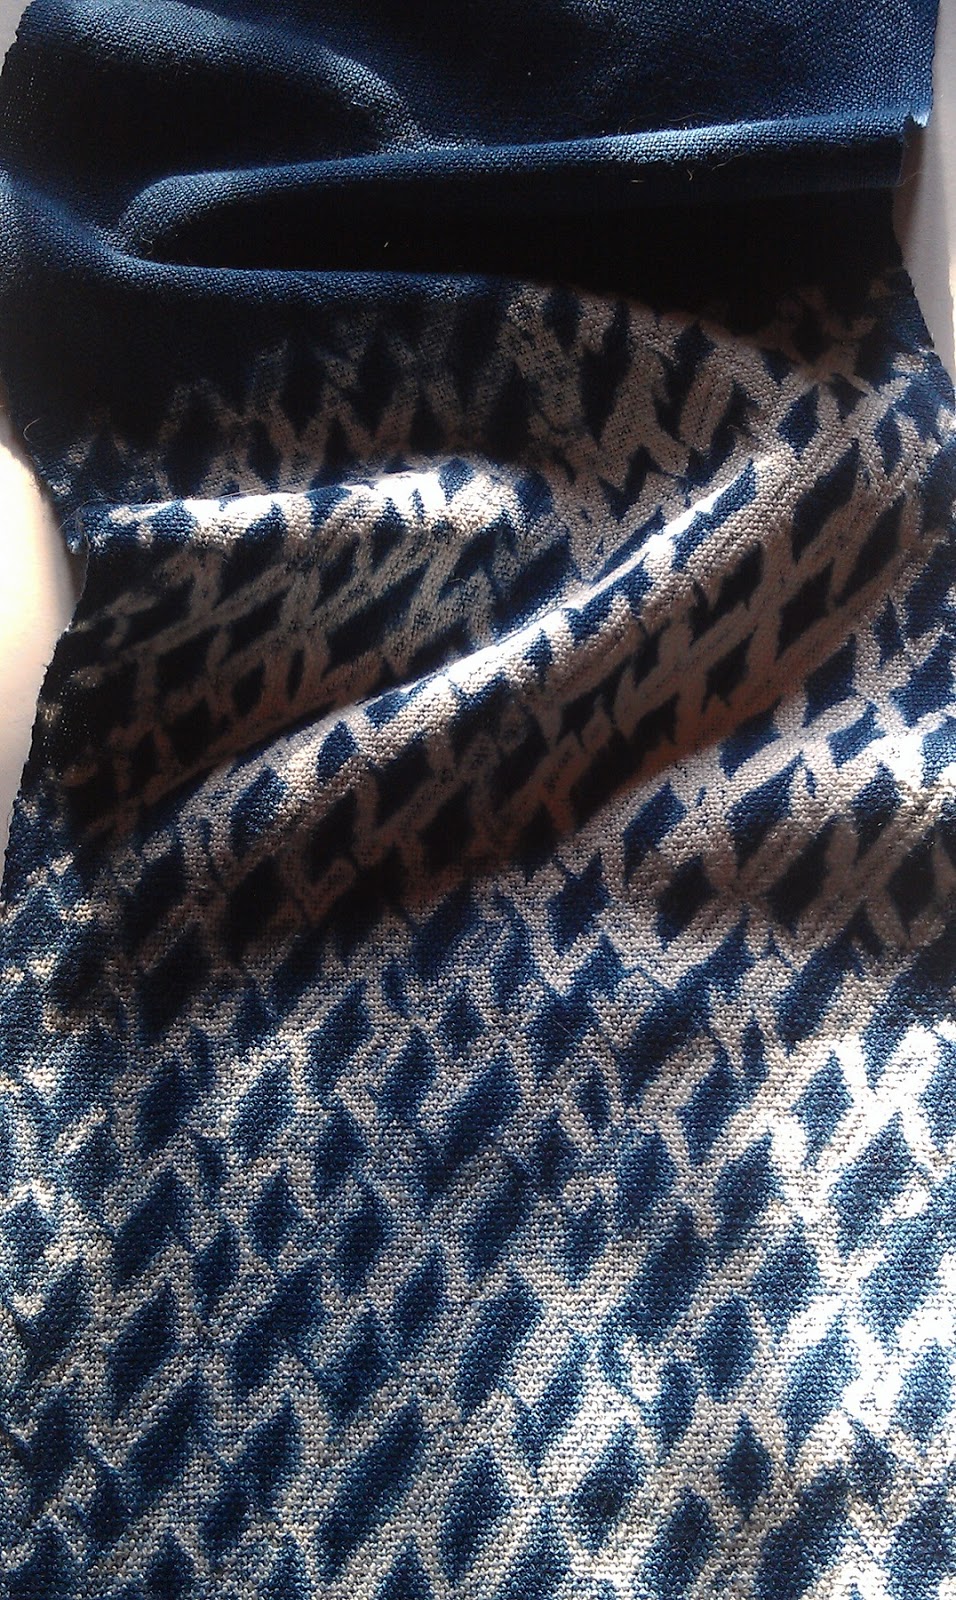
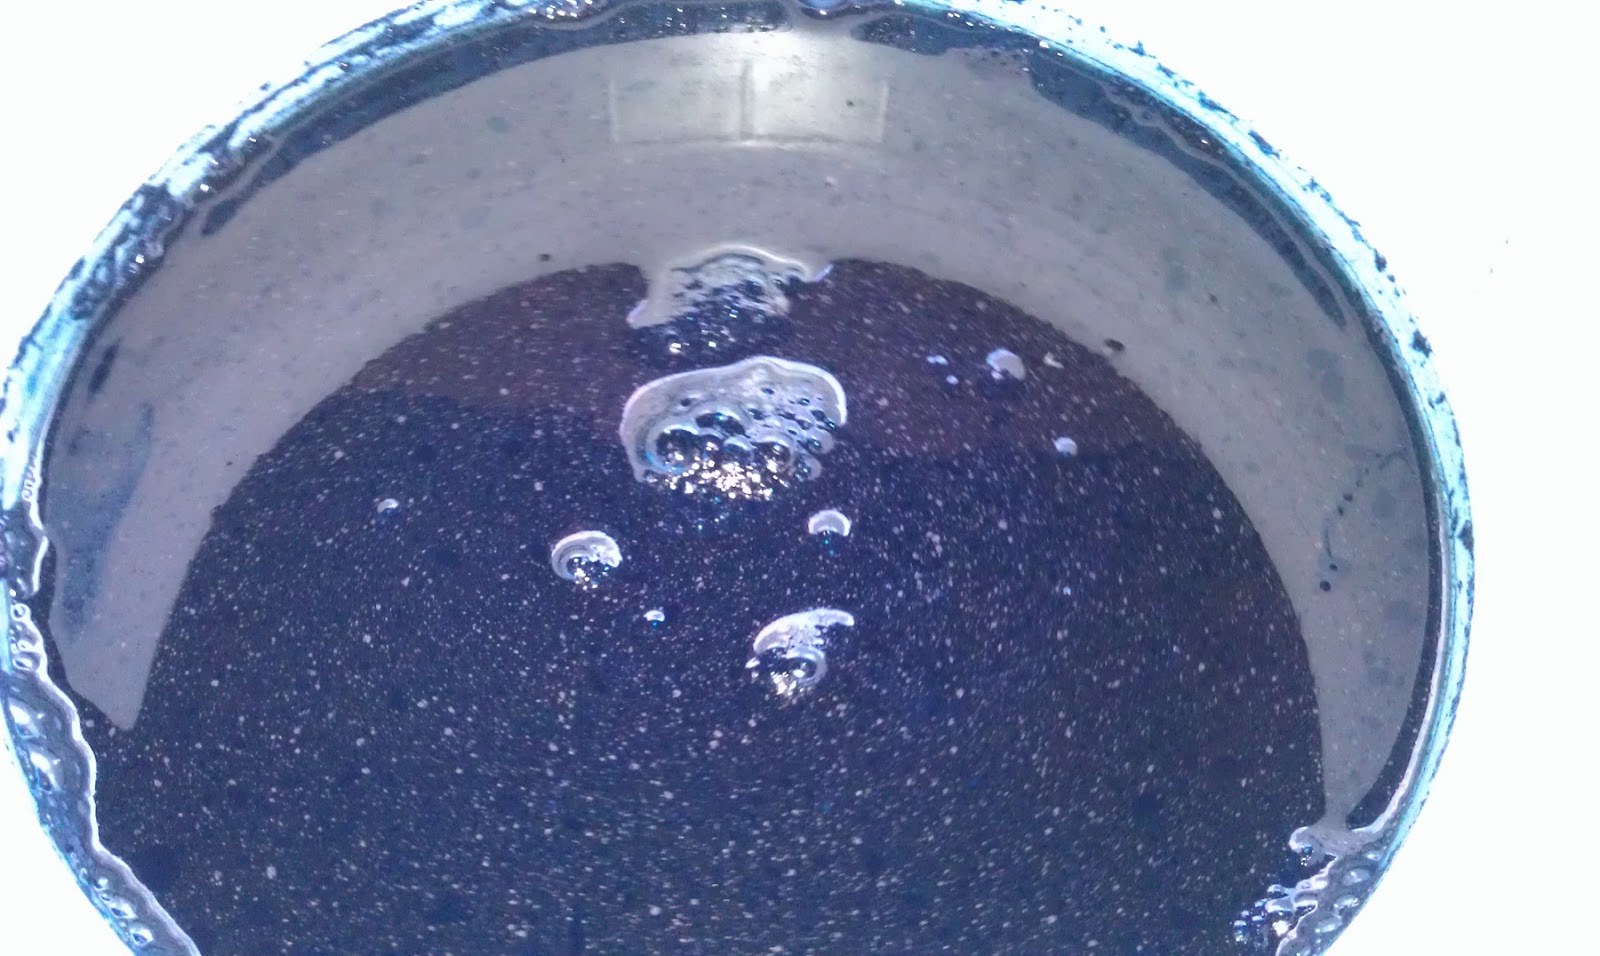
Four new woven shibori scarves were woven this past week for a small five artist/artisan show.  Using 16/2 Swedish cotton, 30 epi, advancing twill threading, freeform tie-up, each scarf was treadled differently.  Friday was a beautiful mostly sunny day, warm and a bit humid.  I set up on a table on the lakeside porch, and opened the dyepots to see how they were after weeks of very little use.  The original vat looked great, green though there were blue specks.  The vat with the lightest shade did not look good at all, and the smaller vat with a medium shade looked hopeful. 

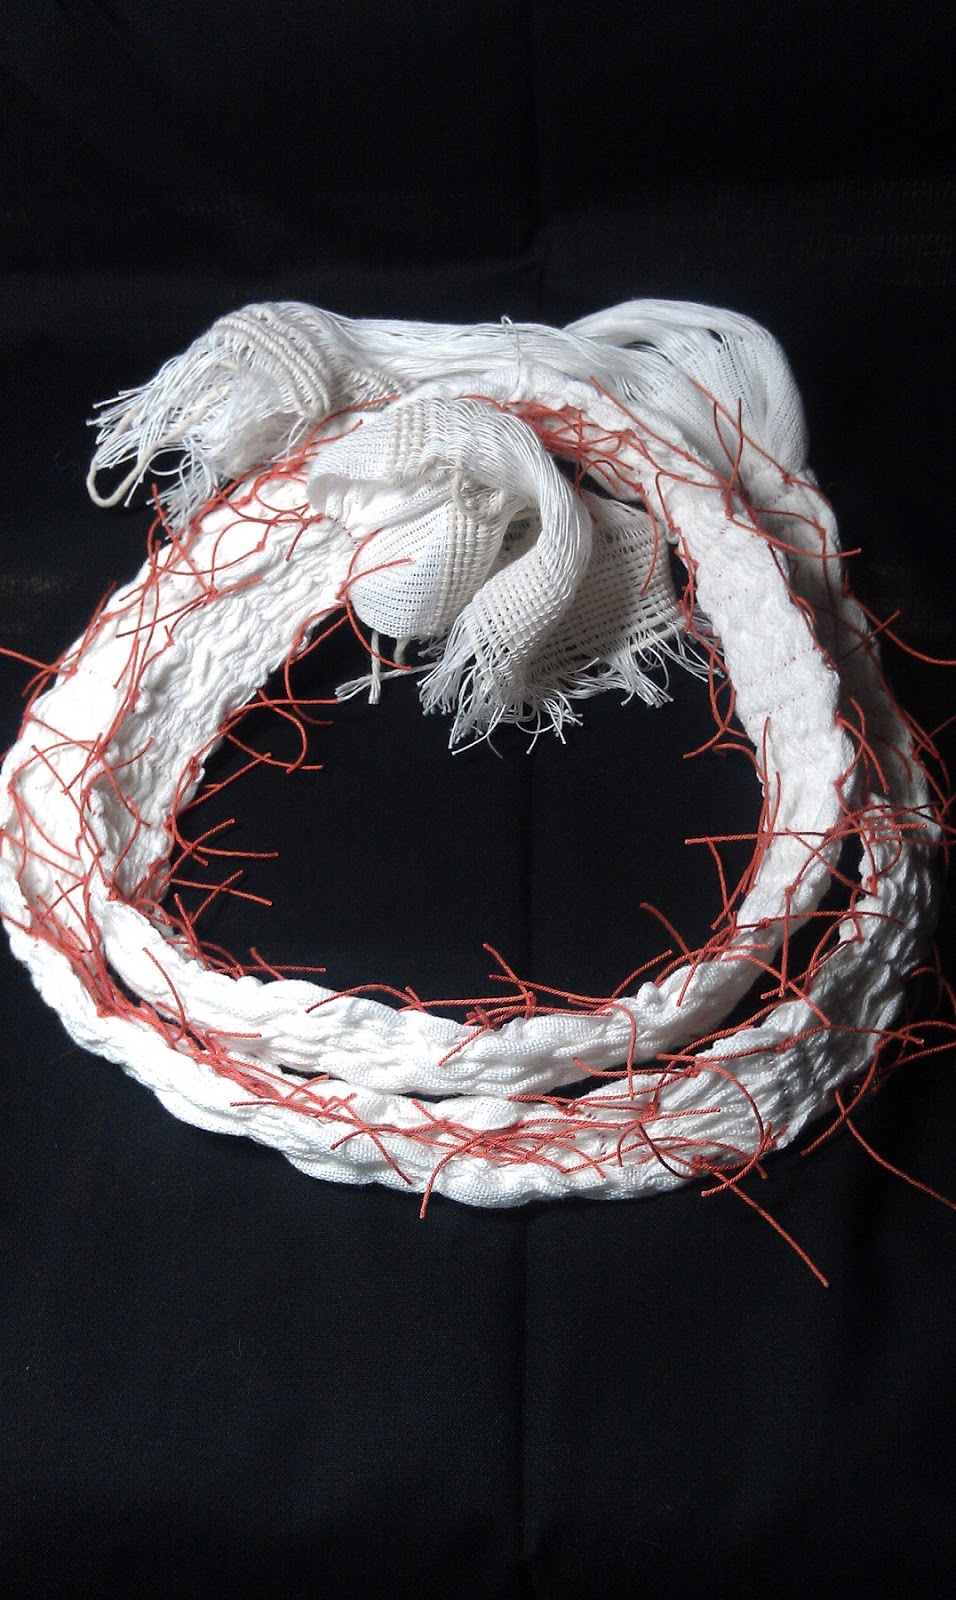
Four scarves, gathered and tied, soaking in water before dying.


I placed the four gathered and tied scarves in water and gave them time for the water to penetrate the folds.  Meanwhile, I got online to see what I would need to do to revive the vats.  Thiox was needed, so mixing a bit at a time, I added some to each.  Only the lightest vat didn’t seem to change no matter how much I added or how long I waited. 


Left, scarves hanging on rack to begin drying; right, fabric test pieces.


 tried fabric in each vat, to check how well it would dye as well as shade.  The original vat worked well, not as dark a color as the first time, but that was fine as I didn’t want that dark of a color.  Another vat gave a light shade by a bit uneven color, the medium vat was working better than the light.  Some fabric pieces were dipped a second time to give a bit darker shade.  Once I felt confident the dying would work, the scarves were dyed, a couple of them put in the dyebath a second time very briefly.  They were each rinsed in two large buckets of water, then left to dry on the porch, but because of the humidity weren’t drying.  Needing them finished the next day, I moved the rack to an upstairs bedroom, turned a box fan on and closed the door. 

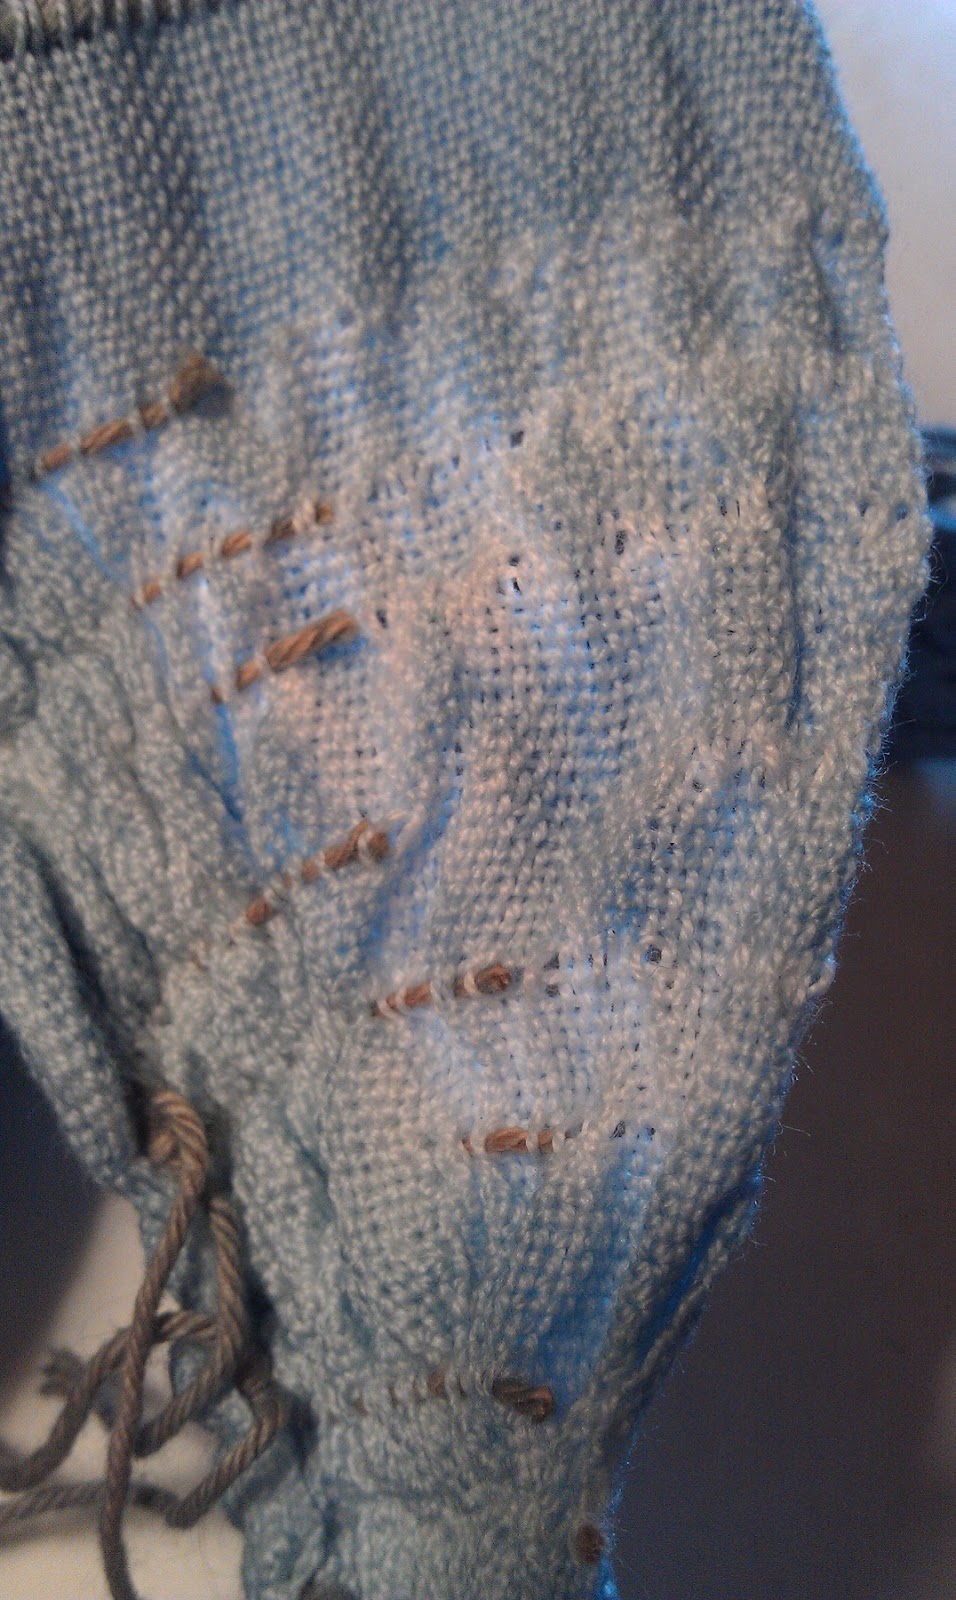
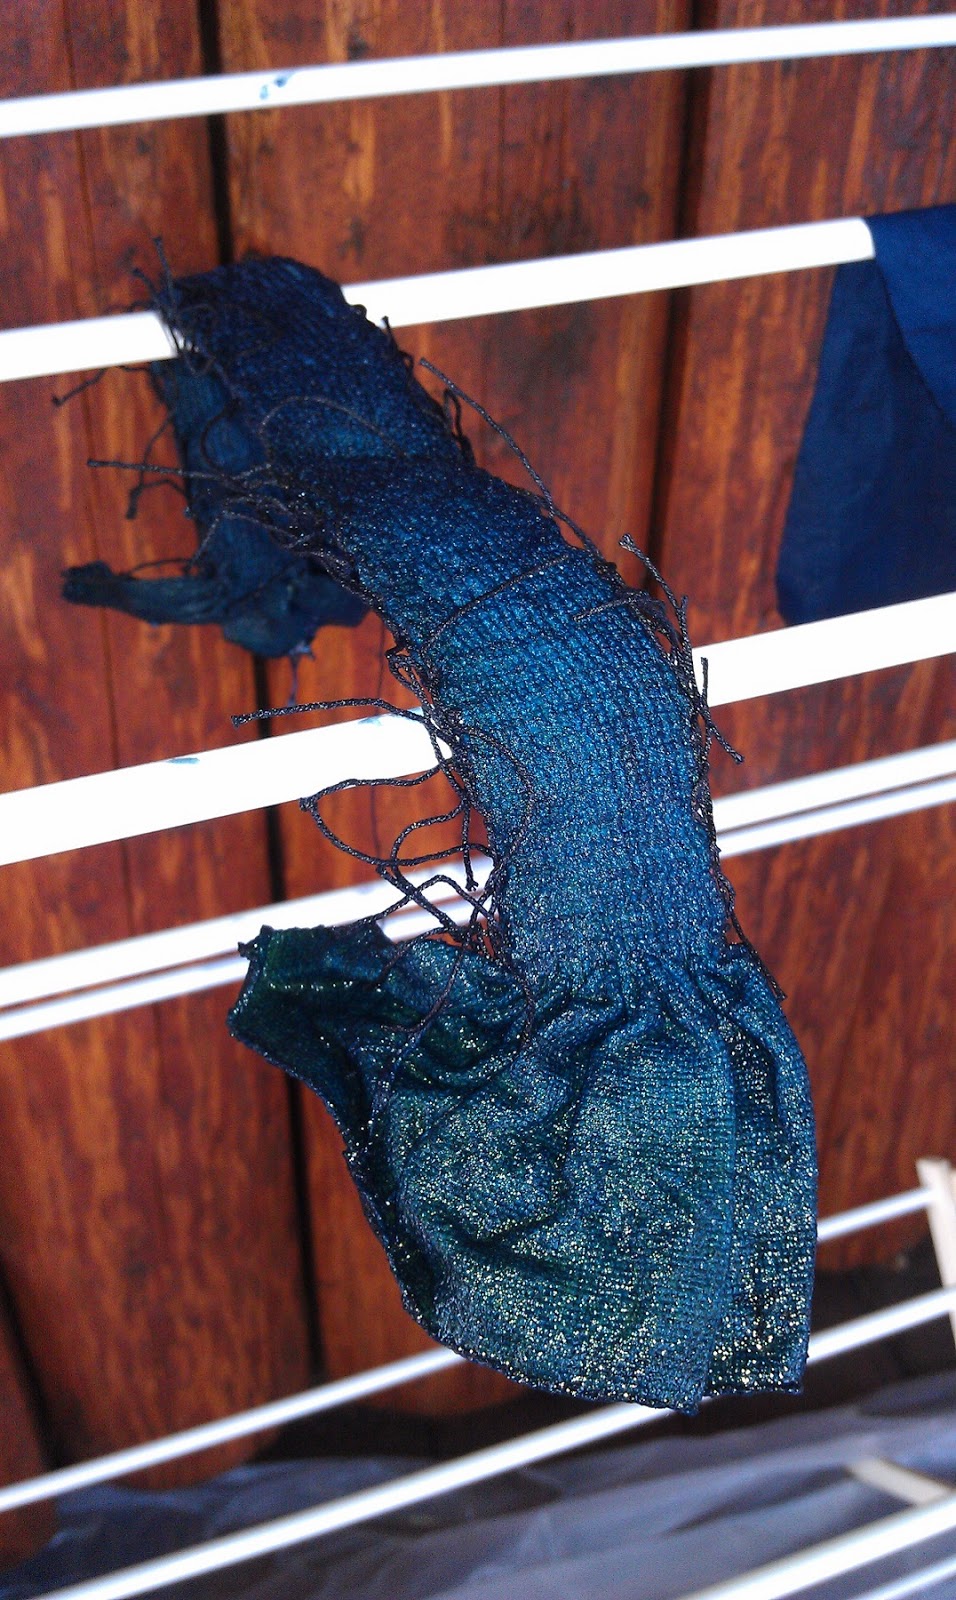
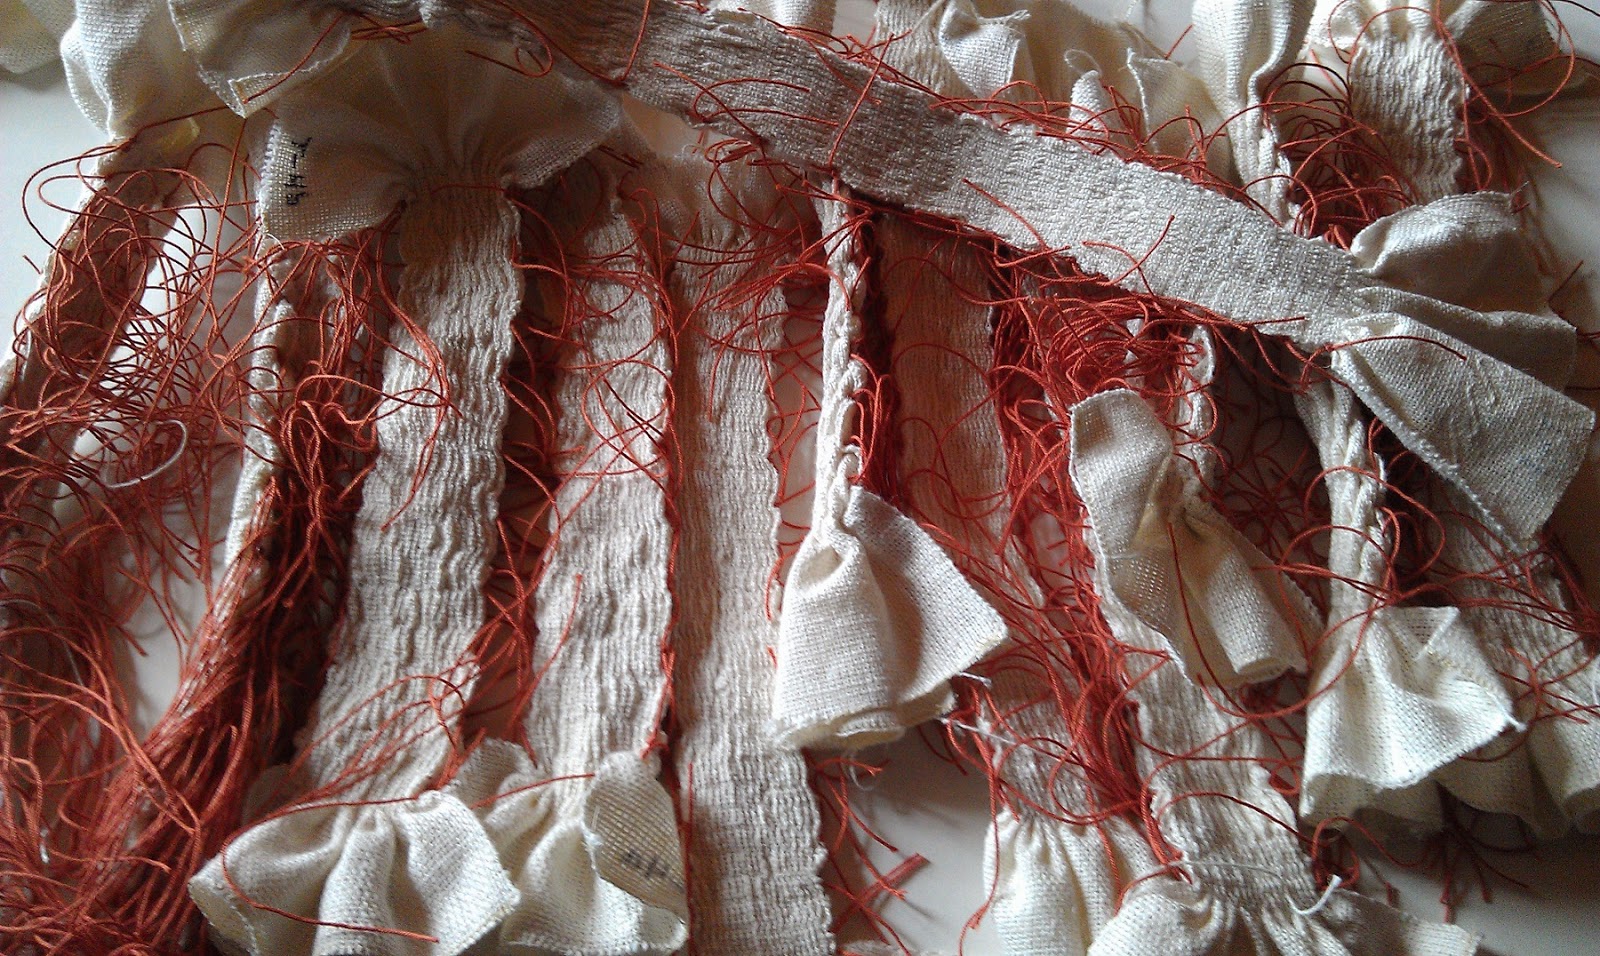
Beginning to remove pattern threads from the lightest color scarf.


Needing the scarves for Saturday, I started removing pattern threads as soon as they were partly dry.  I began with the lightest scarf, leaving the others to continue drying.  Removing the threads involves clipping the knots along one edge, sometimes a challenge when tightly knotted as you do not want to clip a warp or weft thread in the process.  My fear was having used 16/2 cotton, I might either cut a thread with scissors, or break a thread when pulling the pattern threads from the other side.  By the time I got to the last scarf, I discovered the threads pull out easier when dry (or nearly dry). 

On one scarf, I had mistakenly used a shuttle with seine twine which I had used on previous cottolin scarves.  For the next three I used a beige rug warp which though strong, was also a bit more difficult to tie tightly and hold a tight knot.  After clipping all the knots on one edge, I  turned the scarf around and began smoothing out the gathers to my left while holding the pattern thread with my right hand, approximately half the gathers, then go back to the top and start pulling the threads out, gently. 

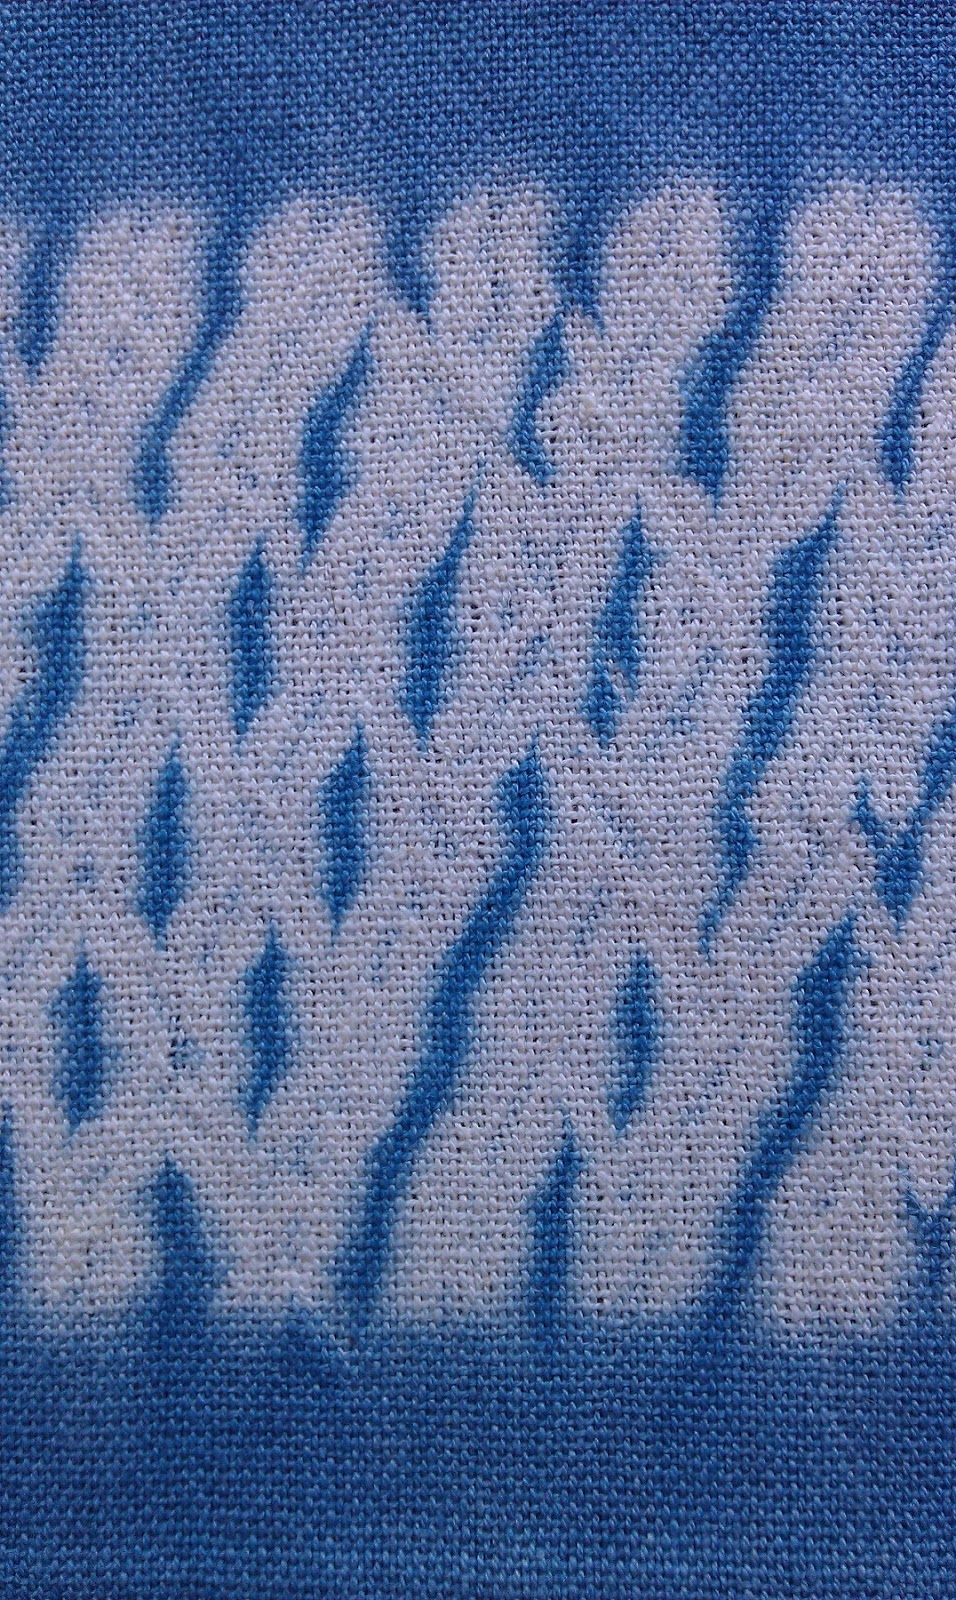
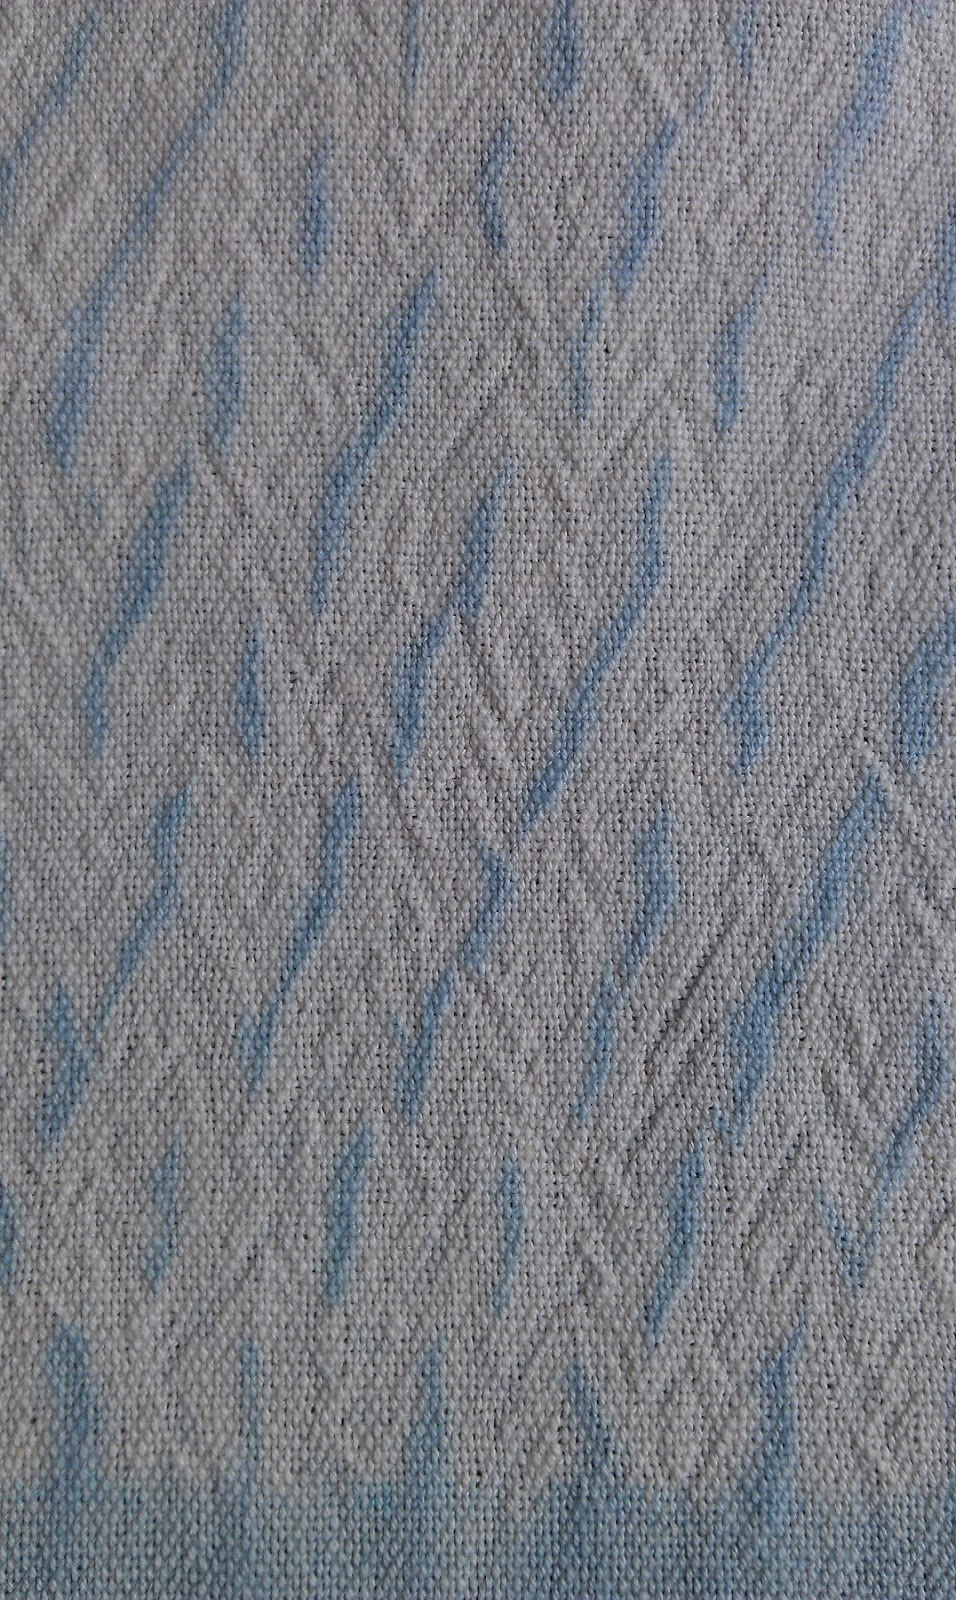
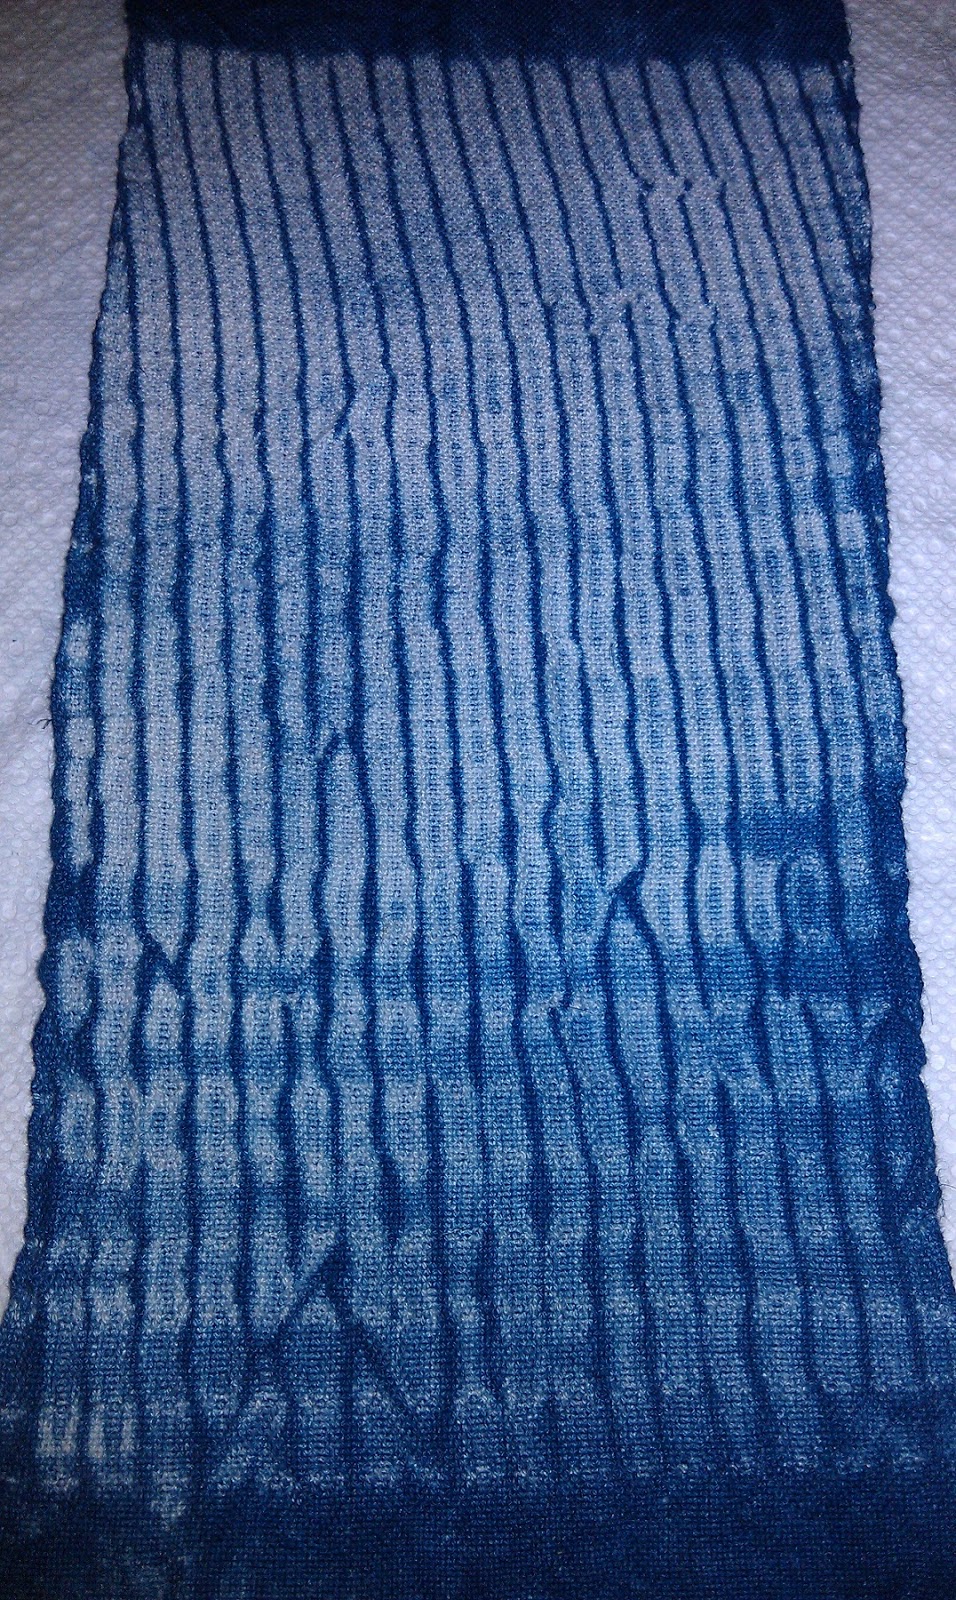
First, a crinkly look.

After the pattern threads are removed, the fabric is crinkly, really quite a nice effect, but they still needed pressing a couple of times, and twisting of fringe.

Were the first two rinses out on the porch enough?  NO!  There is indigo inside those folds that does not rinse out until the pieces are able to be opened.  So, downstairs to a sink where they were washed with mild soap, then rinsed repeatedly until the water was clear.  Then back up the drying rack and box fan to dry them again, prior to finishing.  They were pressed while still a bit damp, allowed to dry more, fringes twisted, and a final pressing.

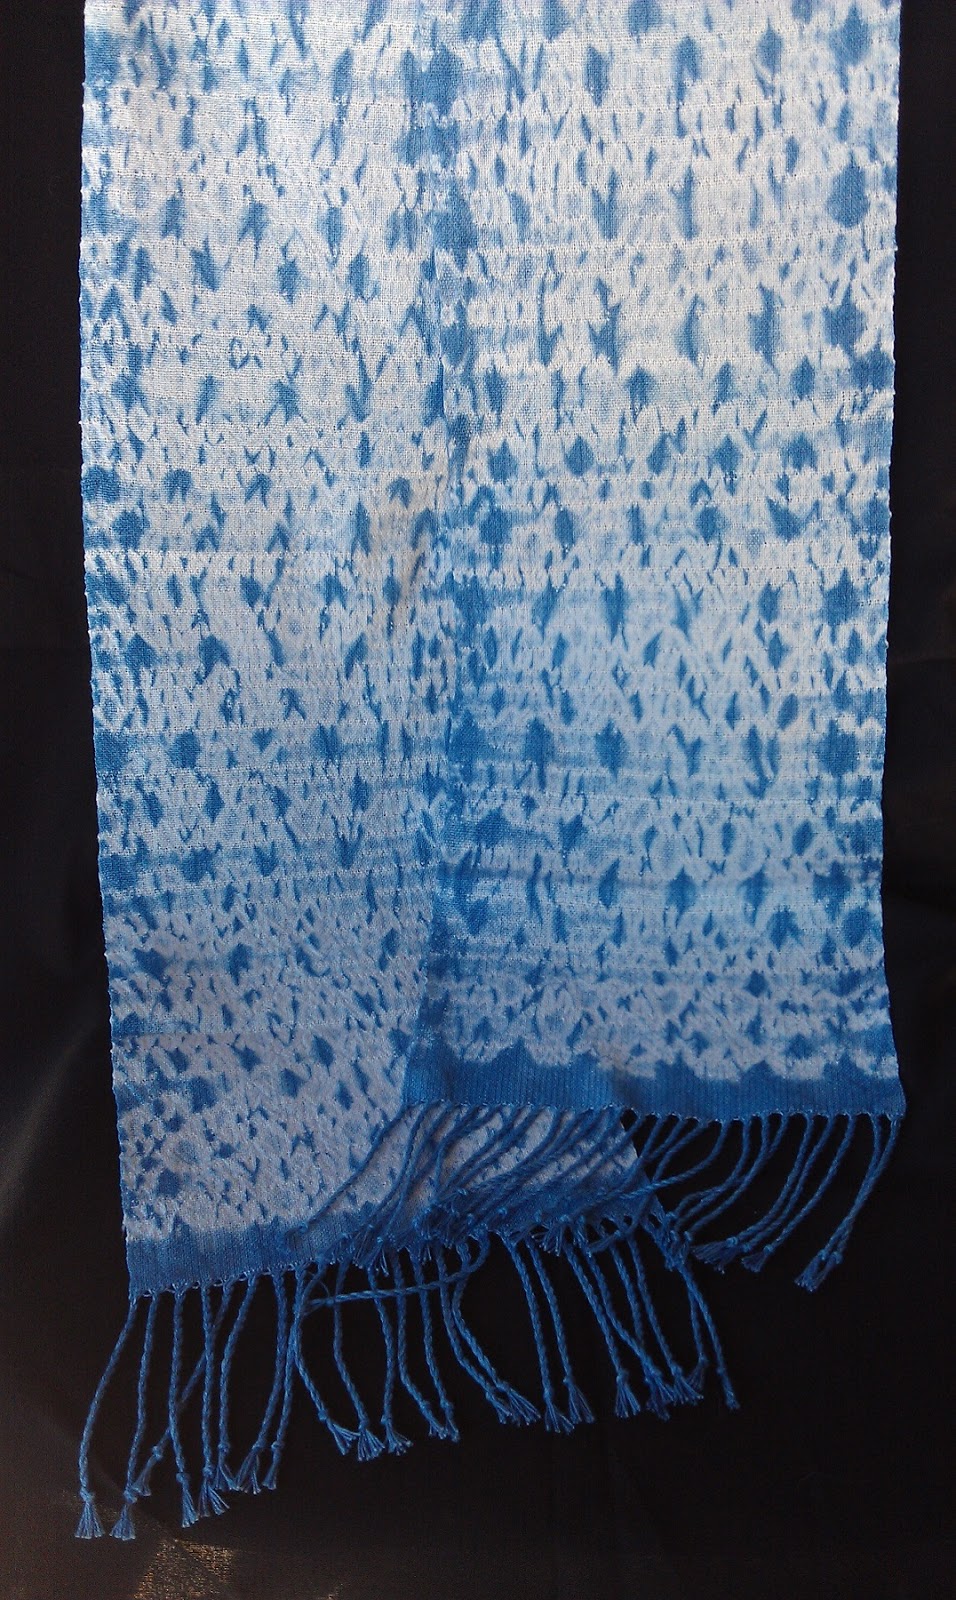
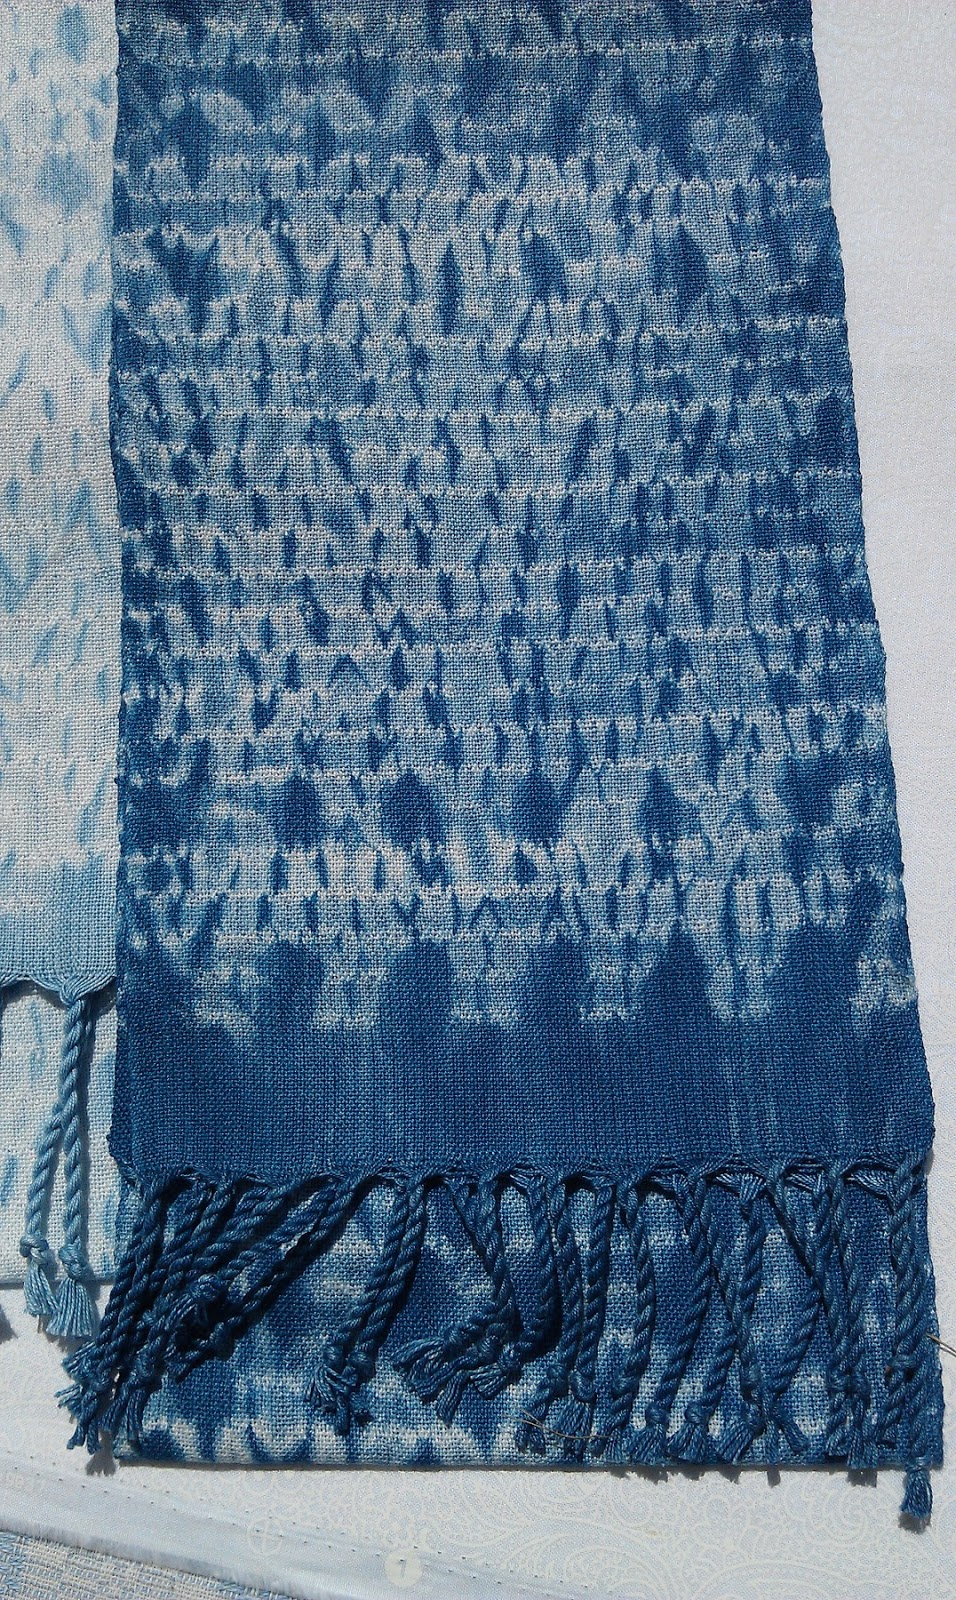
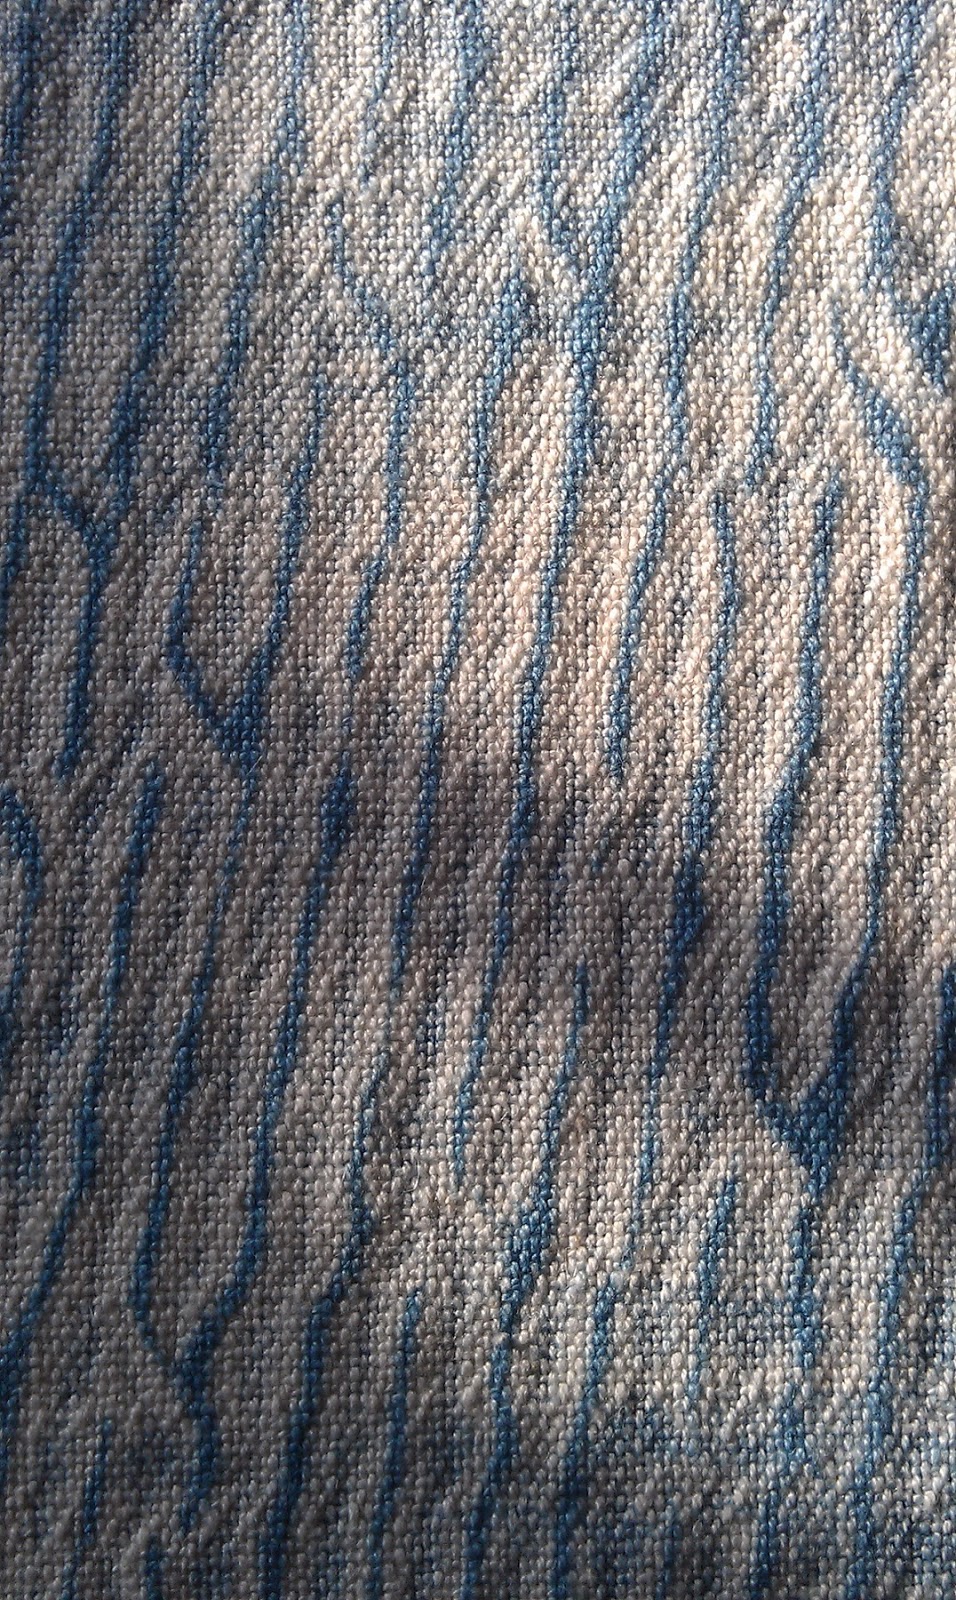
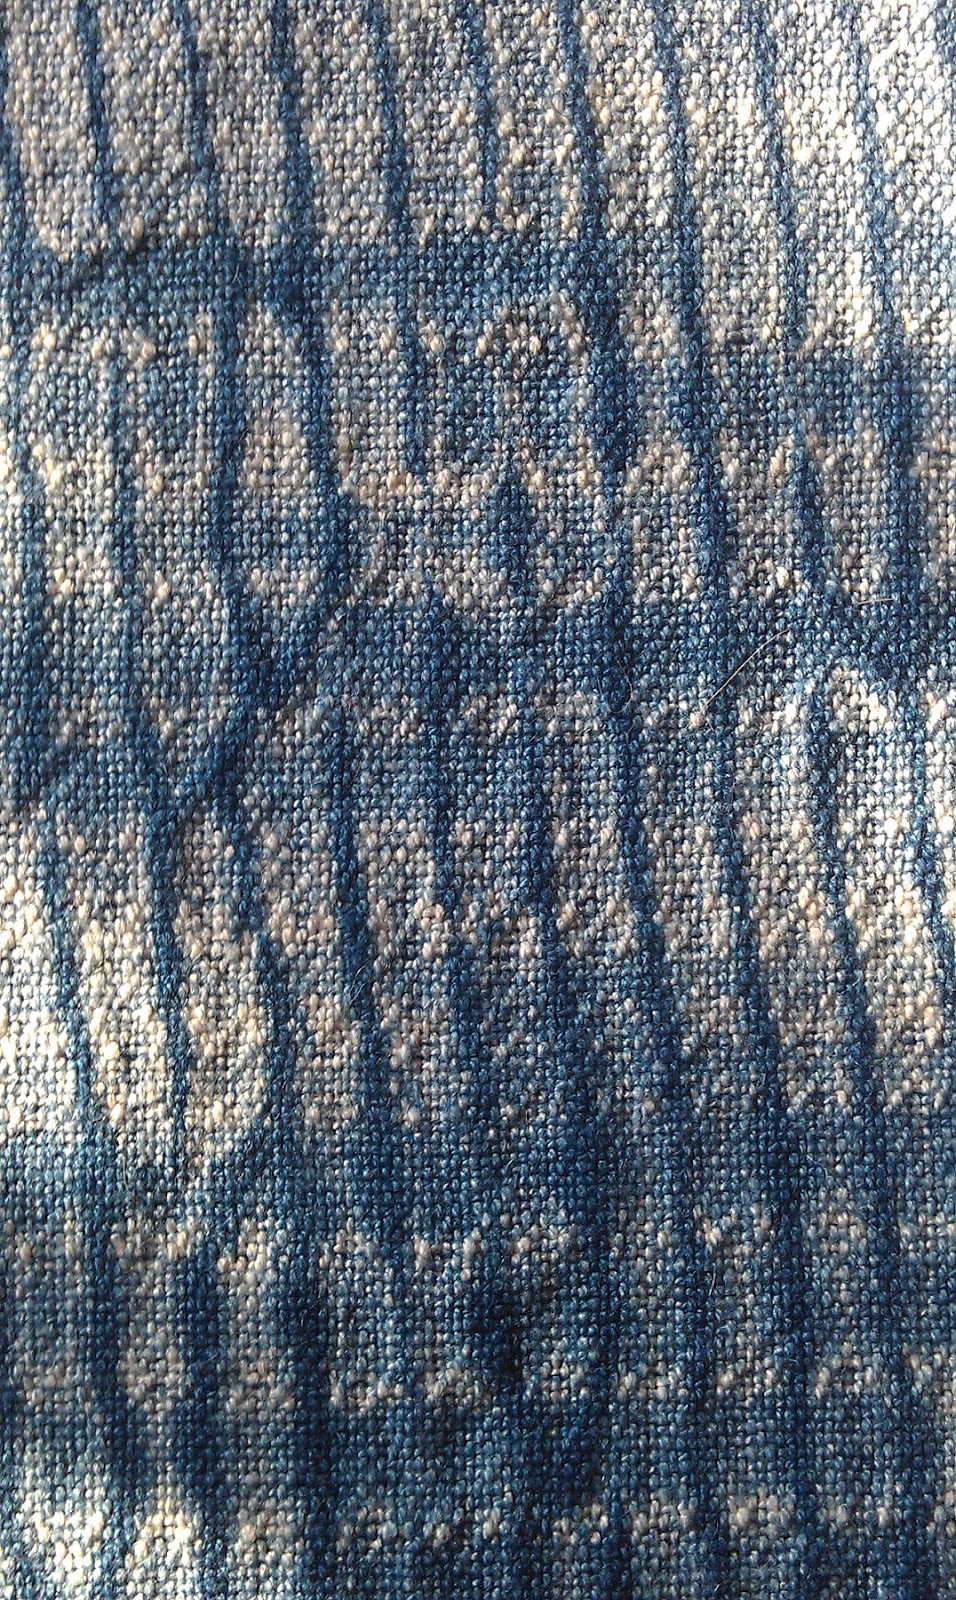
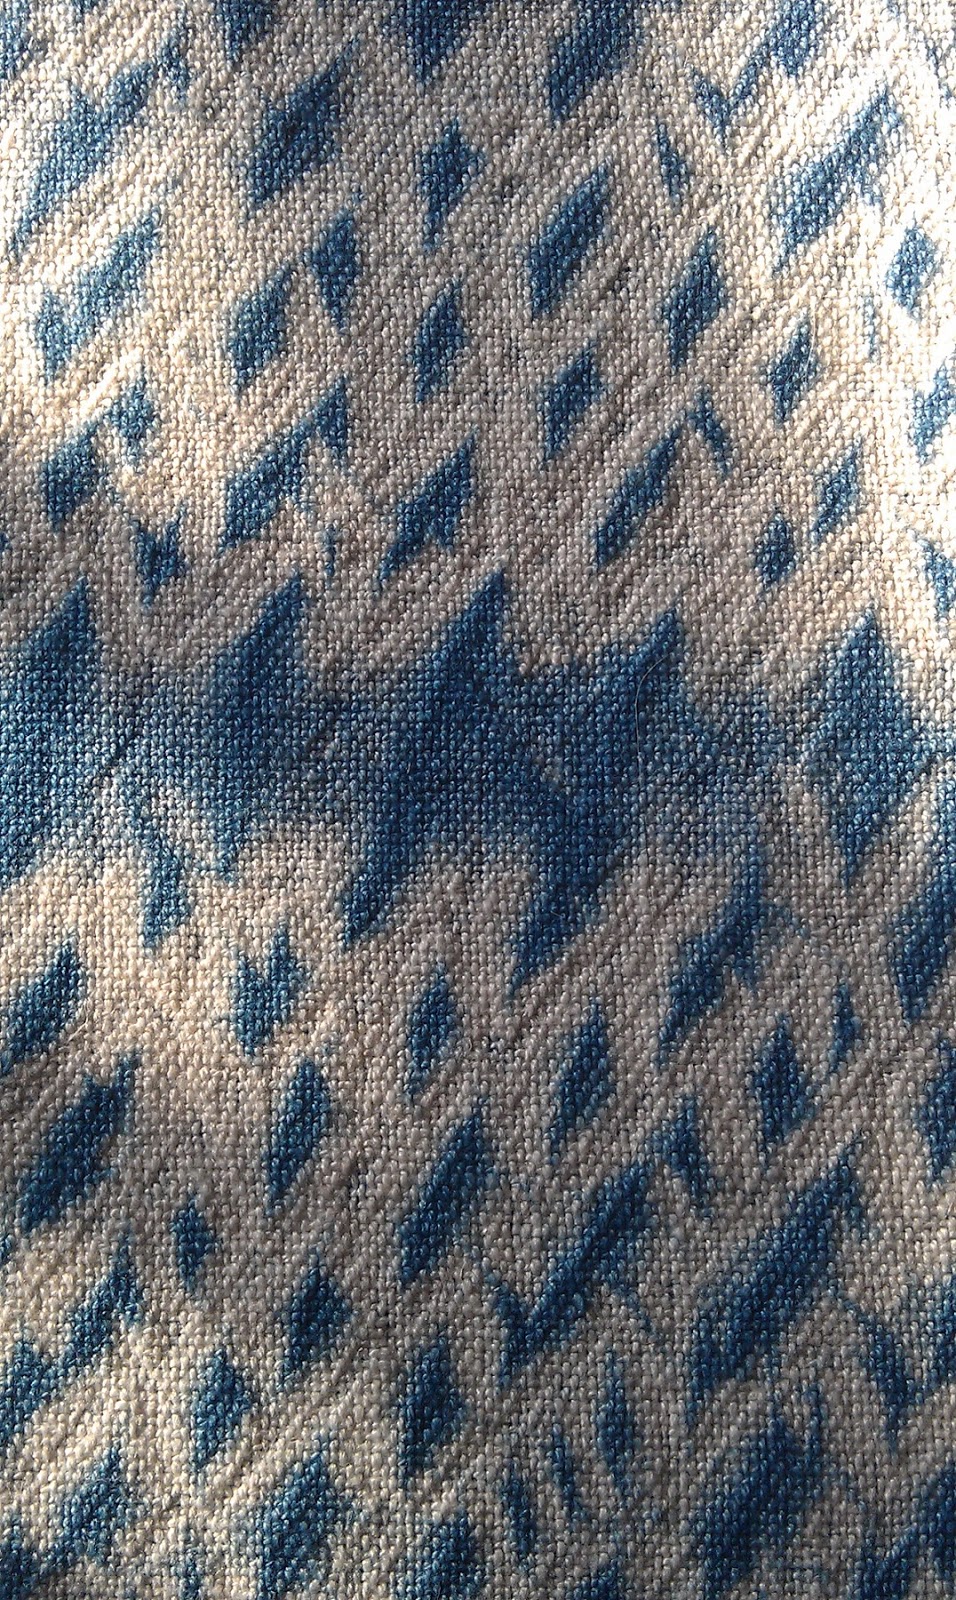
New scarves on Saturday, three of the four new scarves went to new homes!

I’m very pleased with the new finer threads scarves.  Did I mention this is very time-consuming?  For me, they are well worth it, and just need to take that into account in the future.

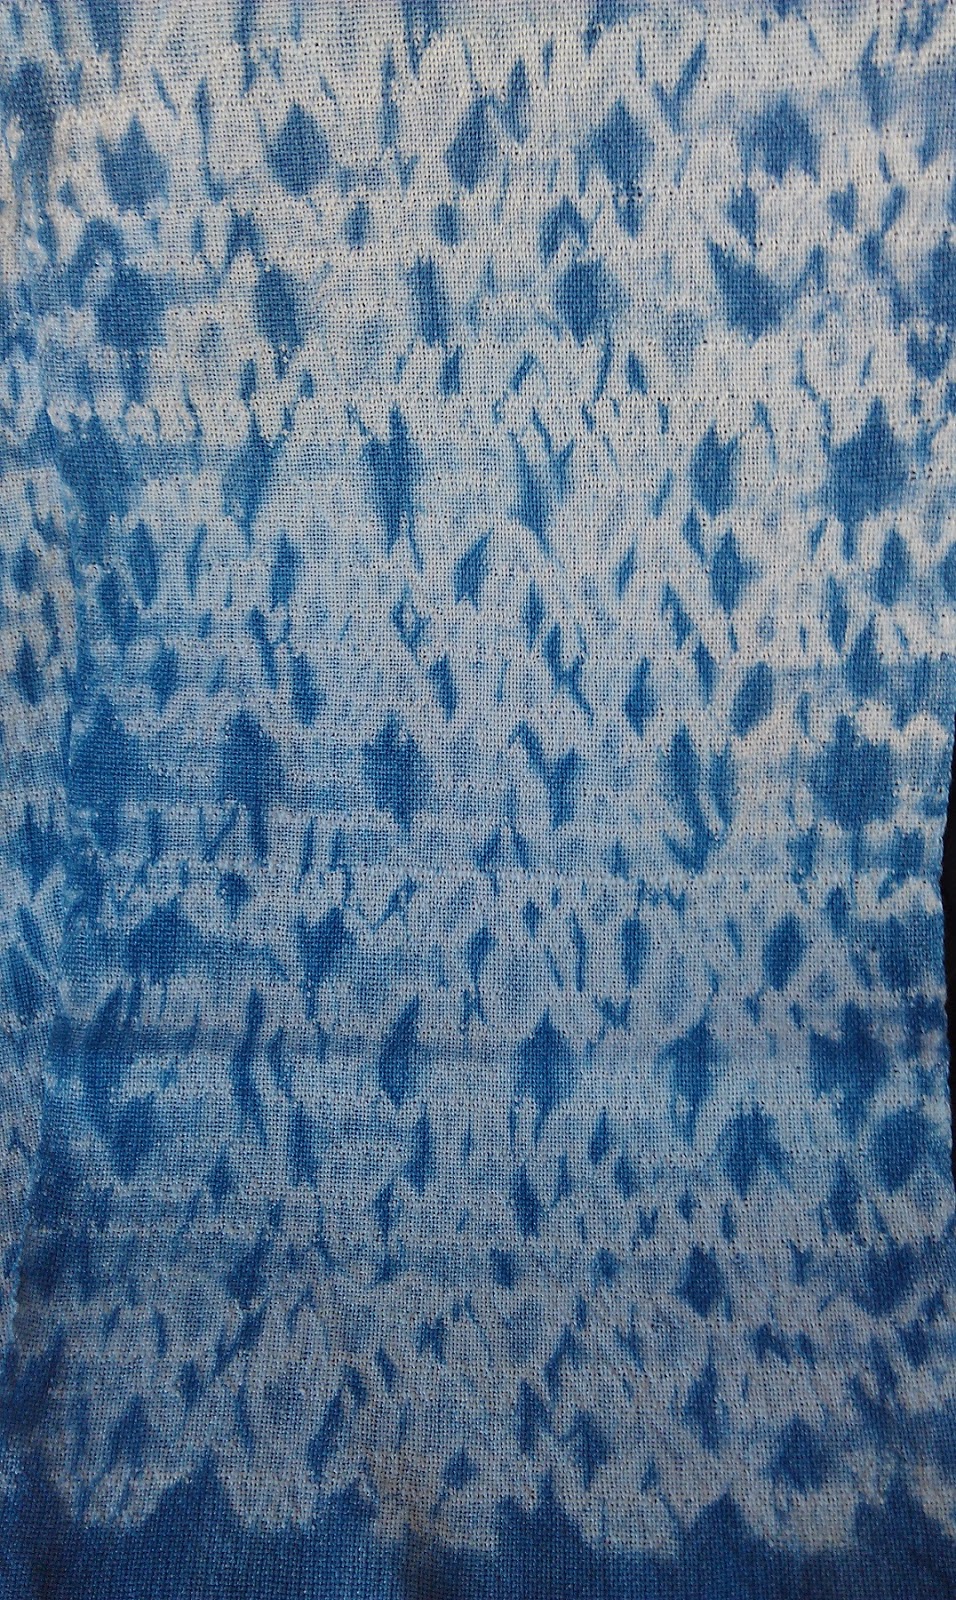
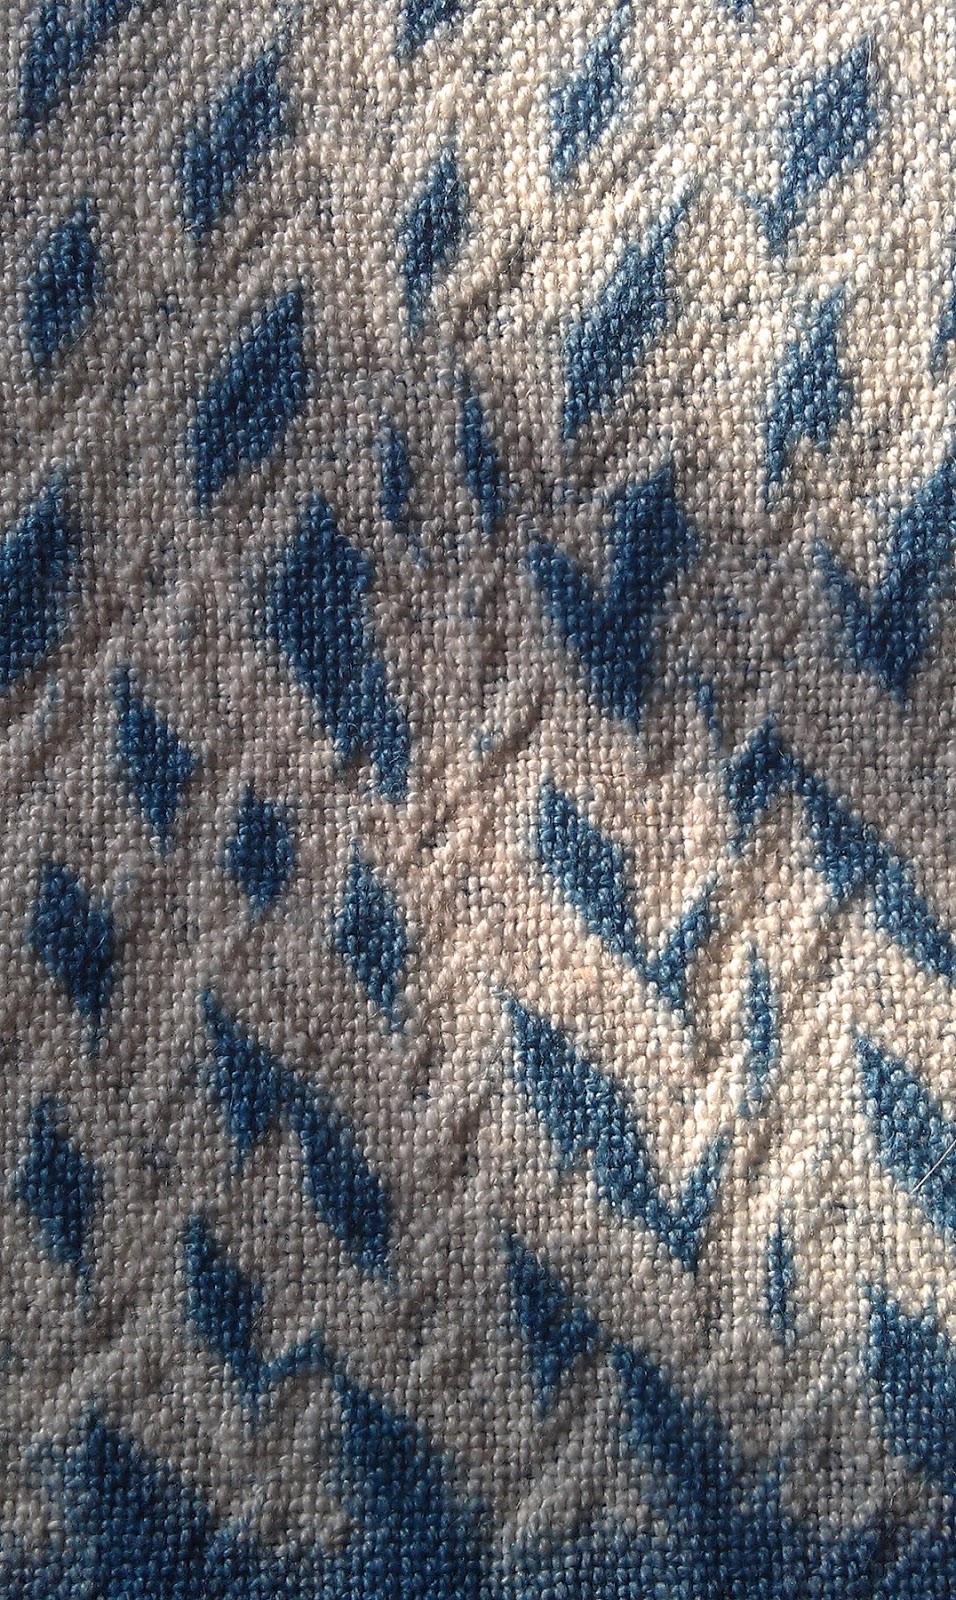
My favorite of the four!

Indigo dyed a medium+ shade, this was my favorite, and is one-of-a-kind since I treadled it randomly, and used random numbers of rows of tabby between the pattern rows, anywhere from 6-14 rows (tabby).  It was also the first scarf sold on Saturday.

It was a beautiful and fun day, I had a great time chatting with people, and was quite tired at the end of the day.  Deciding it was best to go home and rest, that is what I did, for about an hour, and then the phone rang,…

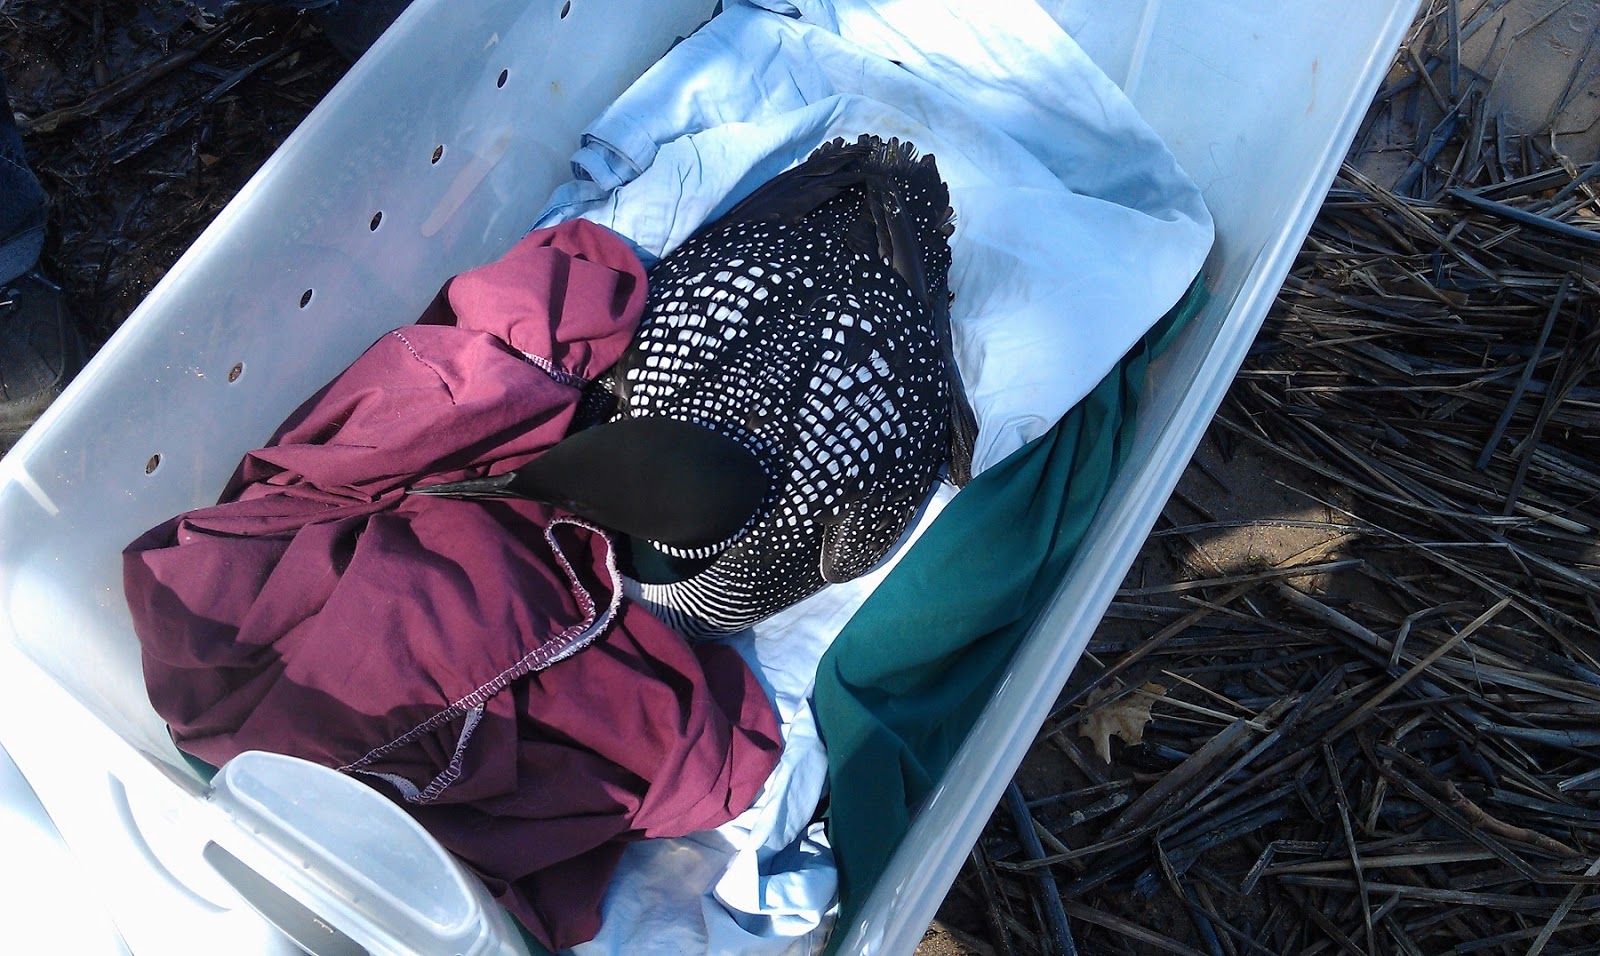
It was Wild Instincts, could I go out on an eagle rescue?  No one else was available and I was closer than the rehabber.  The eagle’s foot was in a beaver trap and it was on the ground under a tree.  If I couldn’t open the trap, just put the eagle with trap into my container and get it to the facility.  I agreed to go, moved the table from the back of my car and put my eagle bin and supply bag back in, and called to get specific directions.

I was given the specific location, and told someone would meet me at the gate.  However, the eagle was now 35+ feet in the air, the chain on the trap caught on a tree branch and the eagle hanging upside down.  Now, I’ll do a lot to try to catch an eagle or other critter, but climbing trees is not something I’m willing to do.  I immediately called the rehabber and said he would have to come and that I was on my way.  This is what I saw when I arrived…

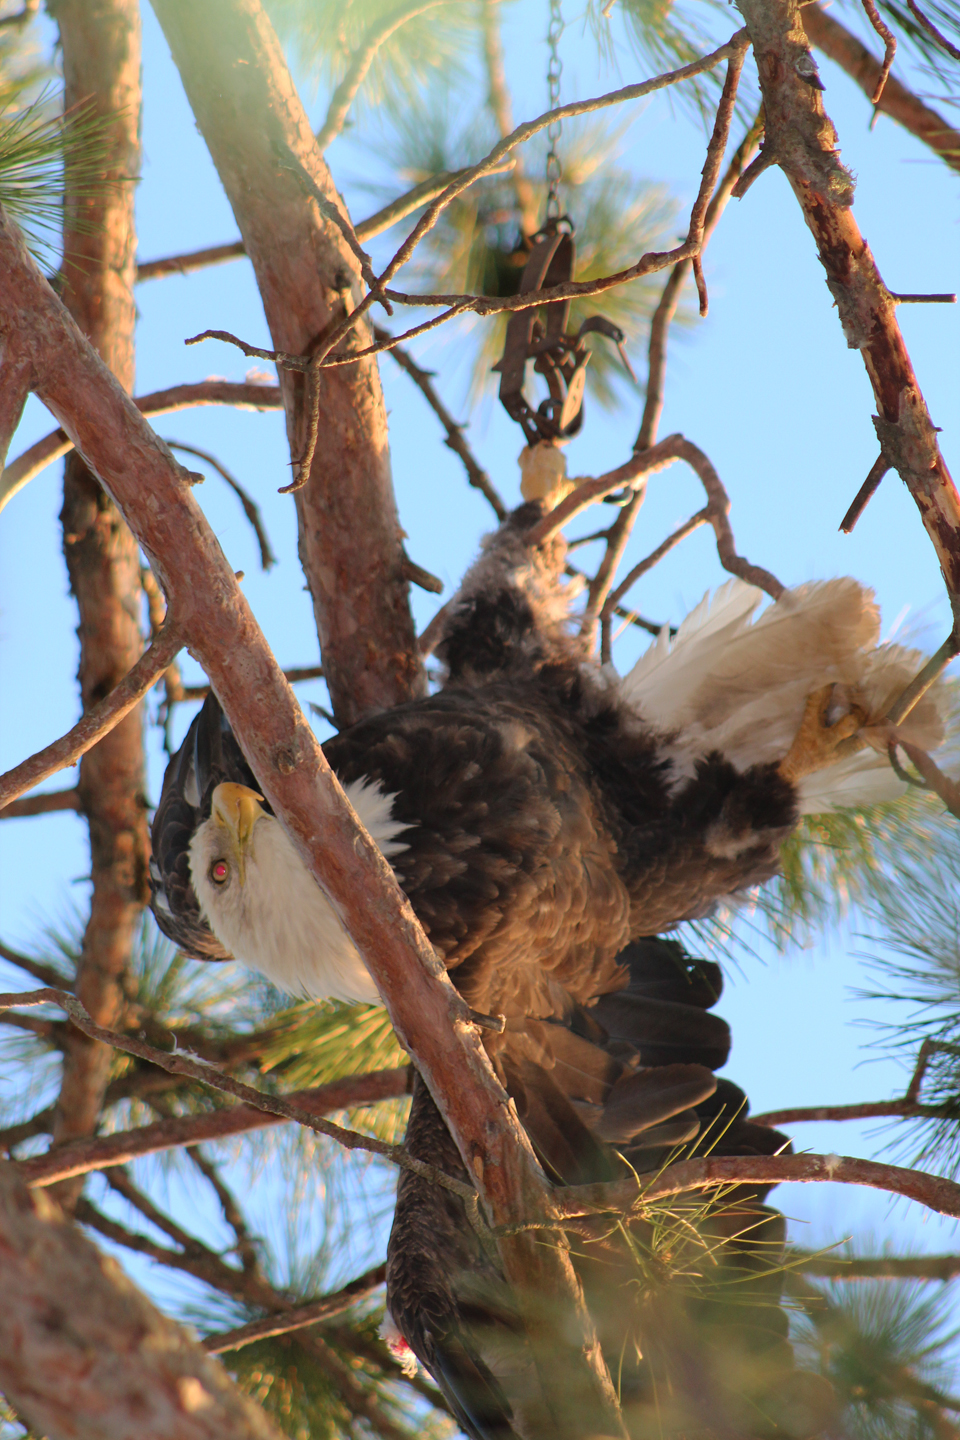
Bald eagle, hanging upside down, trap on its foot caught in a tree branch.

There were three or four men there, one up on a 24′ ladder trimming branches away so they could get a rope over and around the branch so it could be cut and the eagle lowered.  A fire chief also arrived to help provide advice and equipment.  The sun was setting and we were losing light.  The eagle was alert and watching, but also flapping whenever a branch was cut and dropping.  I said please don’t just drop the eagle because if it can fly, it will try to get away and with the trap still on will get tangled somewhere else and die because no one will know where it is. 

A bit blurry, but you can see he trap on its left leg, and chain going up that is tangled on a branch.

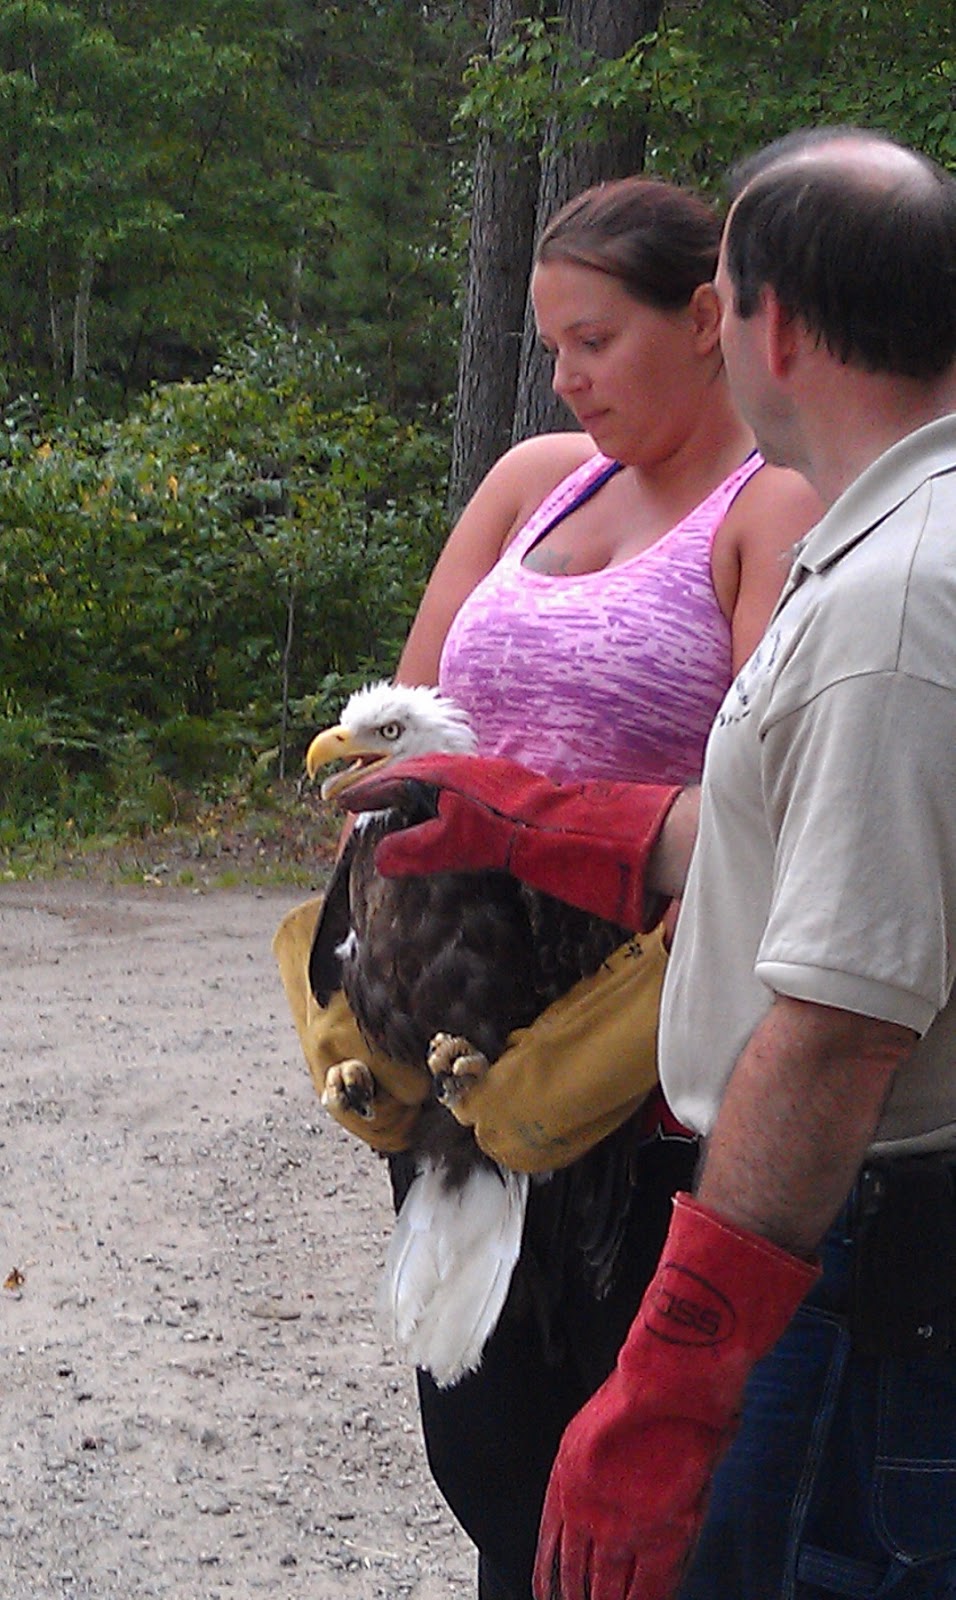
Mark arrived, provided another a small saw to use (instead of the long pruner).  I don’t know if the branch broke or or if it was cut and the rope didn’t hold it, but suddenly the eagle was dropping to the ground and it immediately headed for the lake which was a few feet away down a slope.  Mark Naniot was instantly down the slope and into the water with sheet and heavy gloves and came up with the eagle in his arms, its head covered.  I followed him to the road and heard “where’s Jan?”  “I’m coming,” as I pulled on my heavy gloves on so I could hold the eagles legs while Mark opened the trap.  He then took its legs, turned it over and placed it in the eagle bin, while I slowly slid the cover on so it couldn’t try to escape again.

I called this morning, Mark said the eagle is alive, though maggots were in the wound and they’ll know in a week or two if the toe that was caught in the trap will need to be amputated.  There were also lacerations on the wings from flapping against the tree branches, but none were serious.  Praying now the eagle will survive and be able to be released back into the wild.

Wild Instincts is a wildlife rehab facility about 4.5 miles outside of Rhinelander, WI.  Mark Naniot is a licensed wildlife rehabber, and he and his wife own and run the facility, with the assistance from late spring to fall by a number of interns who are learning and gaining experience with this work.  They have quite a number of transport drivers (willing to transport critters already contained), and rescue drivers, like myself, who will not only transport, but sometimes need to catch the wildlife before transporting.  I think this was the third evening this summer I was sent out for an eagle.

Wild Instincts has a high success rate and is a blessing to the WI Northwoods.  Check out their website, http://www.wildinstinctsrehab.com; their blog, http://wildinstincts.wordpress.com; and their Facebook page, they often post photos and video.  They are supported entirely by memberships and donations.

Today I gave myself a day to rest, some computer time, time to read, a nap, lots of rest.  Tomorrow, I need to call and order more 16/2 Swedish cotton warp, there is a warp to finish weaving off, and it’s time to begin making socks again, and an evening guild meeting.  And you never know when the phone will ring, you look at it and see the words “Wild Instincts!”  

Scarves are Coming!

Swedish cotton warp.


I started a new warp yesterday, 16/2 Swedish cotton, 30 epi, 3 threads per dent in a 10 dent reed, and weaving not quite 30 ppi.  The threading is an advancing twill on 8 shafts, with a “freeform” tie-up.  I’m really looking forward to seeing the results after dyeing.  This is a new group of woven shibori scarves I hope to have done and at a sale this coming Saturday. 

Scarf #1.

Scarf #1 was treadled the same as the threading,… 1-2-3-4-5; 2-3-4-5-6; 3-4-5-6-7; 4-5-6-7-8, and so on.  To help me keep track I put a little tie thread on after each two groups, and had a notecard I was checking them off on.  I leave small loops on each side to make it easy to hold onto for gathering and tying.  Those threads are then trimmed to approxi-mately 1.5″ before dyeing.  As I was taking this scarf off the loom, I immediately noticed what a fine hand and drape the cotton has.

Gathered, tied, ready for the indigo dyepot.


I like to start in the center, pulling on a couple loops at a time to begin the gathering, working my way to the end, then the other half.  Then I go back and start clipping a few loops at a time, gather again, and tie a tight square knot.  When one side is done, I repeat the process on the other side, making sure the gathers are as tight as I can get them, then knotted.  With this warp, I’m having to be careful because of the finer warp threads.  (During an edit, Blogger has added spaces between lines that it will not let me remove.)

When I started weaving I wasn’t thinking about the harshness of seine twine on the fine warp so as you can see, that is what I used on this first scarf.  No threads broken yet, and it is ready to be soaked, water squeezed out, and immersion into the dyepot.  Now the question is, will I be able to remove those pattern threads without breaking any of the warp threads,… we will see.


Scarf #2.

I was thinking about the issue of what to use for the pattern threads this morning, needing something strong, that won’t break during the gathering/knotting, but not abrasive on the warp threads.  Recalling reading rug warp as an option, also suggested to me by tapestry weaver Janet Austin, I found a bag with partial tubes of rug warp, filled a bobbin, and started weaving Scarf #2.  The treadling on this one is simpler, 1-3-5-7; 2-4-6-8.  Repeat.  I’m again adding my little counting thread on the side and have a notecard in the basket hanging on my loom bench.  And I never walk away without completing a repeat.

The warp was somewhere around 10-12 yards or so, so I’d better get back to my loom, finish this scarf, and hopefully get another scarf half woven yet tonight.  Later, I’ll do the gather-tie work on Scarf #2, preferring that to leaving them to do all at once.

I plan to be dipping these into indigo dyepots Wednesday afternoon followed by a lot of rinsing, washing, more rinsing and hanging to dry.  Then fringes need to be twisted.

It’s a busy week, having been procrastinating, but I’m enjoying it all immensely.  The WI Northwoods has been having early autumn weather since late July.  It is cool, sunny, a few clouds here and there, breezy, and with windows open, really perfect weaving weather!

Check back this weekend to see how the scarves turn out!

A Little Distraction

Ashford Inklette loom.


I am supposed to be hard at work, weaving and indigo dyeing “woven shibori” scarves, yet somehow I let myself be distracted the past month, perhaps I needed to do something different while my subconscious worked at understanding the new weaving and dyeing I was doing.  This week, it was the little Ashford Inklette that suddenly needed to be warped, and so it was, with red, green, and silver 10/2 Valley perle cotton from WEBS.  I’d made the heddles from seine twine which just happened to be handy and was a mistake,… it’s a bit too thick, and tends to wear on the perle cotton.  With the next warp, the heddles will be replaced with rug warp heddles.


First attempt at inkle weaving!


I’d started with just a short warp to get the hang of warping this little loom, and as I began weaving, was not happy with my selvedges.  A contributing factor was a tension issue with the outer threads on each side, and since I’d never seen anyone weaving on an inkle loom, my technique was a little iffy.  Asking for advice on a Facebook inkle weaving list, I was directed to a YouTube video which did help.  Of course, a lot of practice at the inklette, inkle, and band looms will help a lot, too.


Monograph by Daryl Ebeling Lancaster.


I was using the above monograph, available from a link at http://weaversew/wordblog/, written and published by Daryl Ebeling Lancaster.  She has monographs on beginning and advanced inkle weaving (among others), and I believe I’d ordered the combination version with both beginning and advanced monographs together in one spiral-bound book.  Her directions and photos are very clear and understandable.  A fellow guild member had recommended this monograph to me, and I’m very happy she did!

I’m already thinking it might be fun to skein up some white cotton (or silk?), dye it shades of indigo, to warp and weave with on an inkle or band loom.


“Moraband” by Barbro Wallin (in Swedish).


Several weeks back I’d called VavStuga (http://vavstuga.com), and ordered “Moraband,” a lovely book and treasure of Swedish band weaving patterns.


Band weaving books by Susan J. Foulkes


Recently, I’d seen mention again of a book titled “Sami band weaving,” and this time not only ordered it but also ordered another book “Woven bands from Sweden,” both by the same author, Susan J. Foulkes (of the U.K.), and self-published via Blurb.  They are small books, colorful, and a treasure of motifs/patterns for band weaving.

I really enjoyed my first inkle loom weaving, it went quickly, and was a pleasant late evening activity before retiring for the day.  The band is ready to be cut off, and I’m deciding colors and pattern for the next one.

Meanwhile, I am back at work on woven shibori scarves, and will be back out on the lakeside porch with my indigo dyepots sometime this week.  New photos will be here in a week or so, and a new warp will be beamed for the next scarves. 

Other studio news,… I don’t know why, but gmail drops emails from http://moo.com into the spam file.  It’s a good thing I found it two nights ago, they have a 30% off sale that ends tonight, July 13th.  I spent my evening uploading images of woven shibori to moo.com for new business cards as well as for stickers (image and contact info) to put on the brown bags I use for customer’s purchases.  After that was done, I suddenly decided to do another order, this time for business cards with sock images for the sock customers, and another sticker with a studio image/contact info.  They’ll arrive later in July, and are needed for two small art shows in August and October.

The Art Gypsies “Garden Party” art show is Sat., Aug. 17th, in Land O’Lakes, WI at Fir Tree Cottage where I’ll have woven shibori scarves.  On Sat., Oct. 5th, Mary Jackl and I will be at the U.C.C. Church during CranberryFest weekend.  I’ll have woven shibori scarves and wool socks, and Mary will have her rag rugs, skeins of handspun beaded yarn, and handknit/felted hats and slippers.  If you are in the area for either of these, I hope you’ll stop by and say Hi!

It’s time to get some rest, tomorrow is a busy day cleaning and moving furniture.  My younger daughter is coming to take a bedroom set (yay!!!) on Sunday.  After that, I’ll be dividing my time between studio, and cleaning out and doing work on my home.  I’m in the mood to get a lot done and get this house on the market.  I think I’m finally ready to leave this place and move forward.  It’s going to be an adventure!

Learning Curve Continues


Woven Shibori scarf, dyed June 8, 2013.


In early June two more scarves on an 8 shaft Monk’s Belt threading were woven, along with a sample of each treadling.  This past Saturday, the scarves and samples were indigo dyed in “watered down” indigo vats, attempting to achieve lighter shades. 

The scarf above came out light/medium shade; the matching sample (below) was dipped in the vat twice to get a bit darker shade.  After dyeing, the scarves and samples were rinsed as well as can be done with gathering threads still in, put in lingerie bags so any remaining water was spun out in the washer (no rinse), and hung to dry on a wood rack outside on the porch.  That evening, I sat down and started clipping and removing the gathering threads, anxious to see the results.


A closer look at the border of this scarf.

Detail of the border, tracking visible.

After the gathering threads were removed, they were rinsed again several times until the water ran clear, and again, water was spun out so they would dry a bit faster.  Normally I would start pressing them while still a bit damp, but they had dried overnight so the next morning they were misted both sides; the iron was set on cotton with highest steam setting.  It takes more than one pressing to get the wrinkles out of cottolin. 

While pressing the first time I noticed what appears to be tracking, something I was not expecting.  I’ve had tracking happen twice, once with Harrisville wool singles, another time on a towel with cottolin warp and cotton weft (which gave a couple short diagonal lines.  I’ve woven many cottolin towels, plain weave and twill, and never had tracking occur.  A third steam pressing this afternoon helped a bit, but the tracking seems to be here to stay, and actually, I like the textured look it is giving to the borders.  The tracking is not on the plain weave hems and plain blue areas, only the woven shibori borders.

Additional note:  I just looked at the first scarf and samples.  Tracking does not appear on the samples woven on the twill threading, but there is tracking on the first Monk’s Belt warp, on the dark indigo scarf and the samples, just not as visible because they were dyed darker shades of indigo.

Unfortunately, the photos, taken outdoors in good light but not direct sunlight, appear in the photos as medium and light blue, but the borders are actually medium blue on bleached (white) Swedish cottolin.  Setting up a place and learning how to better photograph my work is fast moving up on my priority list.

Sample for notebook, dipped in dye bath two times.

Back of the above sample.

Another woven shibori scarf, also dyed June 8th.

This scarf above was dyed in a more diluted indigo dyebath, coming out quite a light blue, and unevenly dyed, exactly the effect I was going for.  I had done a little marketing research, showing the scarf in the previous post and a few samples to two women I know.  They liked them all, and asked if I would have any lighter color scarves, to wear with stonewashed jeans in summer.  

These two scarves were my first attempts to get the lighter, “stonewashed denim” look  in woven shibori scarves.  These two scarves were shown to the same women yesterday, and they wanted to know when I would bring some in for them to choose from.  I think I’m on the right track!

Border area of this second scarf.


In the border photo above, you can see how the tracking seems to add great texture to those areas of the scarf.

Detail, to show the “tracking.”
 
Sample for notebook, dipped in dye bath twice.

Back of this sample.


Because of how the gathers happen on this Monk’s Belt threading, the bolder color and design side is really the “back” side of the fabric as it is being woven.  The “back” side of the scarves and samples have lighter indigo color and more delicate design, and are actually the “right” side of the woven fabric. 

All were hand-hemmed, and I chose to have the bolder, brighter indigo sides to be the right side of the fabric, but could just as easily have had the more delicate design side by the “right” side. 

Now, I am thinking of other ways of finishing hems.  Hand-hem, hemstitched, knotted, and others.  What I am trying to keep in mind is how the particular thread looks after repeated washings, even hand washing.  Cottolin, after repeated washing can get a little ratty looking on the ends of the threads, something I want to avoid.  So now, I must delve into my weaving/fiber library and find options that will stand up to wear and care.

There is now a finer warp on the loom, 16/2 Swedish cotton, and I’m looking forward to seeing how the next scarves turn out! 

And all this blue, I’m thinking I’d better warp up another loom with some color and different technique or structure for a little variety for all of us!

Sampling Becoming Routine

Woven shibori sample on Monk’s Belt threading.


In over 32 years of weaving, I’ve never been one to do much sampling, but oh, how that has changed with woven shibori.  Perhaps with a lot more experience, I’ll be able to take a weave structure and have an idea of how it might turn out when woven using this technique, but right now it is so new to me that samples are becoming a way of life.  They will also be a very useful record of threading/treadling/probable results, aware that the dyeing results are also a bit of an unknown.  As in the sample above, the samples are being hand-hemmed and placed with record sheets in a notebook.  In addition, I can do samples first, decide which results I like, then weave the full-size pieces using those threading/treadling/spacing notes.  The results won’t be exactly the same due to the dyeing process as well as minor differences when gathering and tying, but overall, you have a good idea of what the final result might be.

Another sample on Monk’s Belt threading.


Each sample was treadled differently and had varying numbers of rows of plain weave between pattern rows.  Pattern rows are gathered and tied, in this case Monk’s Belt, so the closer together those rows are, the less dye is able to get between the gathered folds or pleats.  Pattern rows further apart allow more dye in.  So by varying the number of plain weave rows between each pattern row, you can have a bit of control in how light or dark a piece is (also keeping in mind the strength of the indigo you are using). 

Another sample on Monk’s Belt threading.


The second time indigo dyeing, I wanted to try to obtain lighter shades, as in this sample.  The original vat results were very dark, so after watching a video clip by Glennis Dolce, in which she was taking measured amount(s) from the original vat and adding to water to obtain lighter shades, I followed those same directions.  Taking 250 ml. from the original vat and adding it to 1000 ml. gave a result not too different from the original dark vat.  I then took another container and added 250 ml. from the original vat to 2000 ml. of water, which gave me a lighter shade of indigo.  Experimenting with these ratios and keeping careful notes is an area I will be continuing to explore, so when I have a particular shade in mind for a particular piece, I will have a good idea of how to achieve it, keeping the many variables in mind.


Woven shibori on twill threading.

This twill sample was dipped into the lightest indigo vat.

Another twill threading sample.

 
Monk’s Belt threading.

This sample had a one inch or so “gap” between pattern thread areas, allowing more dye to be absorbed, giving a “stripe” across the middle. 


Border scarf on Monk’s Belt threading.


The scarf was on the Monk’s Belt threading, and dipped twice into the dark (original) vat, and like the samples, finishing included hand-hemming.

I am busy weaving more scarves, and a sample of the treadling for each, to add to the notebook.  This Friday, after beaming a new warp, a friend and I will be at the indigo dyepots, so results should be on this blog next week, after everything has had time to dry, be hemmed, pressed, and photographed.

(Note, these photographs were taken outdoors on the lakeside porch, late afternoon, and as soon as I started clouds rolled in, so colors in the photos are not as “bright” as they really are.)

Baby (left) and Mom (right) porcupines.

Yes, they continue to return most nights, some days.  Discouraging them has not been successful.  Using a hot pepper sauce was suggested, but I hate the idea of doing that to the young one especially. 

Porcupine damage.

I
 can live with their chewing on the old salt lick wood stand out on the red pine, but I do object when they are chewing on my home.  This doorsill at entry to my home will need to be replaced, but I’m waiting until they stop visiting.  For now, there is a piece of metal hardware screening laid over the board, a piece of landscape timber holding it in place, and a rock in place to keep them from dislodging it.  After the board is replaced, it will be well-stained in hopes they won’t like the “taste.”  Sometimes life in the WI Northwoods can have its challenges!

Indigo Days

Woven shibori samples, Monk’s Belt threading.


My second time indigo dyeing included 3+ PFD cotton swatches, nine woven shibori samples (Twill, and Monk’s Belt), and one woven shibori scarf (border area of Monk’s Belt).  I’m using the cotton swatches basically to test color before dipping the handwoven pieces.  

This was my first attempt at achieving shades of indigo (photo above), and had some success and look forward to trying for more (and keeping accurate notes).

Scarf with woven shibori borders.


The last piece dyed this day was my first woven shibori scarf, woven to have a border at each end, and solid blue in-between.  After the first dip, I could see a couple areas where the dye he not penetrated through the cottolin threads, so it was given a second dip, leaving it a very dark blue.  The samples and scarf were rinsed many, many times; after nearly dry they were pressed and hand-hemmed. 

I had hoped to have more scarves woven and be on the porch dyeing again, but have been sick the past four days.  While sitting here, thought perhaps tomorrow I could at least dye a bit more PFD cotton (I’ll do something with those swatches someday), but a check of weather revealed the high will be 44 F.  So, three or so days of weaving, then more indigo dyeing Friday through Monday when warmer and sunny.

My 5 gal. indigo vat is parked in my kitchen on my woodburning range (not in use at present), and even with a lid on, I can smell the contents.  Hoping to move it out to the porch soon, but need the nights to warm up more.  Now, I need to start gathering supplies and begin learning shibori techniques, as well as how to get various mottled, cracked, and other effects on the cotton (non-shibori).  There are 28 yards here to use for learning.   

After a last snow/sleet/ice storm late Mother’s Day night, spring has finally arrived in the WI Northwoods.  Forsythia are in bloom, the lilac has leaves, and my apple tree, too.  Perennial herbs are emerging.  And with windows open at night, I am treated to a symphony of spring peepers, the whippoorwill singing, an owl hooting, coyotes howling, and a couple other unknown nocturnal birds calling occasionally.  And of course, the loons on the lake call to each other during the night.

My yard has turned into a porcupine hangout!  A few nights ago, about midnight, through an open window, I heard a sound I’d heard before, and it suddenly dawned on me what it was,… porcupines chewing on wood.  On my wood sawhorses on the porch!  Last fall they had done this and I’d laid the sawhorses up on their sides up on a long table, but I’d set them down again so I could do my dyeing on the lakeside porch.  Well, what could I do but shout, stomp, and herd them toward the steps and off the porch, then moving buckets aside, hoist the sawhorses up out of their reach.  Sorry, no photo.  But,…


Baby porcupine on the ground, mom trying to climb.


On the afternoon I started to not feel well, I looked out to see a porcupine on the old salt lick (hasn’t had salt on it for perhaps 15 years).  I grabbed my phone/camera and went out, and discovered there was also a baby underneath it!  Mom, in an effort to distract me, immediately tried to climb, bumping her head on the “roof” of the structure, and quickly discovered she could get around it,…

Mama porcupine climbing high.


… and climb much higher.  I snapped a couple photos and went back inside.  Perhaps an hour later, I looked out again,…

Baby porcupine, turn its back to me and raising its quills.

… and the baby was on the empty salt lick, mom was still up the tree.   After a couple more photos, I left them alone.  

As I write this tonight, it is raining, and looking outside,… there is a porcupine on the salt lick.   

My nighttime reading, “A Different Kind of Luxury, Japanese Lessons in Simple Living and Inner Abundance” by Andy Couturier (Stone Bridge Press).  The book profiles ten individuals living in old, mountainside homes, living simply, growing their food, practicing their arts, living intentional lives. 

Woven Shibori and First Indigo Dyeing

 
First attempt at indigo dyeing!


Perhaps four years ago or so I purchased “Woven Shibori,” by Catherine Ellis, and was fascinated by the both the technique and the results when dyed.  A year or so ago, I signed up for an online self-study class, “Let’s Dye with Indigo” by Glennis Dolce – Shibori Girl, http://shiborigirl.bigcartel.com.  The class is set up with lessons on a blog, you work at your own pace, and there is also a student forum where you can post photos of your work, ask questions, and get answers.  I’d also picked up a couple books on the subject including “A Handbook of Indigo Dyeing” by Vivien Prideaux.  

Finally, a couple months ago I beamed an 8″ wide warp to weave samples, leaving it set up for the 10 shaft twill I had been weaving.  The warp and weft were Swedish 22/2 cottolin which I had on hand.  Needing something strong for the gathering threads, I used seine twine, having a couple partial tubes on my shelf.  I’ve never been able to break that  with my hands, so felt pretty sure it would not break during the gathering process.

The second cottolin warp was made 10″ in width, the loom was re-tied and threaded for Monk’s Belt, for a couple samples and two or three scarves.  Cottolin is not my first choice for scarves, but for experimenting with ideas, it is working fine.  I also expect as I go finer with threads, the results are going to change somewhat.

Not having a good indoor space for dyeing, and living where winter sometimes seems endless, I had to wait for decent weather to begin.  I finally set up yesterday for my first indigo dye attempt.

The outside temp was about 64 F., so I decided to set up on the lakeside porch and enjoy the sun and view (photo above).  I brought out all my supplies, and using the directions from Dharma Trading Co., mixed up my first indigo vat using Pre-Reduced Indigo, Thioureau Dioxide (Thiox), and Soda Ash.  (Follow the instructions carefully and use recommended safety precautions!) 


Pre-reduced indigo vat with “flower” forming on surface.

After mixing the vat, I waited a bit, expecting to see more “flower” on the top.  When that didn’t happen, I cut about 1/4 yard+ off a bolt of PFD cotton, cut it into thirds, and after soaking those pieces of cotton along with one woven shibori sample in water, wrung it out and lowered it into the vat.  Bringing it out, it was yellow-green, and as the indigo oxidized, turned a beautiful bright-dark indigo blue.  I dyed the other two cotton swatches, giving one a second dip for a darker navy color, then the woven shibori sample.  All were rinsed five times, and still blue was coming off in clear rinse water.

Woven shibori sample, tightly gathered, one dip in vat.


Freshly indigo dyed cotton swatches and woven shibori sample (on right).


I laid them over a drying rack, with plastic underneath to catch the drips, and let them start drying, later moving them inside over a floor heat vent.

Had I pulled the gathering threads tight enough on the woven shibori sample?  Did indigo penetrate all the way into those tight “pleats?”  Would I need to untie all the knots on those remaining samples and tighten those gathering threads even more?  I had to find out before dyeing the remaining nine samples and scarf. 
 

After cutting a few knots I started to gently open the pleats.


So mid-evening last night, I carefully clipped the tight knots along one edge of the sample.  I’d read the threads would not come out easily if the piece was still wet, which it was (not dripping wet, but not beginning to feel dry, either).  Now on this piece, I had started with four rows of plain weave between pattern (twill) rows, after a few inches had increased it to eight rows, and a few more inches later, increased to ten rows. 
 

Sample nearly half open, and changes visible.


In the area of four rows of plain weave and gathering threads close together, I could start to open it but it wasn’t easy.  I changed from small pointed scissors to a blunt needle to, thread by thread, ease the gathering threads out.  Further down, at eight rows of plain weave, the pleats opened easier, and at ten, easier yet.  Why had I woven the sample that way?  To see the effects of the indigo, to see what happened with the now elongated twill line, and to see what kind of effect the spacing of the gathering threads would have on how far in the indigo penetrated the pleats.

All gathering threads removed.


At four rows, you see the now steep twill line moving across the piece; at eight rows the movement has nearly stopped and there is a bit more light blue appearing; at 10 rows the vertical lines appear a bit wider and more blue penetrated into the pleats.

I rather like the few “irregularities” in it where short lines cross the long vertical lines.  I believe they are the result of a few areas where the pleats, when gathering, didn’t gather and line up exactly as all the rest, despite my attempts to fix them.   

So today, I will examine the other samples to see if I want to tighten anything up before dyeing them, particularly the Monk’s Belt, where the gathering threads are long floats with I believe ten rows of plain weave between each pattern row.  I expect, as in the  bottom of the above photo, more indigo will be work its way into the pleats. 

In a video in Lesson 1, Glennis demonstrates how to take amounts from the original vat, add to water, to get lighter shades of indigo, something I will also be experimenting with for these samples.  

I did notice on the plain weave on each end of this sample, with one dip, the indigo had not totally penetrated the threads, but I did not want it any darker.  Reducing the strength of color will allow me to dip the samples more than once.   

There is more warp to weave off, perhaps a couple scarves worth.  And now there are tubes of 16/2 Swedish cotton (from Glimakra USA) waiting, along with tubes of 20/2 cotton (from Lunatic Fringe), so a lot more weaving and dyeing coming up. It’s going to be a wonderful summer!

P.S.  Glennis Dolce is about to leave for Japan, leading a silk, indigo study tour, so if you contact her, please be patient! 

Spring Activites at the Studio


“Lammskinn” and “Skinnfeller.”


The second book I sent for, on working with sheepskins arrived, “Lammskinn.”  This is the book mentioned in a previous post that I’d seen in issue 1/2013 of VAV Magazine.  “Lammskinn” is in Swedish, and appears to focus more on items to wear.  “Skinnfeller” is in Norwegian, and is more functional items, along with the stamping done on the leather, an old art in Norway I am told.  I am just beginning to translate them, using Google Translate along with a little help when needed, when I need clarification or something doesn’t make sense.  I am doing this for my own learning.  Photos are wonderful, but I want information, too.  Why did I order these?  I wanted to know how sheepskins are stitched to woven coverlets, and though I could just put it together, I wanted to know how it is done in those countries where this type of coverlet is a long tradition.  Thankfully, “Lammskinn” has a couple photos with diagram of how to stitch the two together.  A lot to spend for that bit of information, yes, but there is so much more contained in these books and I want to learn.

First woven shibori scarf, in progress.


After weaving ten samples, most on the 10 shaft twill threading, and a couple on Monk’s Belt, I re-warped the loom with enough warp for two or three scarves, the photo above is of the first, in progress.  This will be a scarf with woven shibori border at each end. 

Scarf (far left) and ten samples, ready to be dyed.


On the left, above is the scarf with woven shibori border at each end, and the ten samples.  Such a tangle of threads!  Laying horizontally across the top is a sample with the gathering threads trimmed.  I want to be sure things are tight enough before trimming the rest as it will be easier to tighten and tie with the longer threads. 

Woven shibori is an interesting process, full of possibilities.  You weave with white, warp and weft, and the gathering thread.  Off the loom, you gather from one side, tie tightly, then gather and really tighten things up from the other side.  Most of the samples were 8″ wide at the reed, and the scarf was 10″ wide at the reed.  After gathering tightly, they are now perhaps 1 1/8″ to 1 1/4″ wide.

If all goes well, I hope to make up my first indigo dyepot tomorrow, and will test if the vat is working, and depth of color, with a small piece or two of PFD cotton, then try one of the woven samples.  After they are wet, and the first sample dyed, I will probably open it up to see if the tightened pattern threads kept the dye out, or not.  If not, I’ll have to open up and tighten all the threads on all the samples and scarf, then proceed.  I’ll be taking photos during the process, and of the results afterward. 

I kept hoping for spring and warmer temps, and late in April we did have a couple warm days, then it went back to cold, freezing rain, sleet, and even a bit of snow early in May.  Tomorrow should be 64 or so, warmer would be better, as I want to do the dyeing outside on the lakeside porch, close to water source, and stove, or hotplate or something if I need to warm the vat a bit.  Also, I can tie clothesline between the house, a pine tree, and a fence post to have a place to hang the samples and scarves.  I’d really prefer to not have indigo soaking into pine floors.

I had hoped to possibly start the dyeing this morning, but then the phone rang…  it was Wild Instincts (I am a rescue driver for them).  Could I go out and get a loon that had landed on a road?  Yes.  So put bin, bag with heavy gloves, etc. in the back of my vehicle and was on my way.  Arrived, no loon, no people, checked my phone, they had called back, the loon had been taken to an animal hospital, so turn around and head down the highway. 

I put the box the loon was in into my large bin as I didn’t want it deciding to try and escape or get injured further.  All was well until I reached Rhinelander when there was a fair amount of thumping going on in back.  I pulled off the road and sure enough, the loon had had enough and was trying to get out of the box.  No choice, but to put the lid on the bin (there are lots of airholes) for the last 10 minutes of the ride.  I’d left it off as I didn’t want the loon to overheat.  When I arrived and took the lid off, the loon was, of course, still in the bin, but no longer in the box!  An intern examined the loon and found scapes on the bottom of both feet and one “toe” was a bit split.  Injuries were sprayed with appropriate meds and it was determined the loon could be released right away.  So back into the bin, I drove the intern a mile or so down the road, and she was able to release the loon onto a now ice-free lake.  That was one happy loon!  The three photos below are from early this afternoon.  I’ve been doing this rescue driver work for perhaps twelve years, and this was the first time I was there to witness a release.  What a joy!

Common Loon, after treatment, back in bin for ride to a lake.
 
 
Wild Instincts intern releasing the loon at a northwoods lake.


Freedom.


The loon immediately swam away, and began diving.  A very happy ending!